Utils
The Utils section contains a suite of different apps in charge of performing massive data transfer operations:
- Imports: Perform imports from files (on the local drive, URL or directly from Amazon S3) in any server/database.
- Exports: Perform exports from any server/database.
- Clones: Perform copies of databases/tables from any server/database in another server/database.
Imports
This section is used to import SQL files from different sources to any database.
These are the available sources:
- File: A file located on a local drive.
- URL: An accessible URL.
- Cloud: A cloud computing service, such as Amazon Web Services (AWS).
INFO
Accepted file formats: .sql, .gz, .tar and .tar.gz

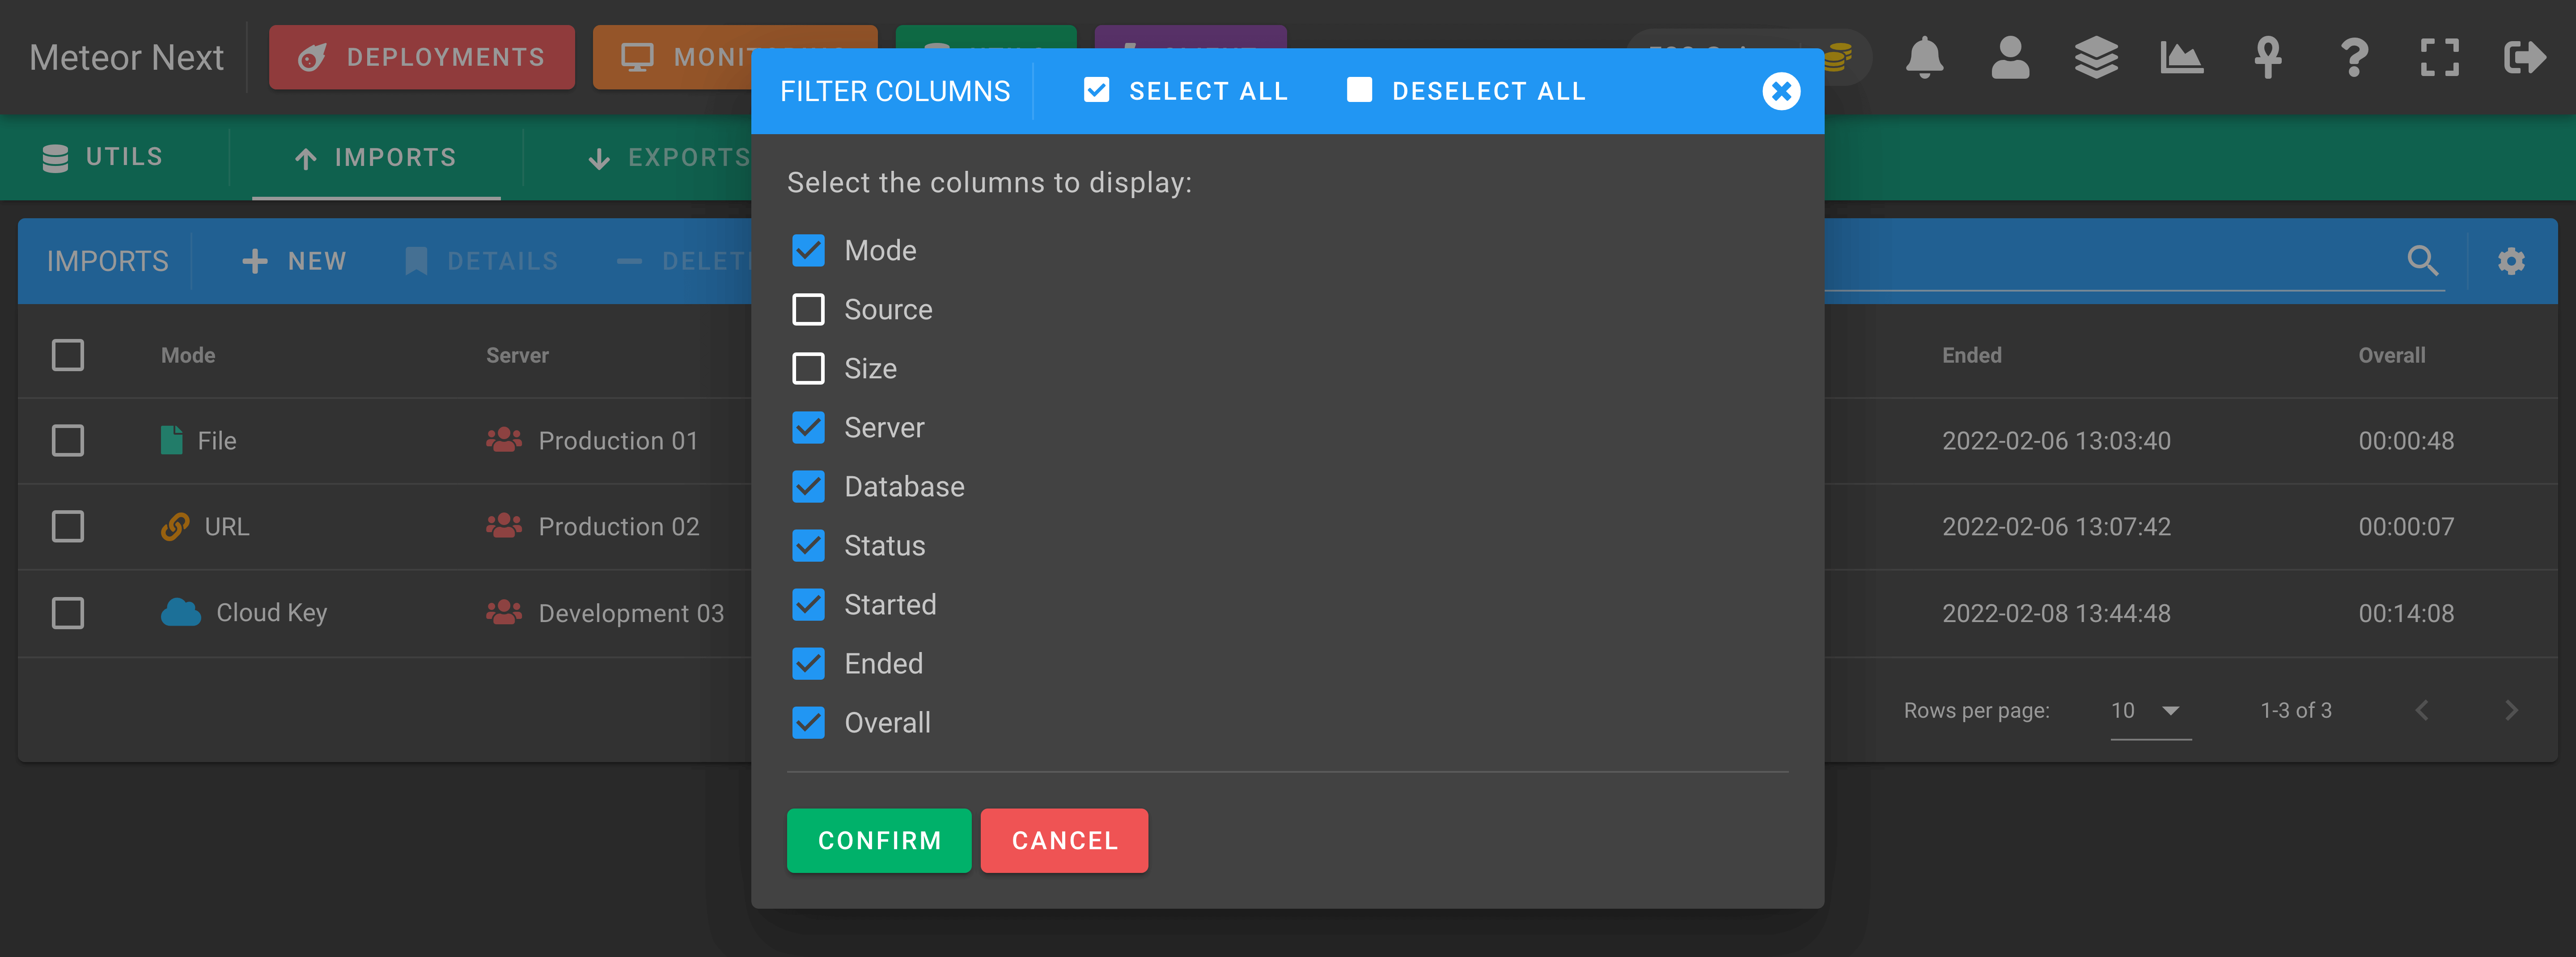
These are all the different columns we can choose to show or hide.
Importing from File
To import a file, choose the File option from the sources list and then select the desired file from your local drive.

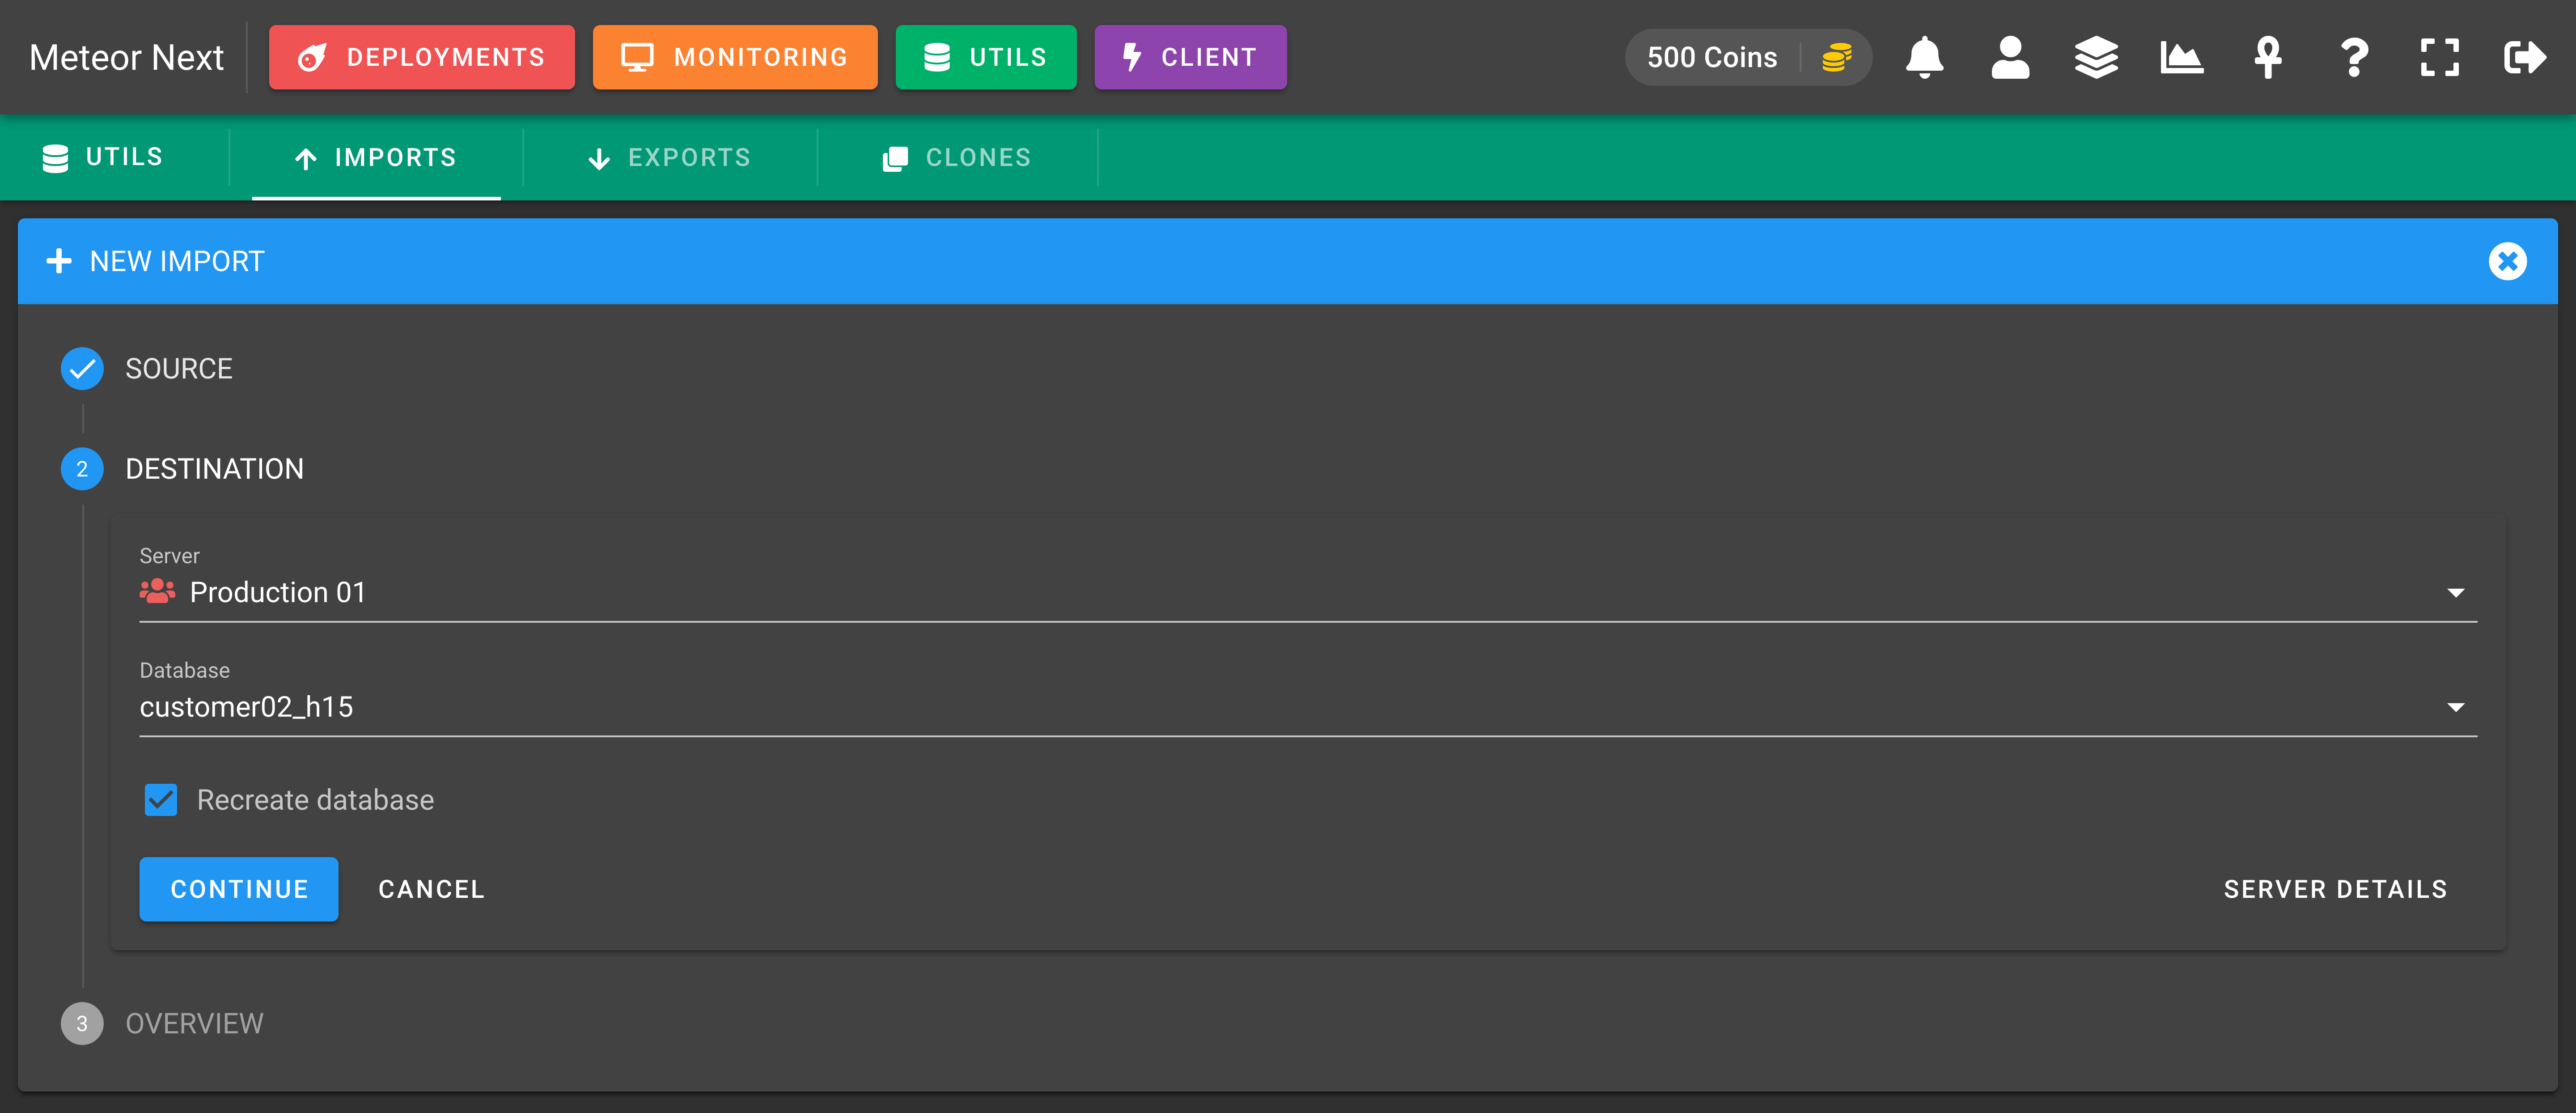
Then select the server you want to import this file and the database name. If you want to perform a clean import, check the Recreate database checkbox. This option deletes the database, creates a new empty one with the same name, and then imports all the schema and data from the specified source.
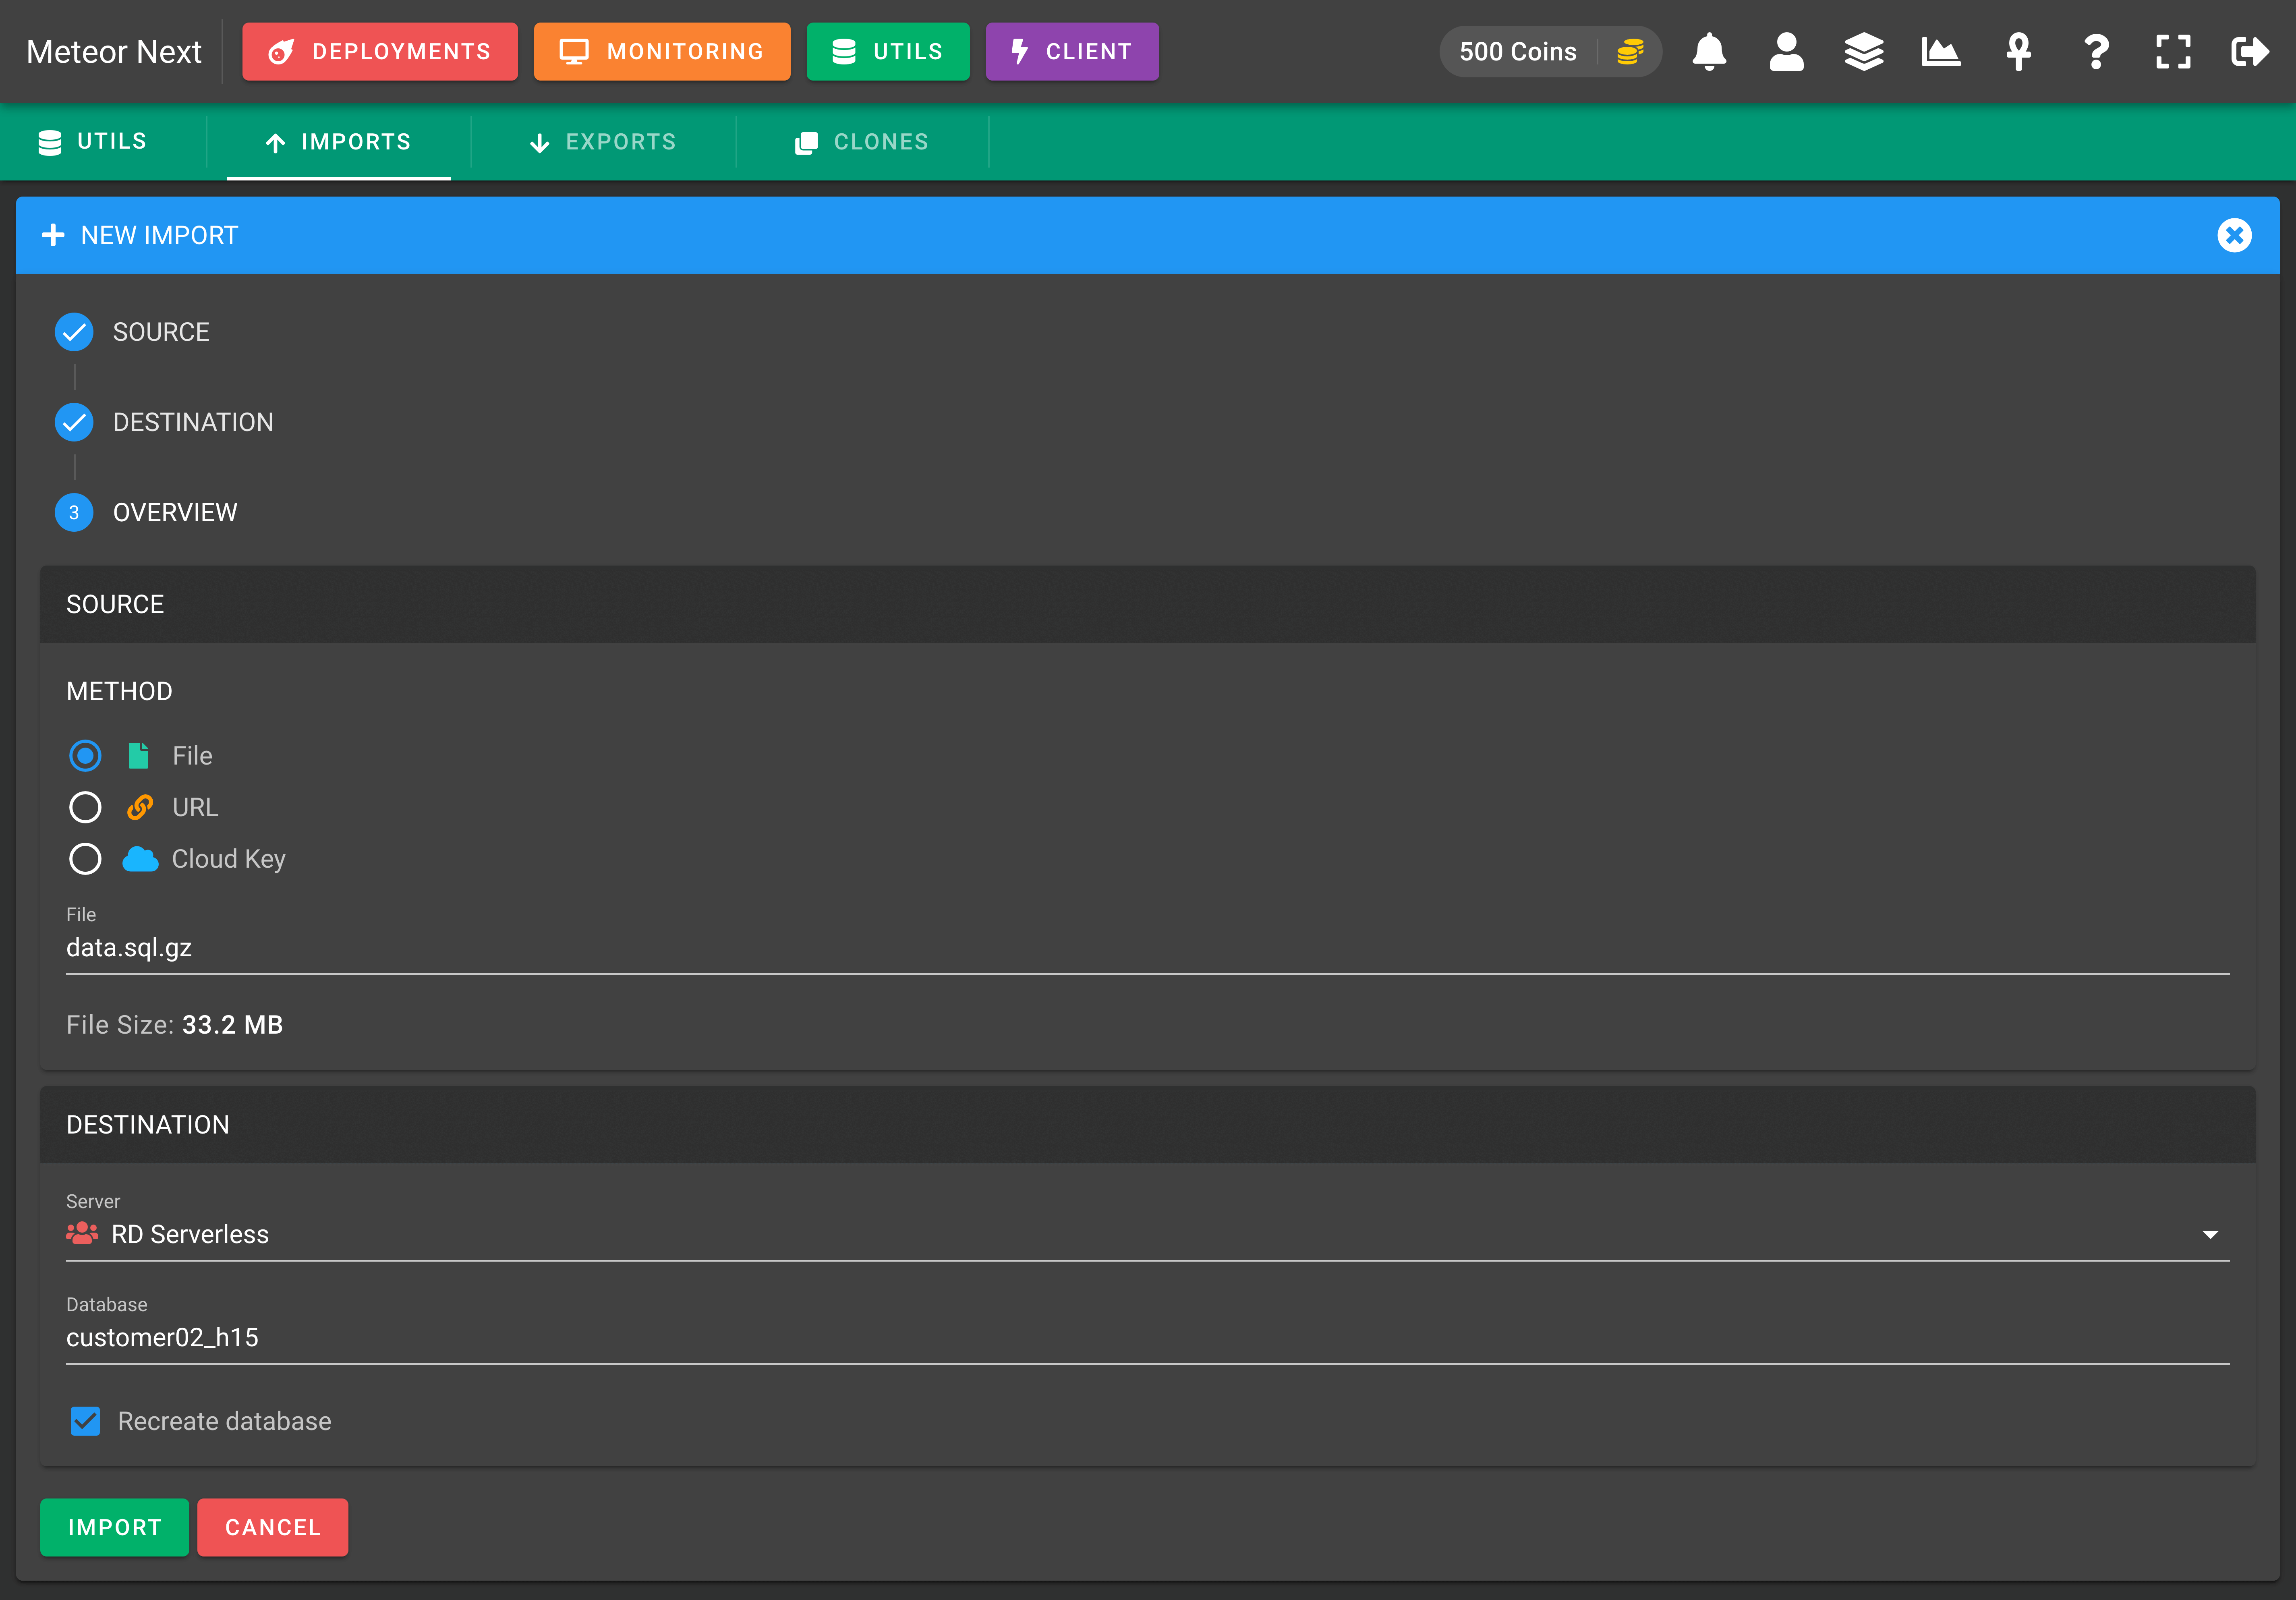
The last step is an overview showing all the filled fields. Click the IMPORT button to start the import process.
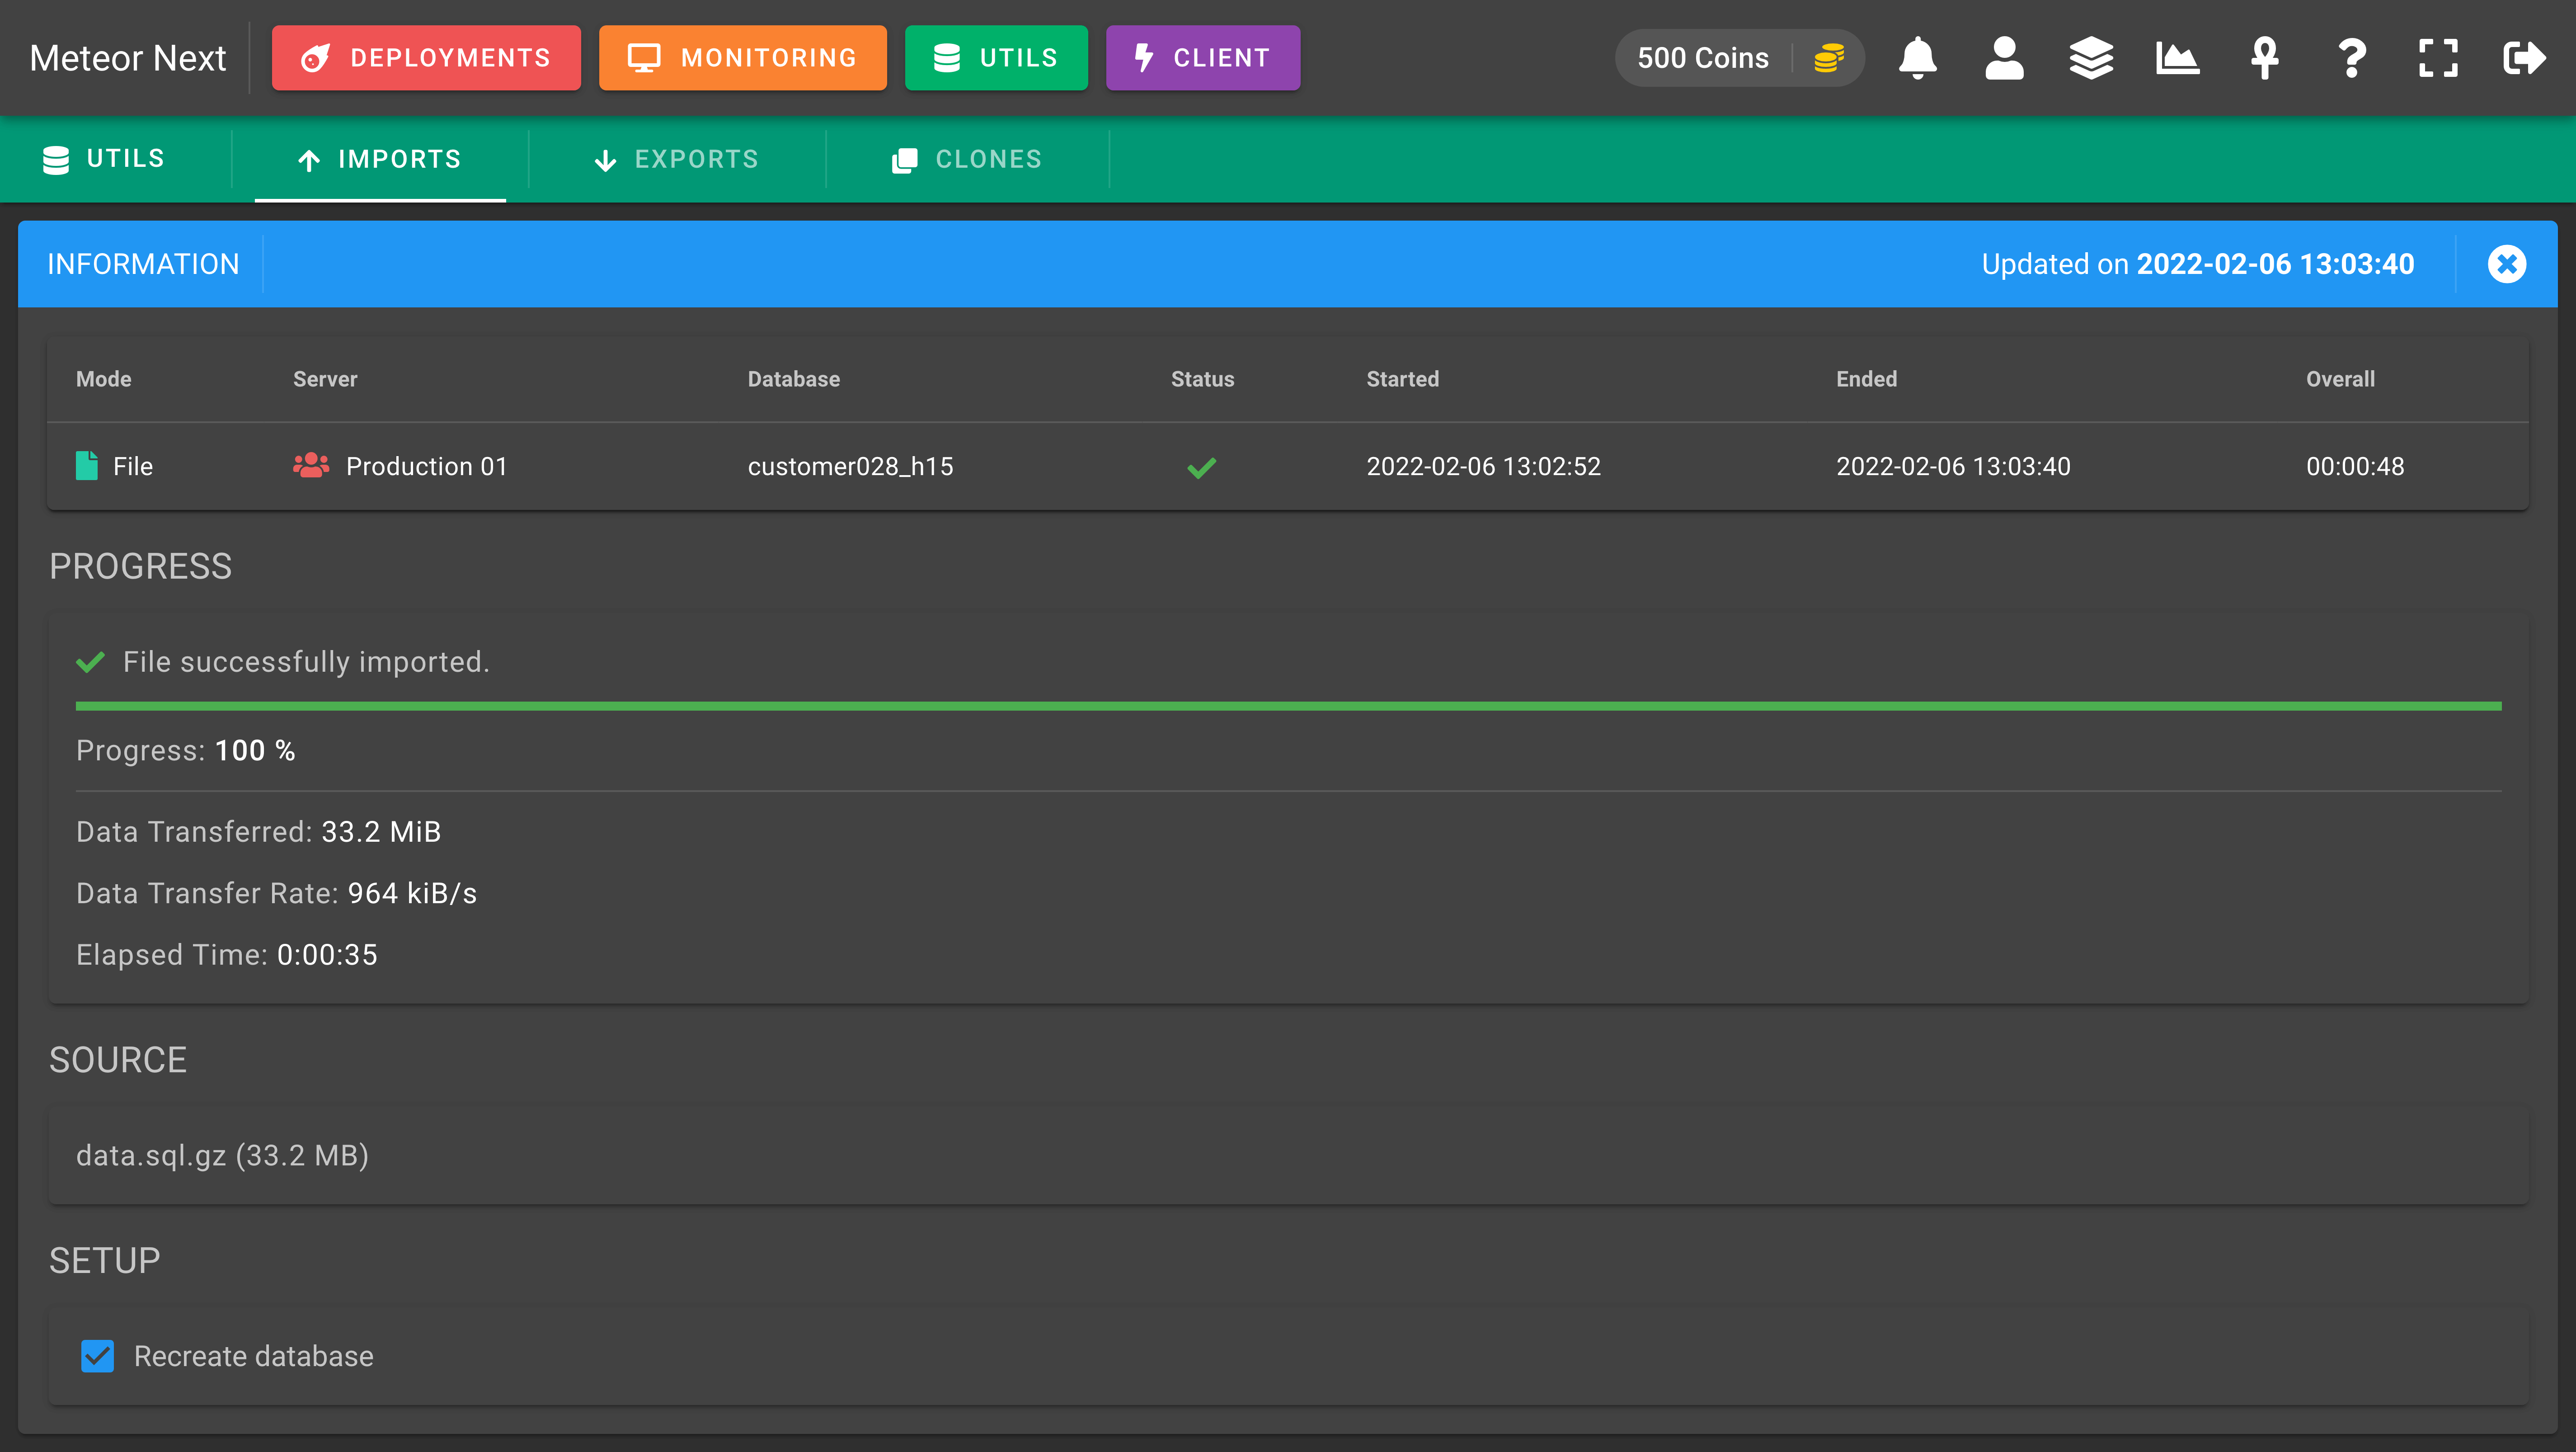
The import process will start showing us some metrics.
Importing from URL
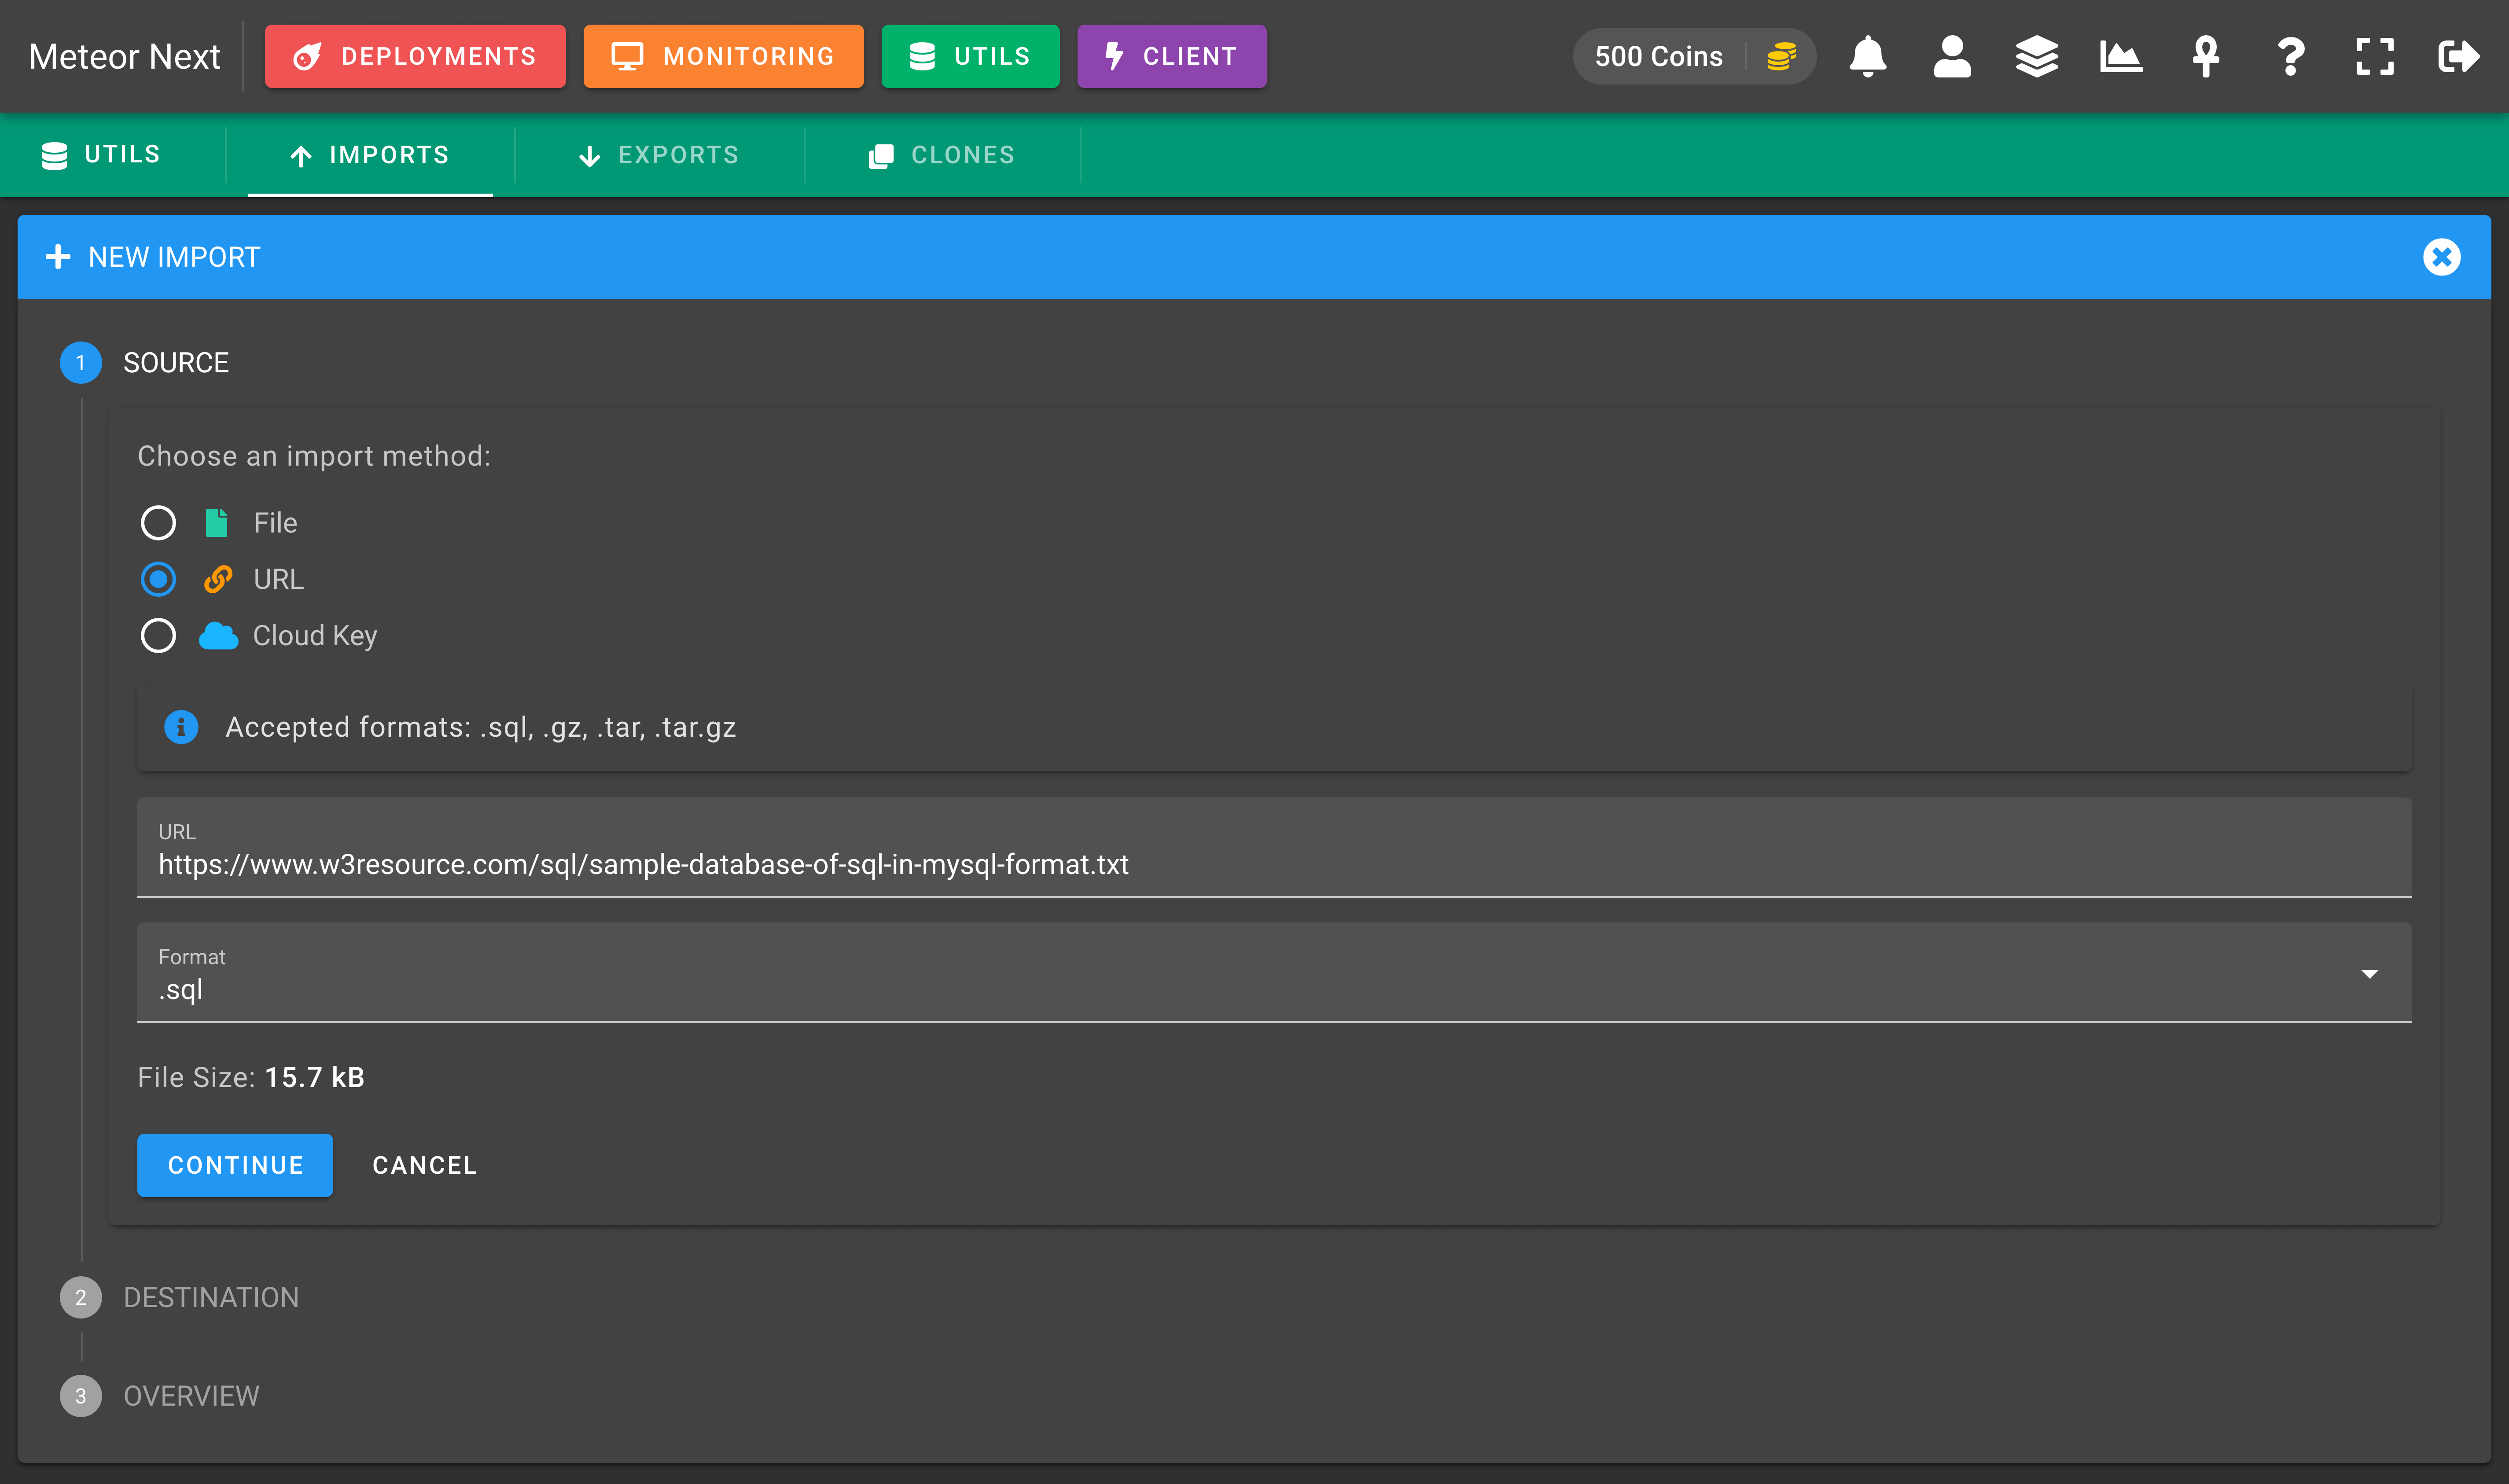
To import a file choose the URL option from the sources list and then enter the desired URL to be imported. Finally select the file format. Select .sql if the URL is a raw text file. If otherwise the file to be imported is compressed or packaged then choose .gz, .tar or .tar.gz.
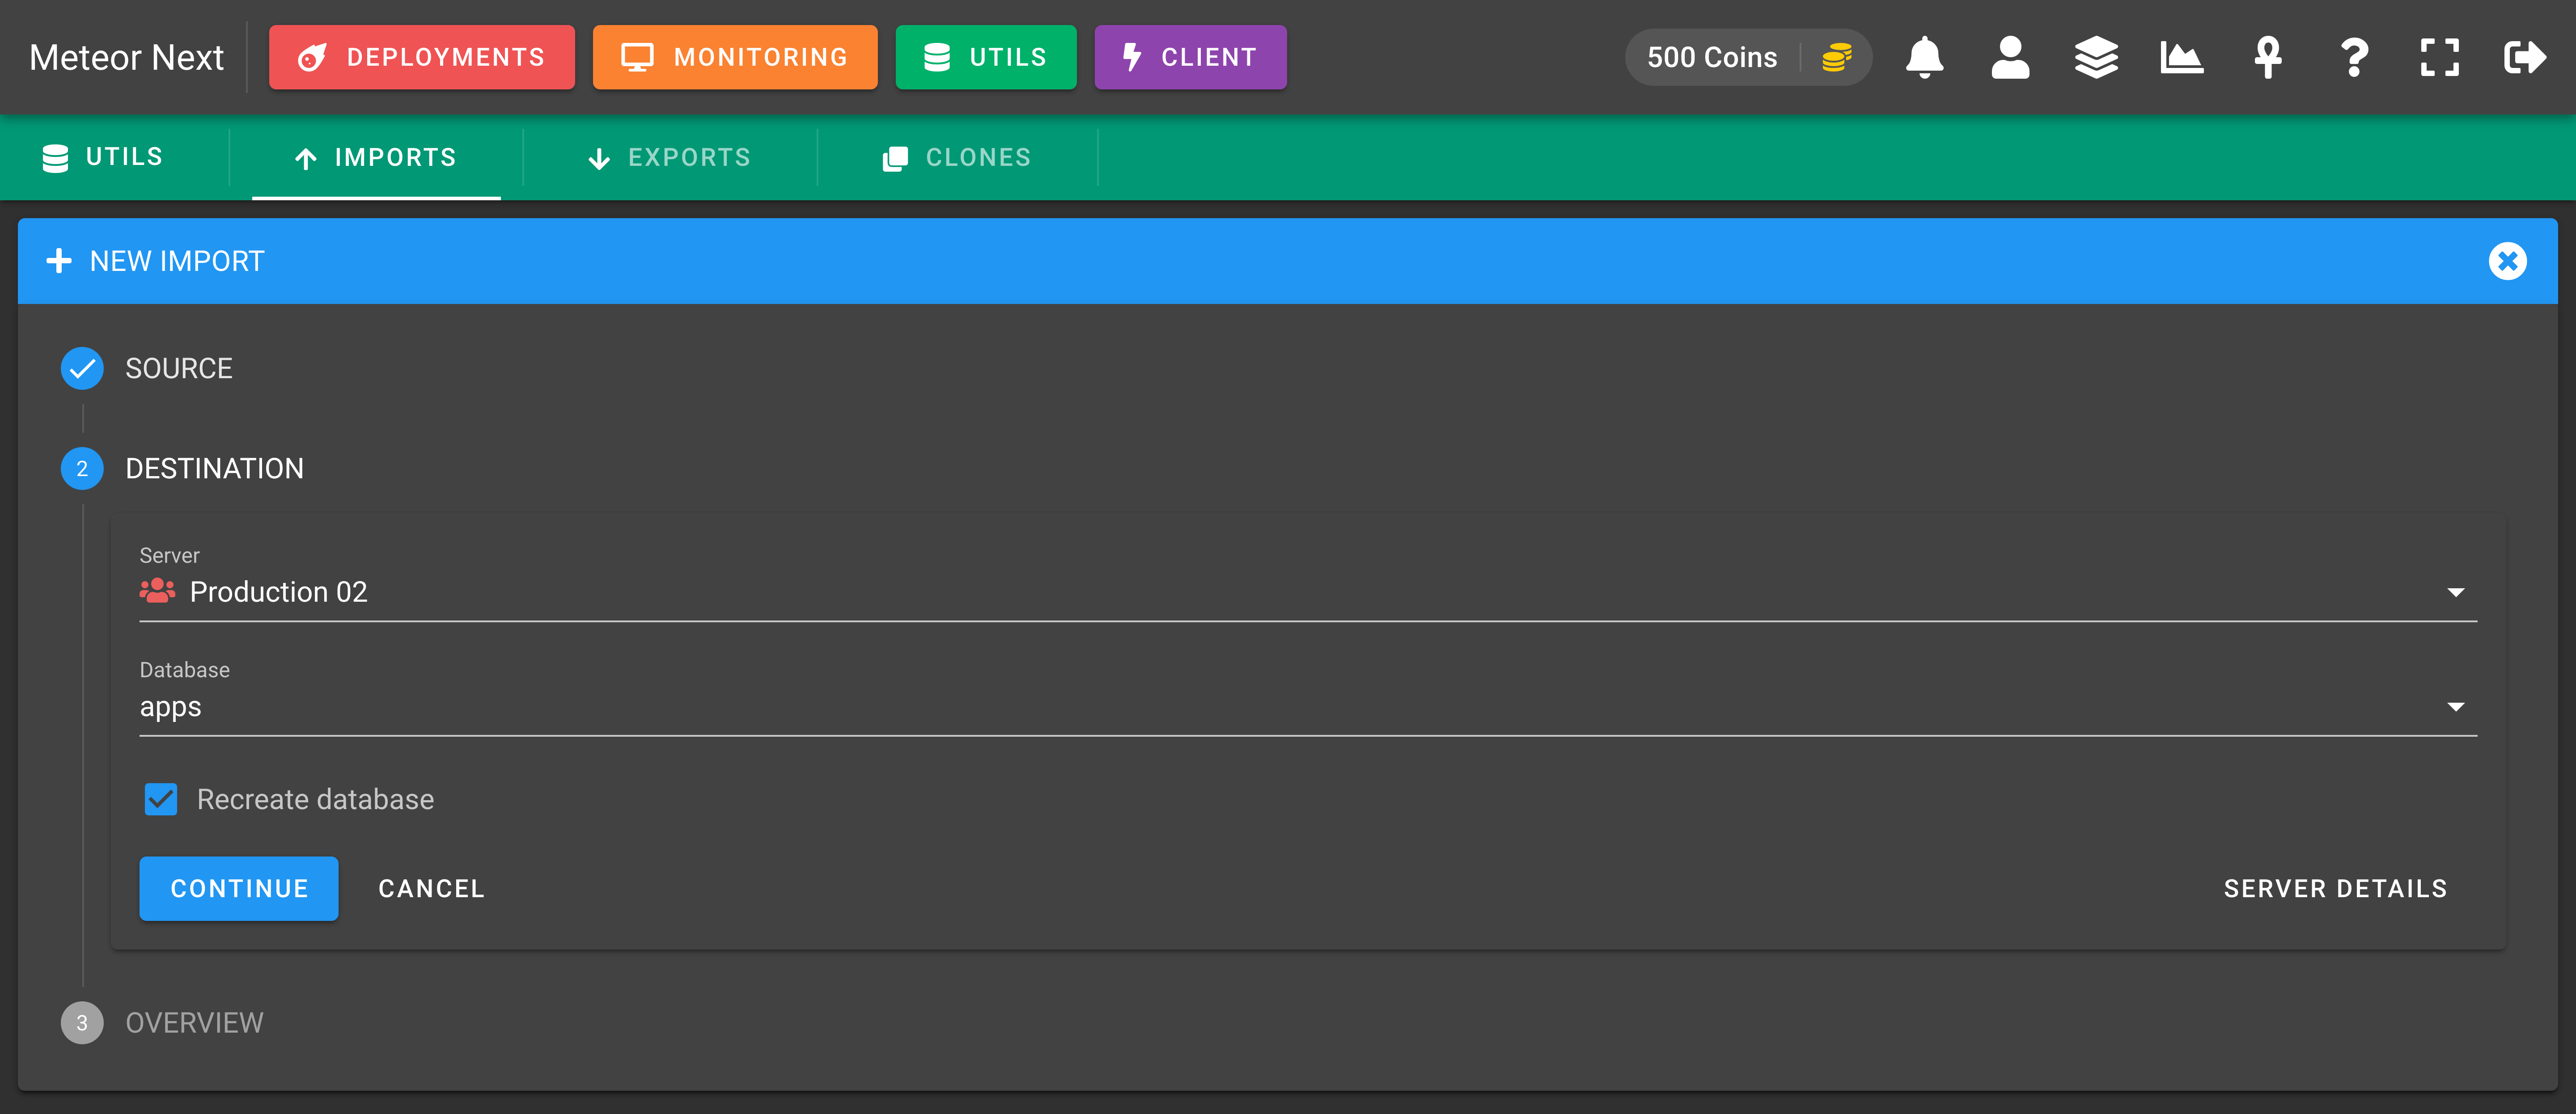
Then select the server you want to import this file and the database name. If you want to perform a clean import, check the "Recreate" database checkbox. This option deletes the database, creates a new empty one with the same name, and then imports all the schema and data from the specified source.
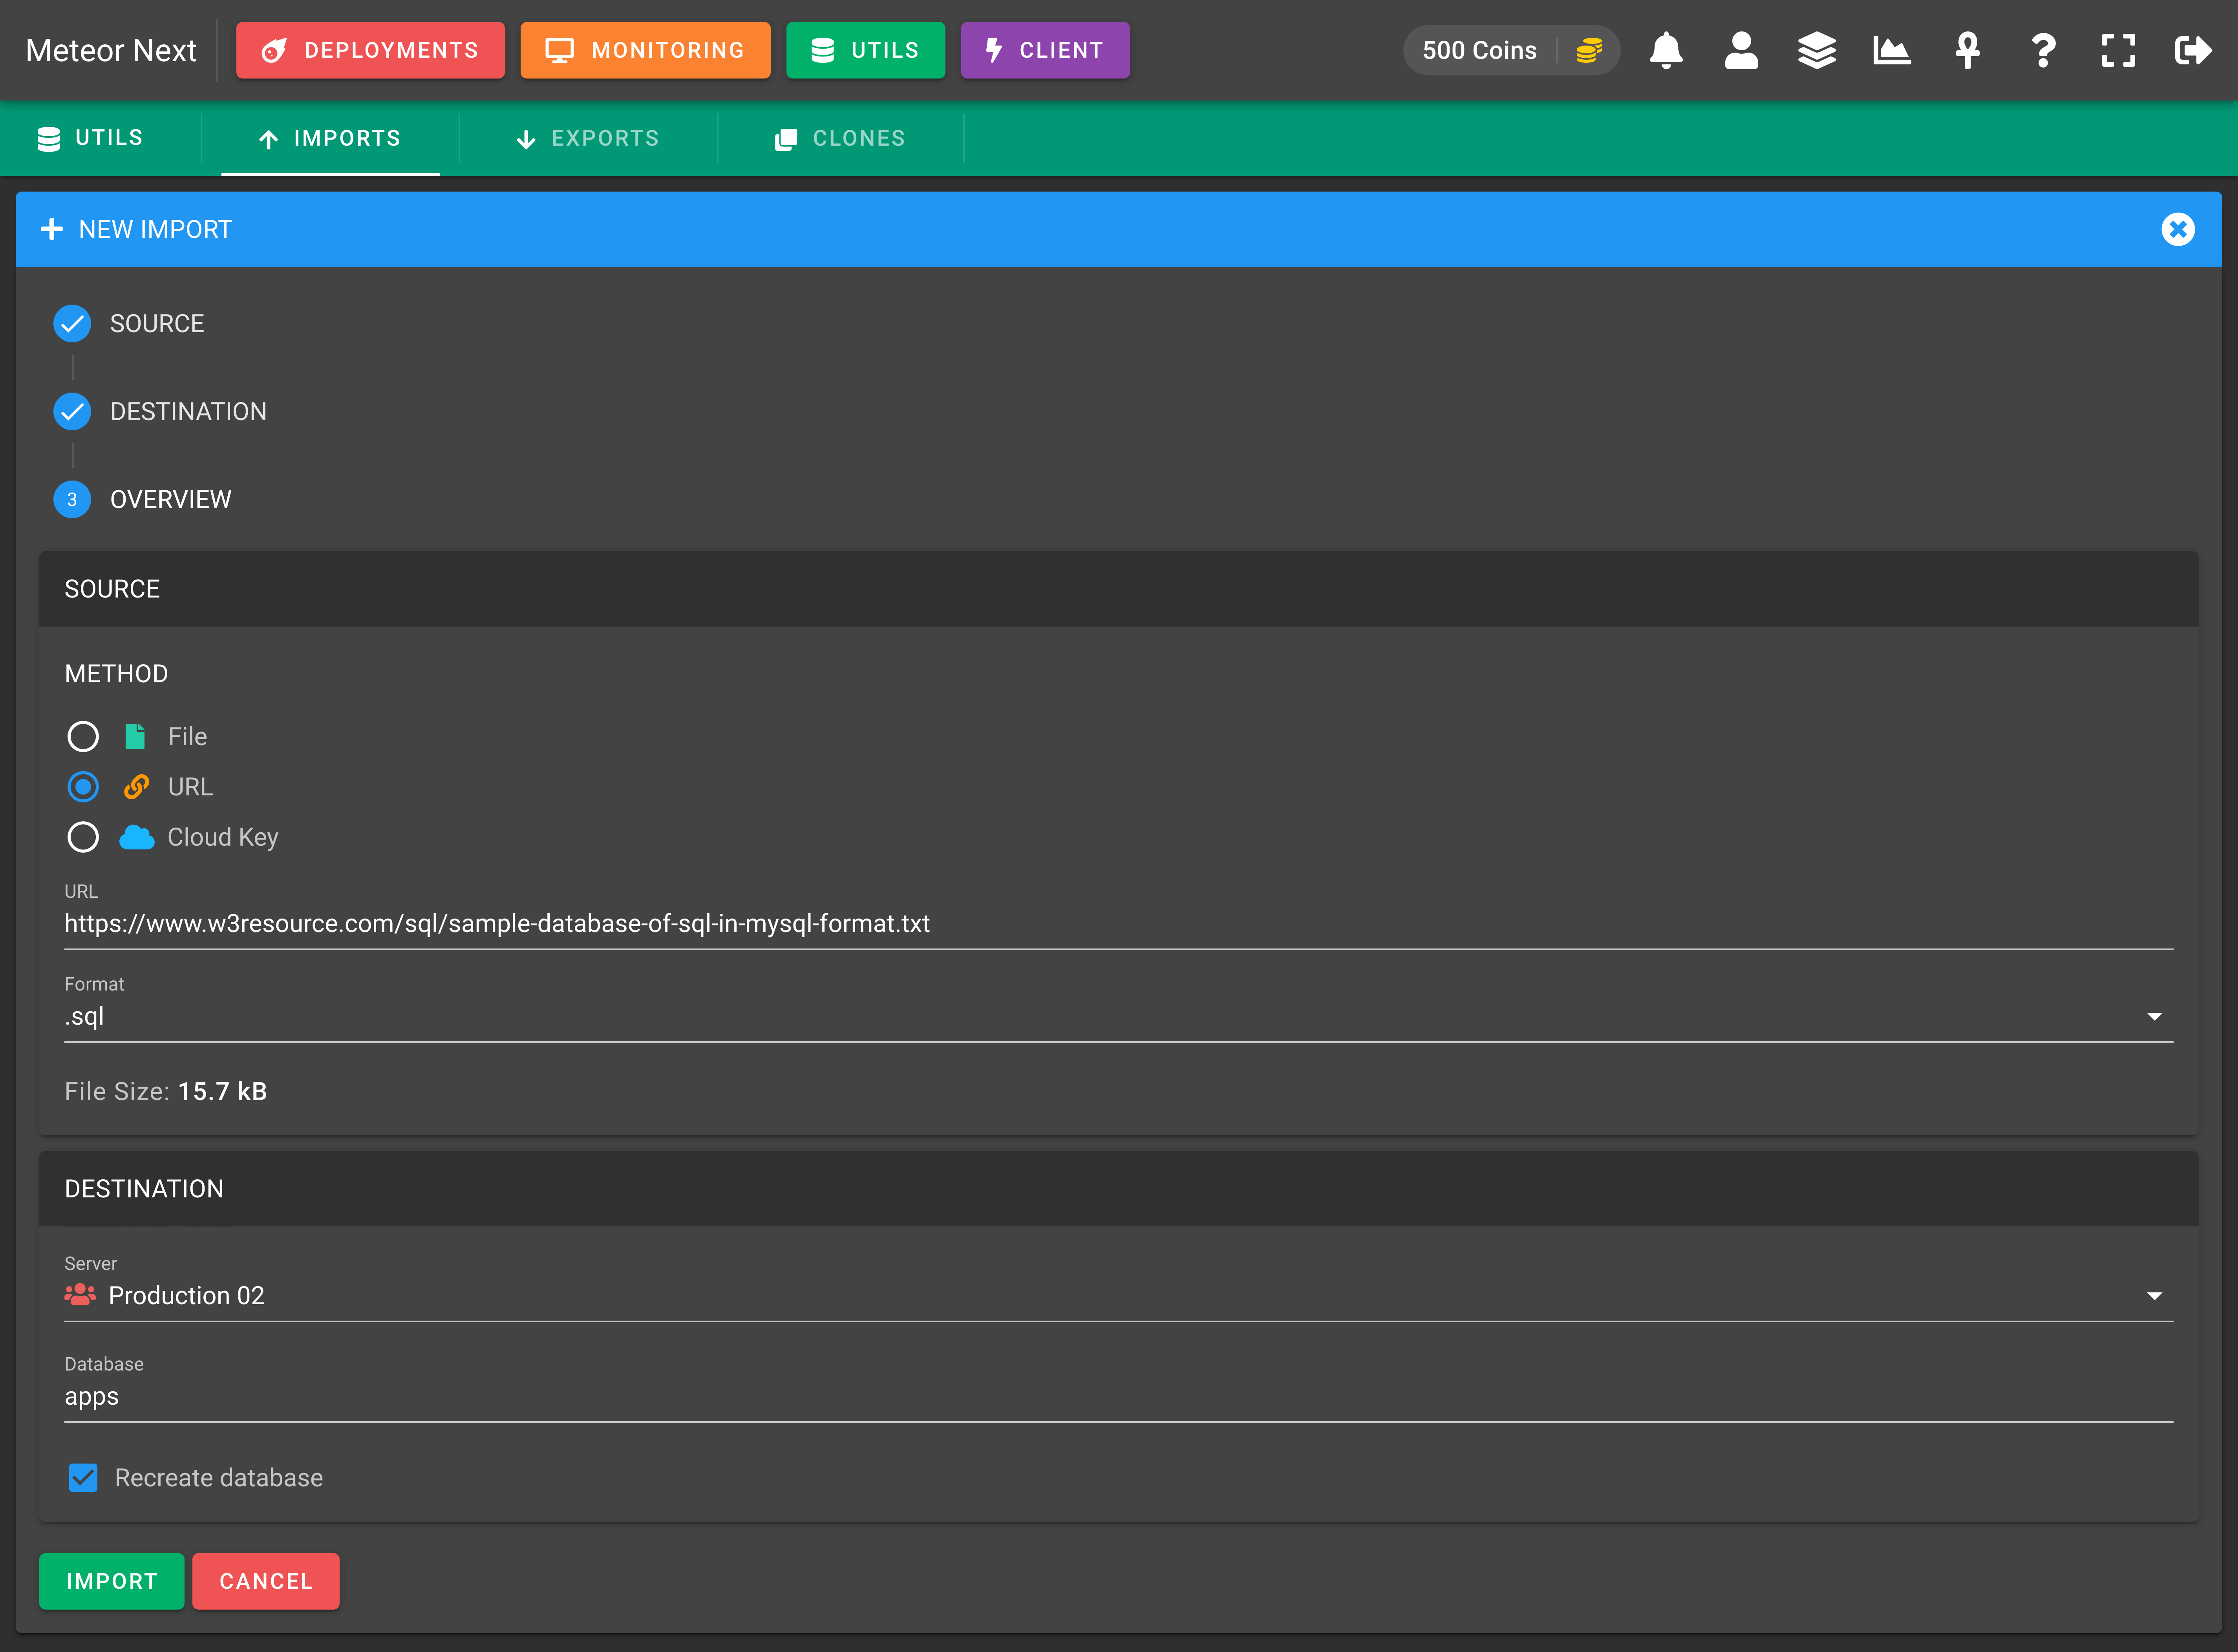
The last step is an overview showing all the filled fields. Click the IMPORT button to start the import process.
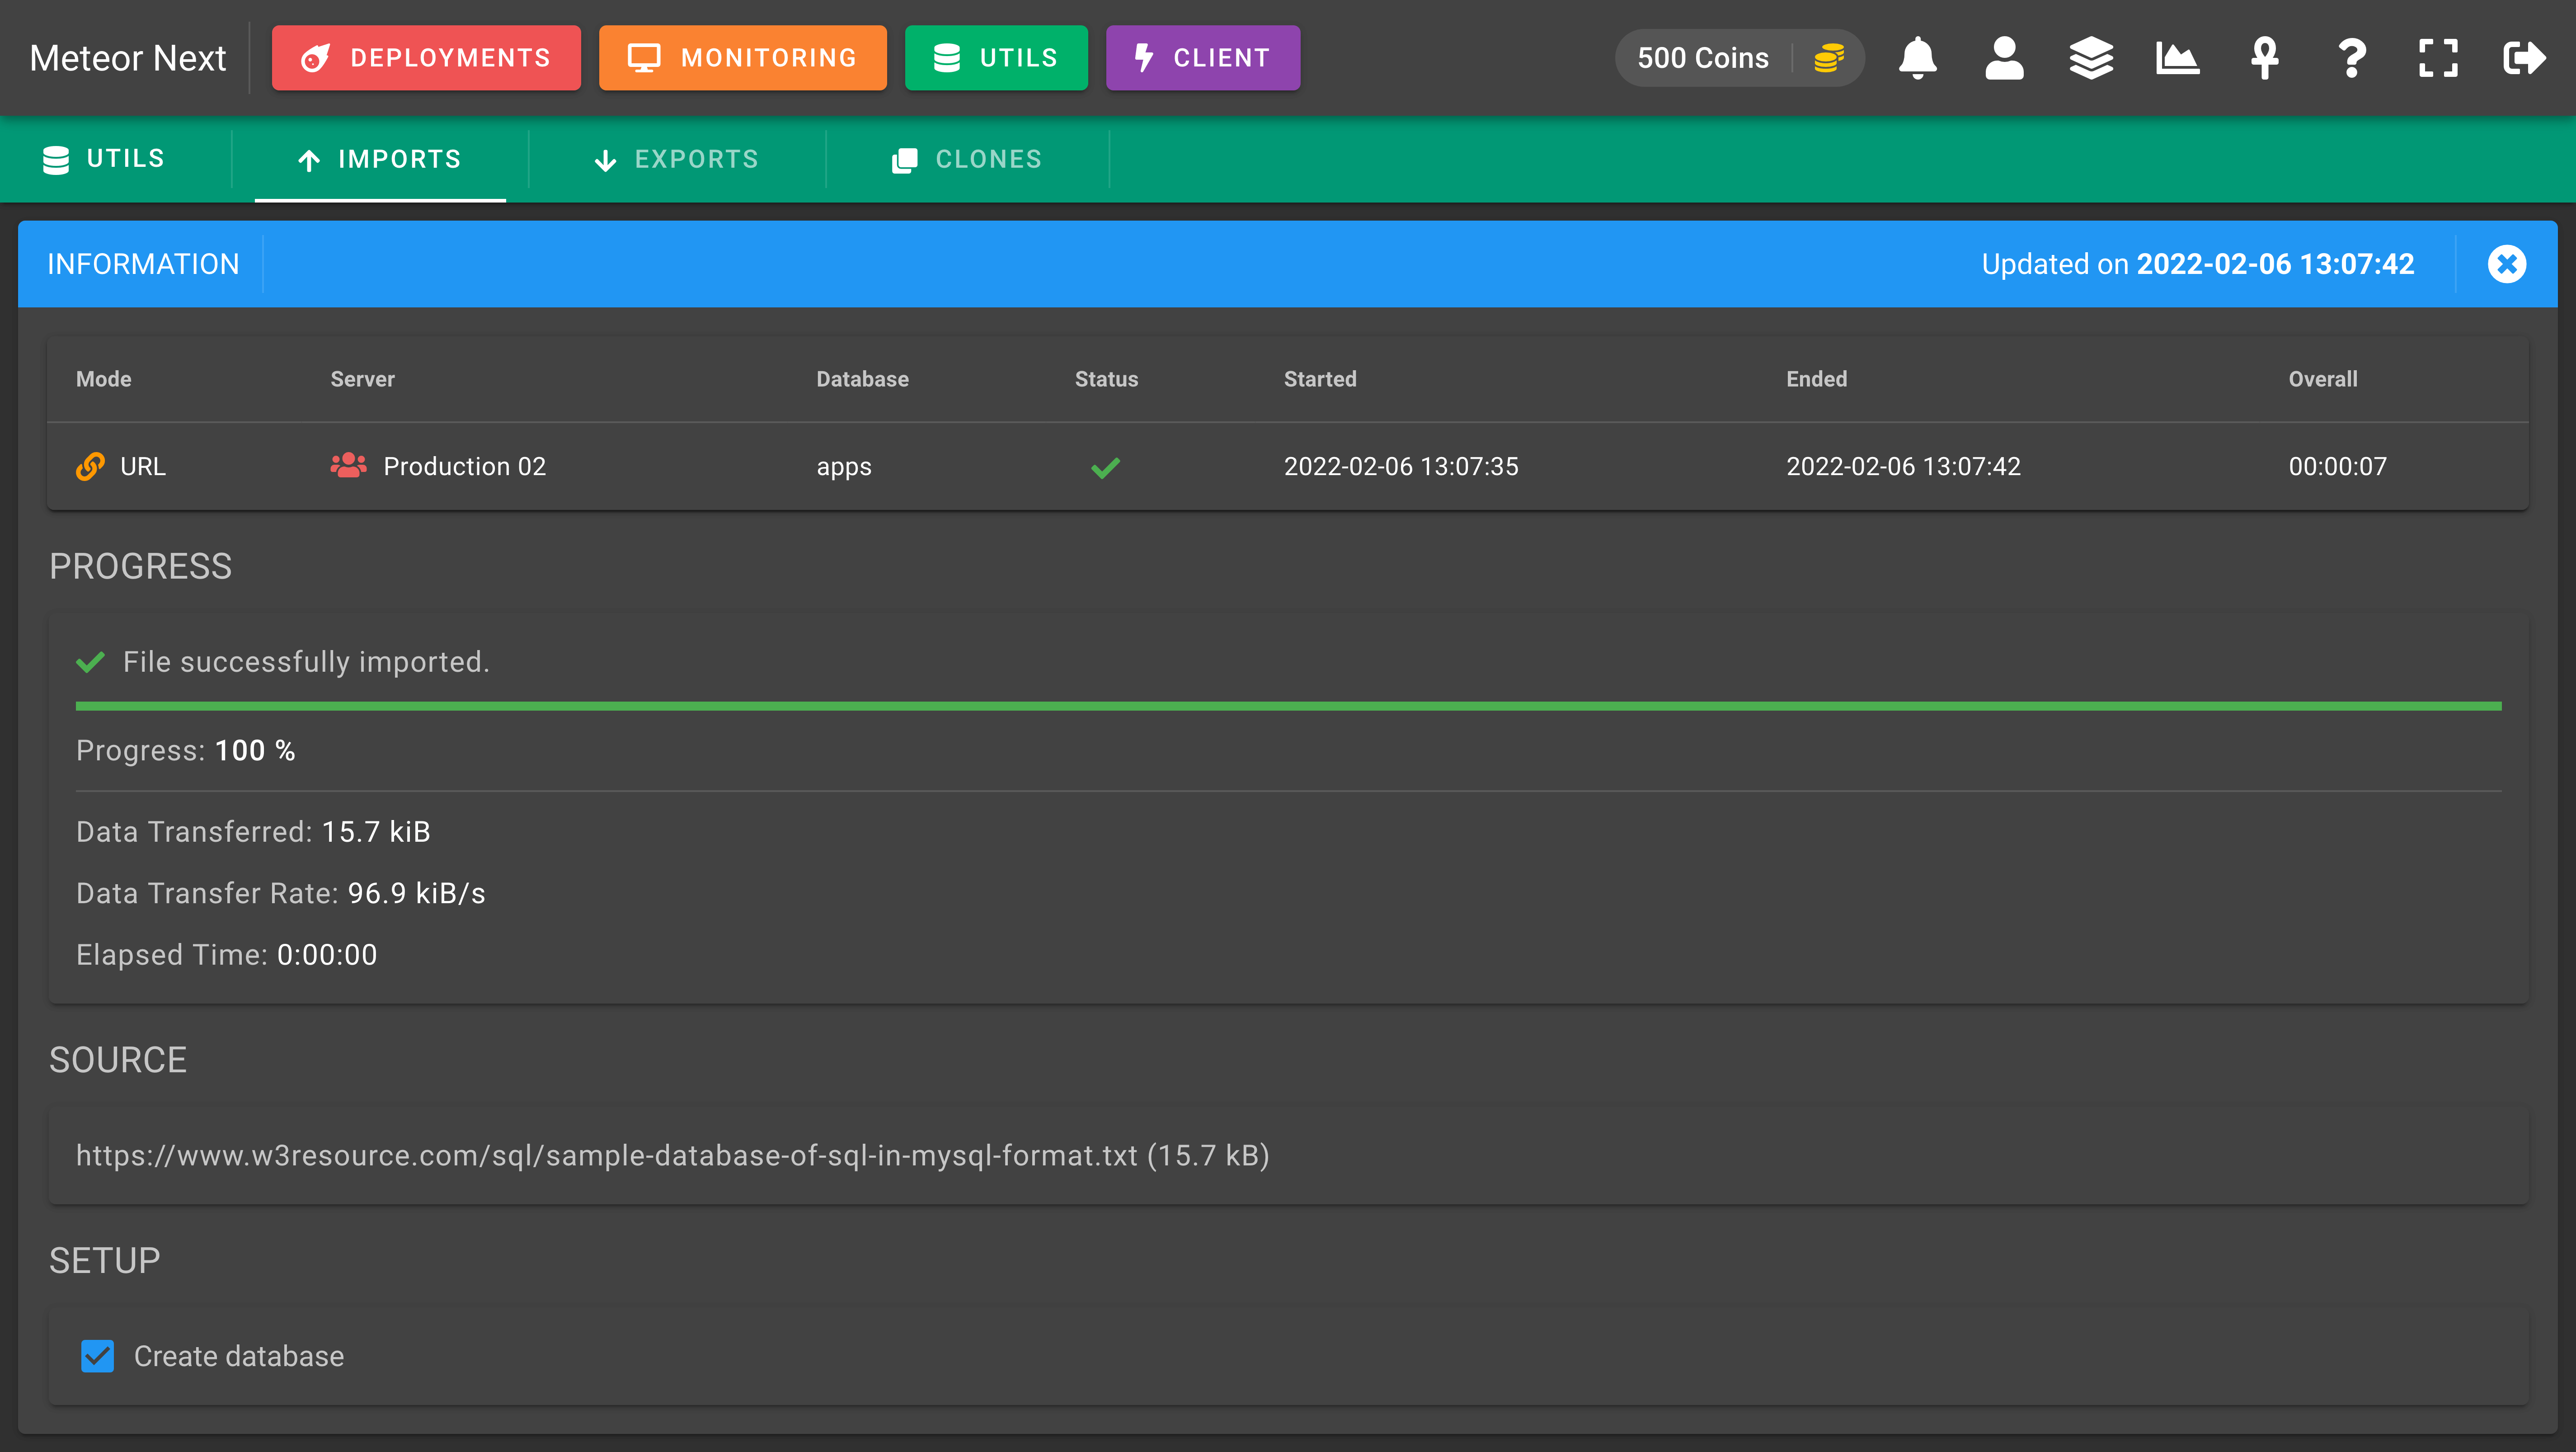
The import process will start showing us some metrics.
Importing from Cloud
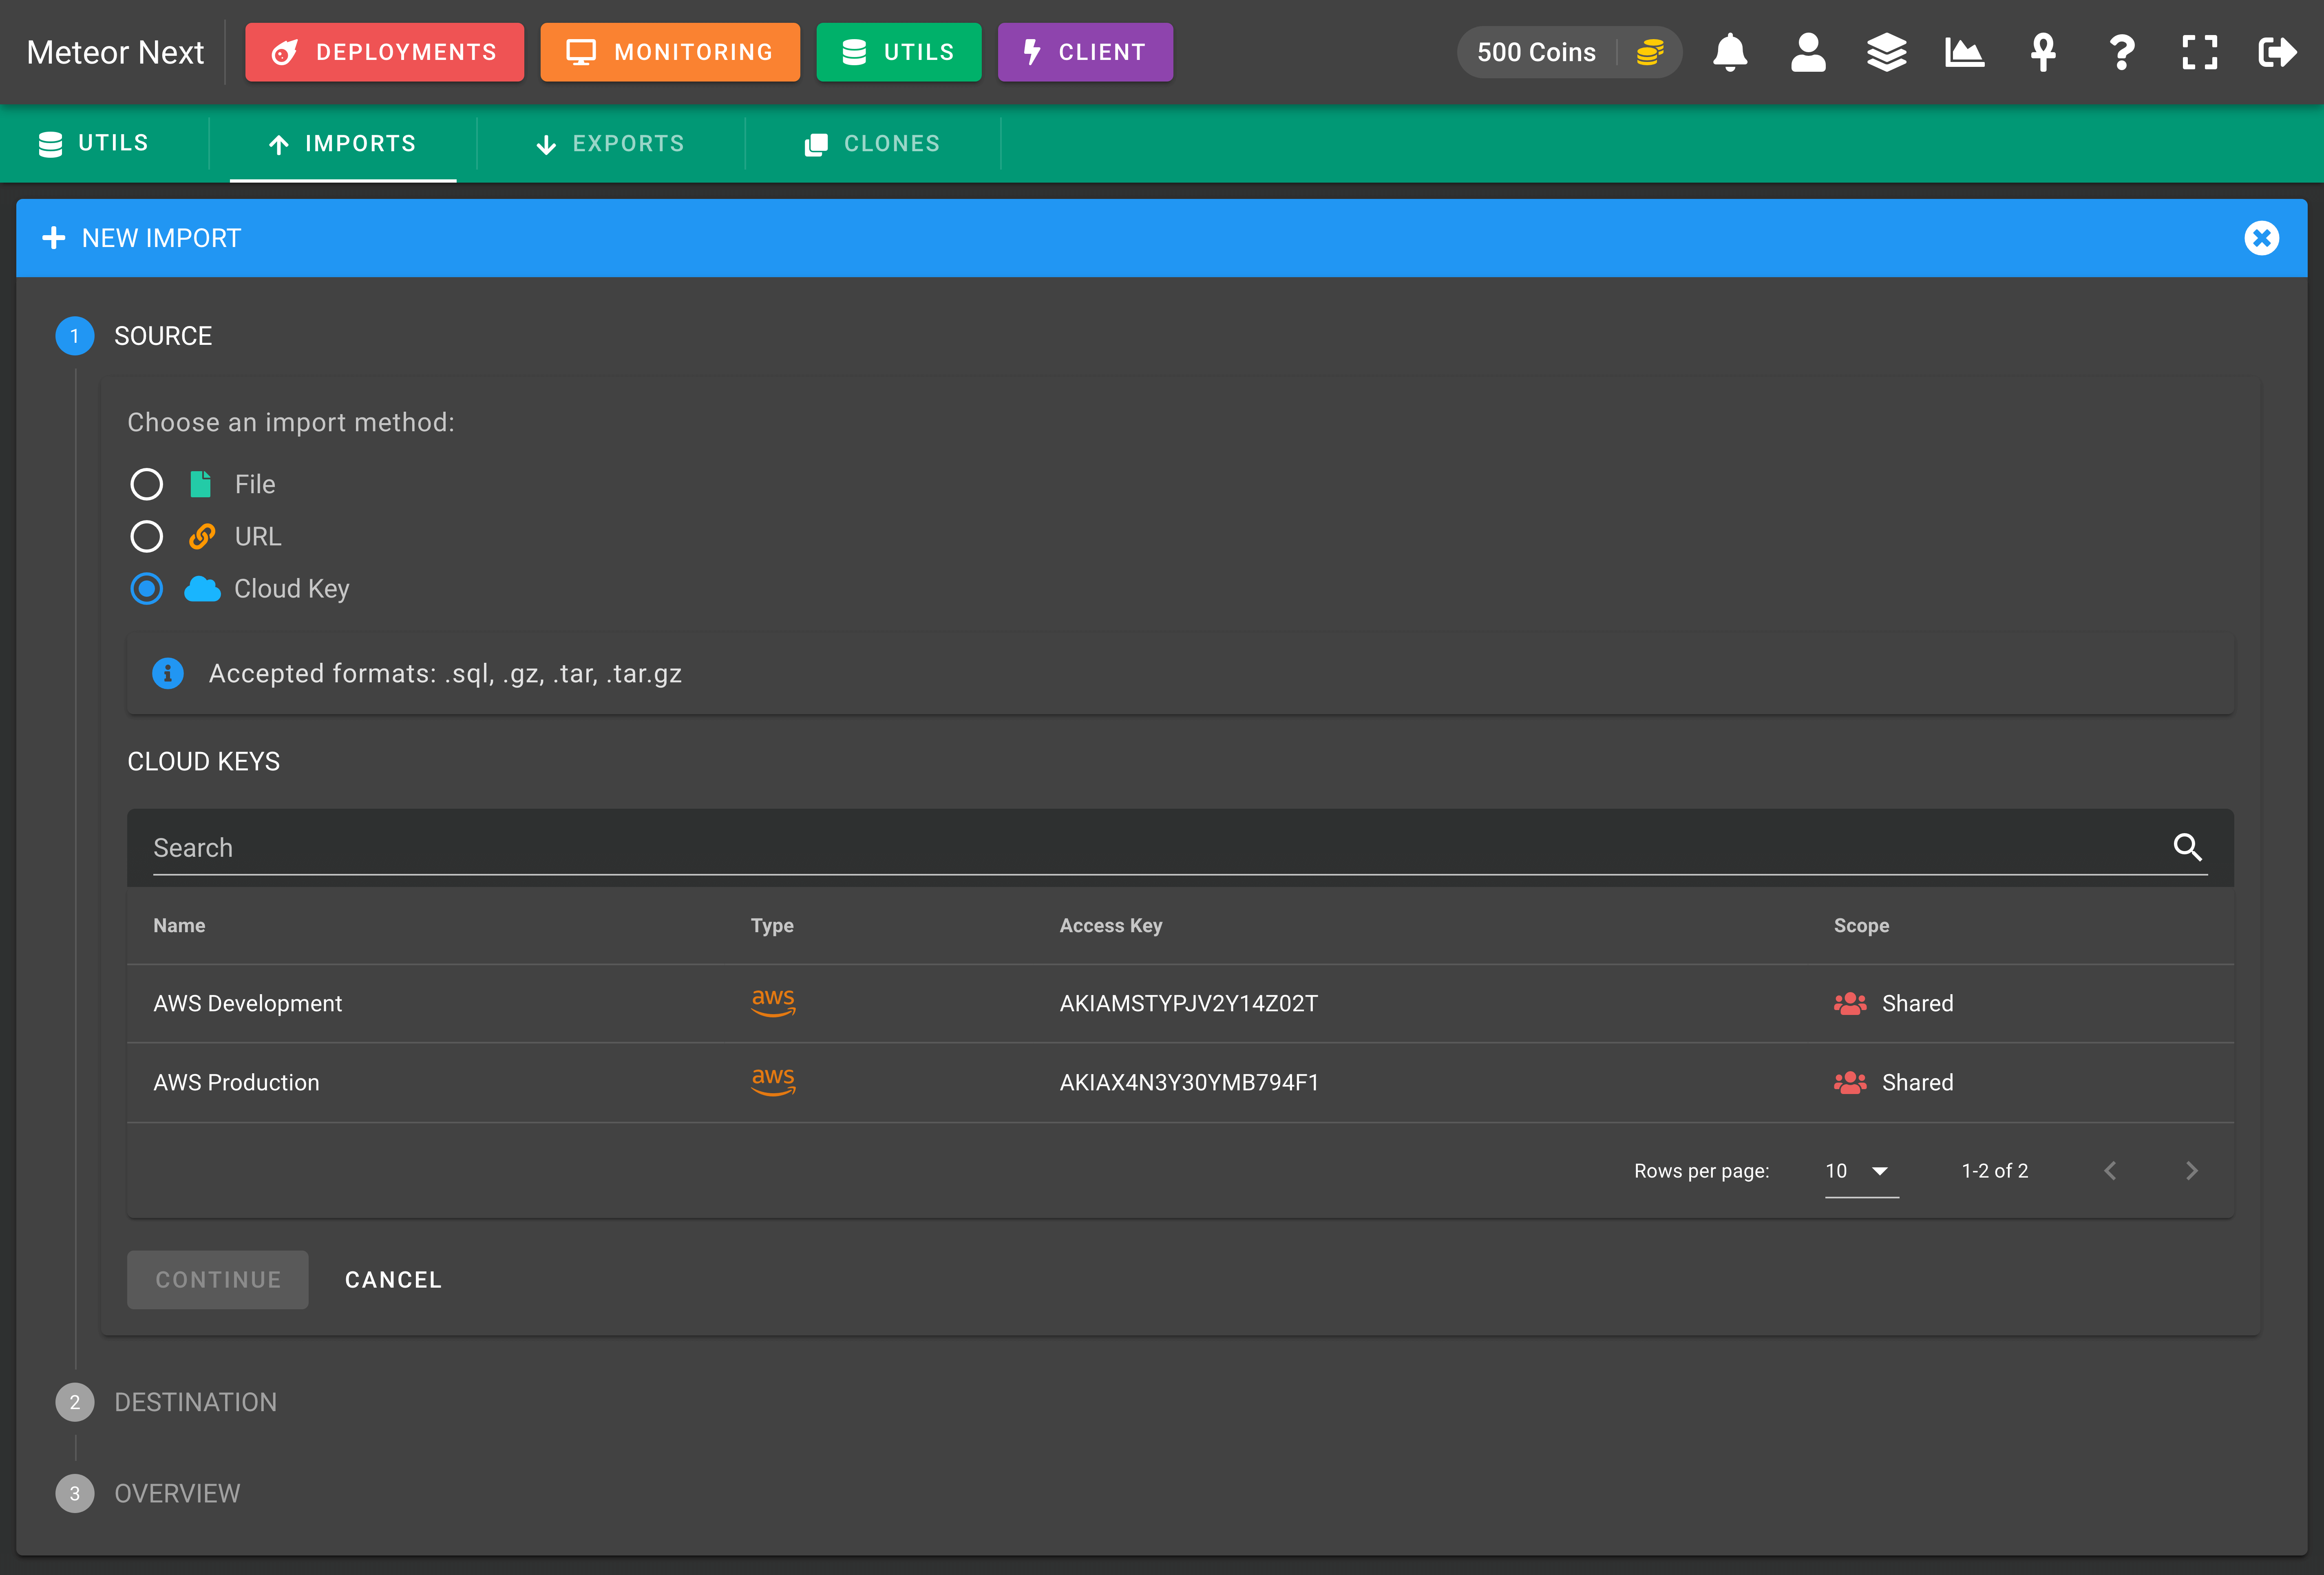
To import a file from the Cloud, choose the Cloud Key option. After that, a table will appear showing all the Cloud Keys we have into our inventory. Choose the one you want to access.
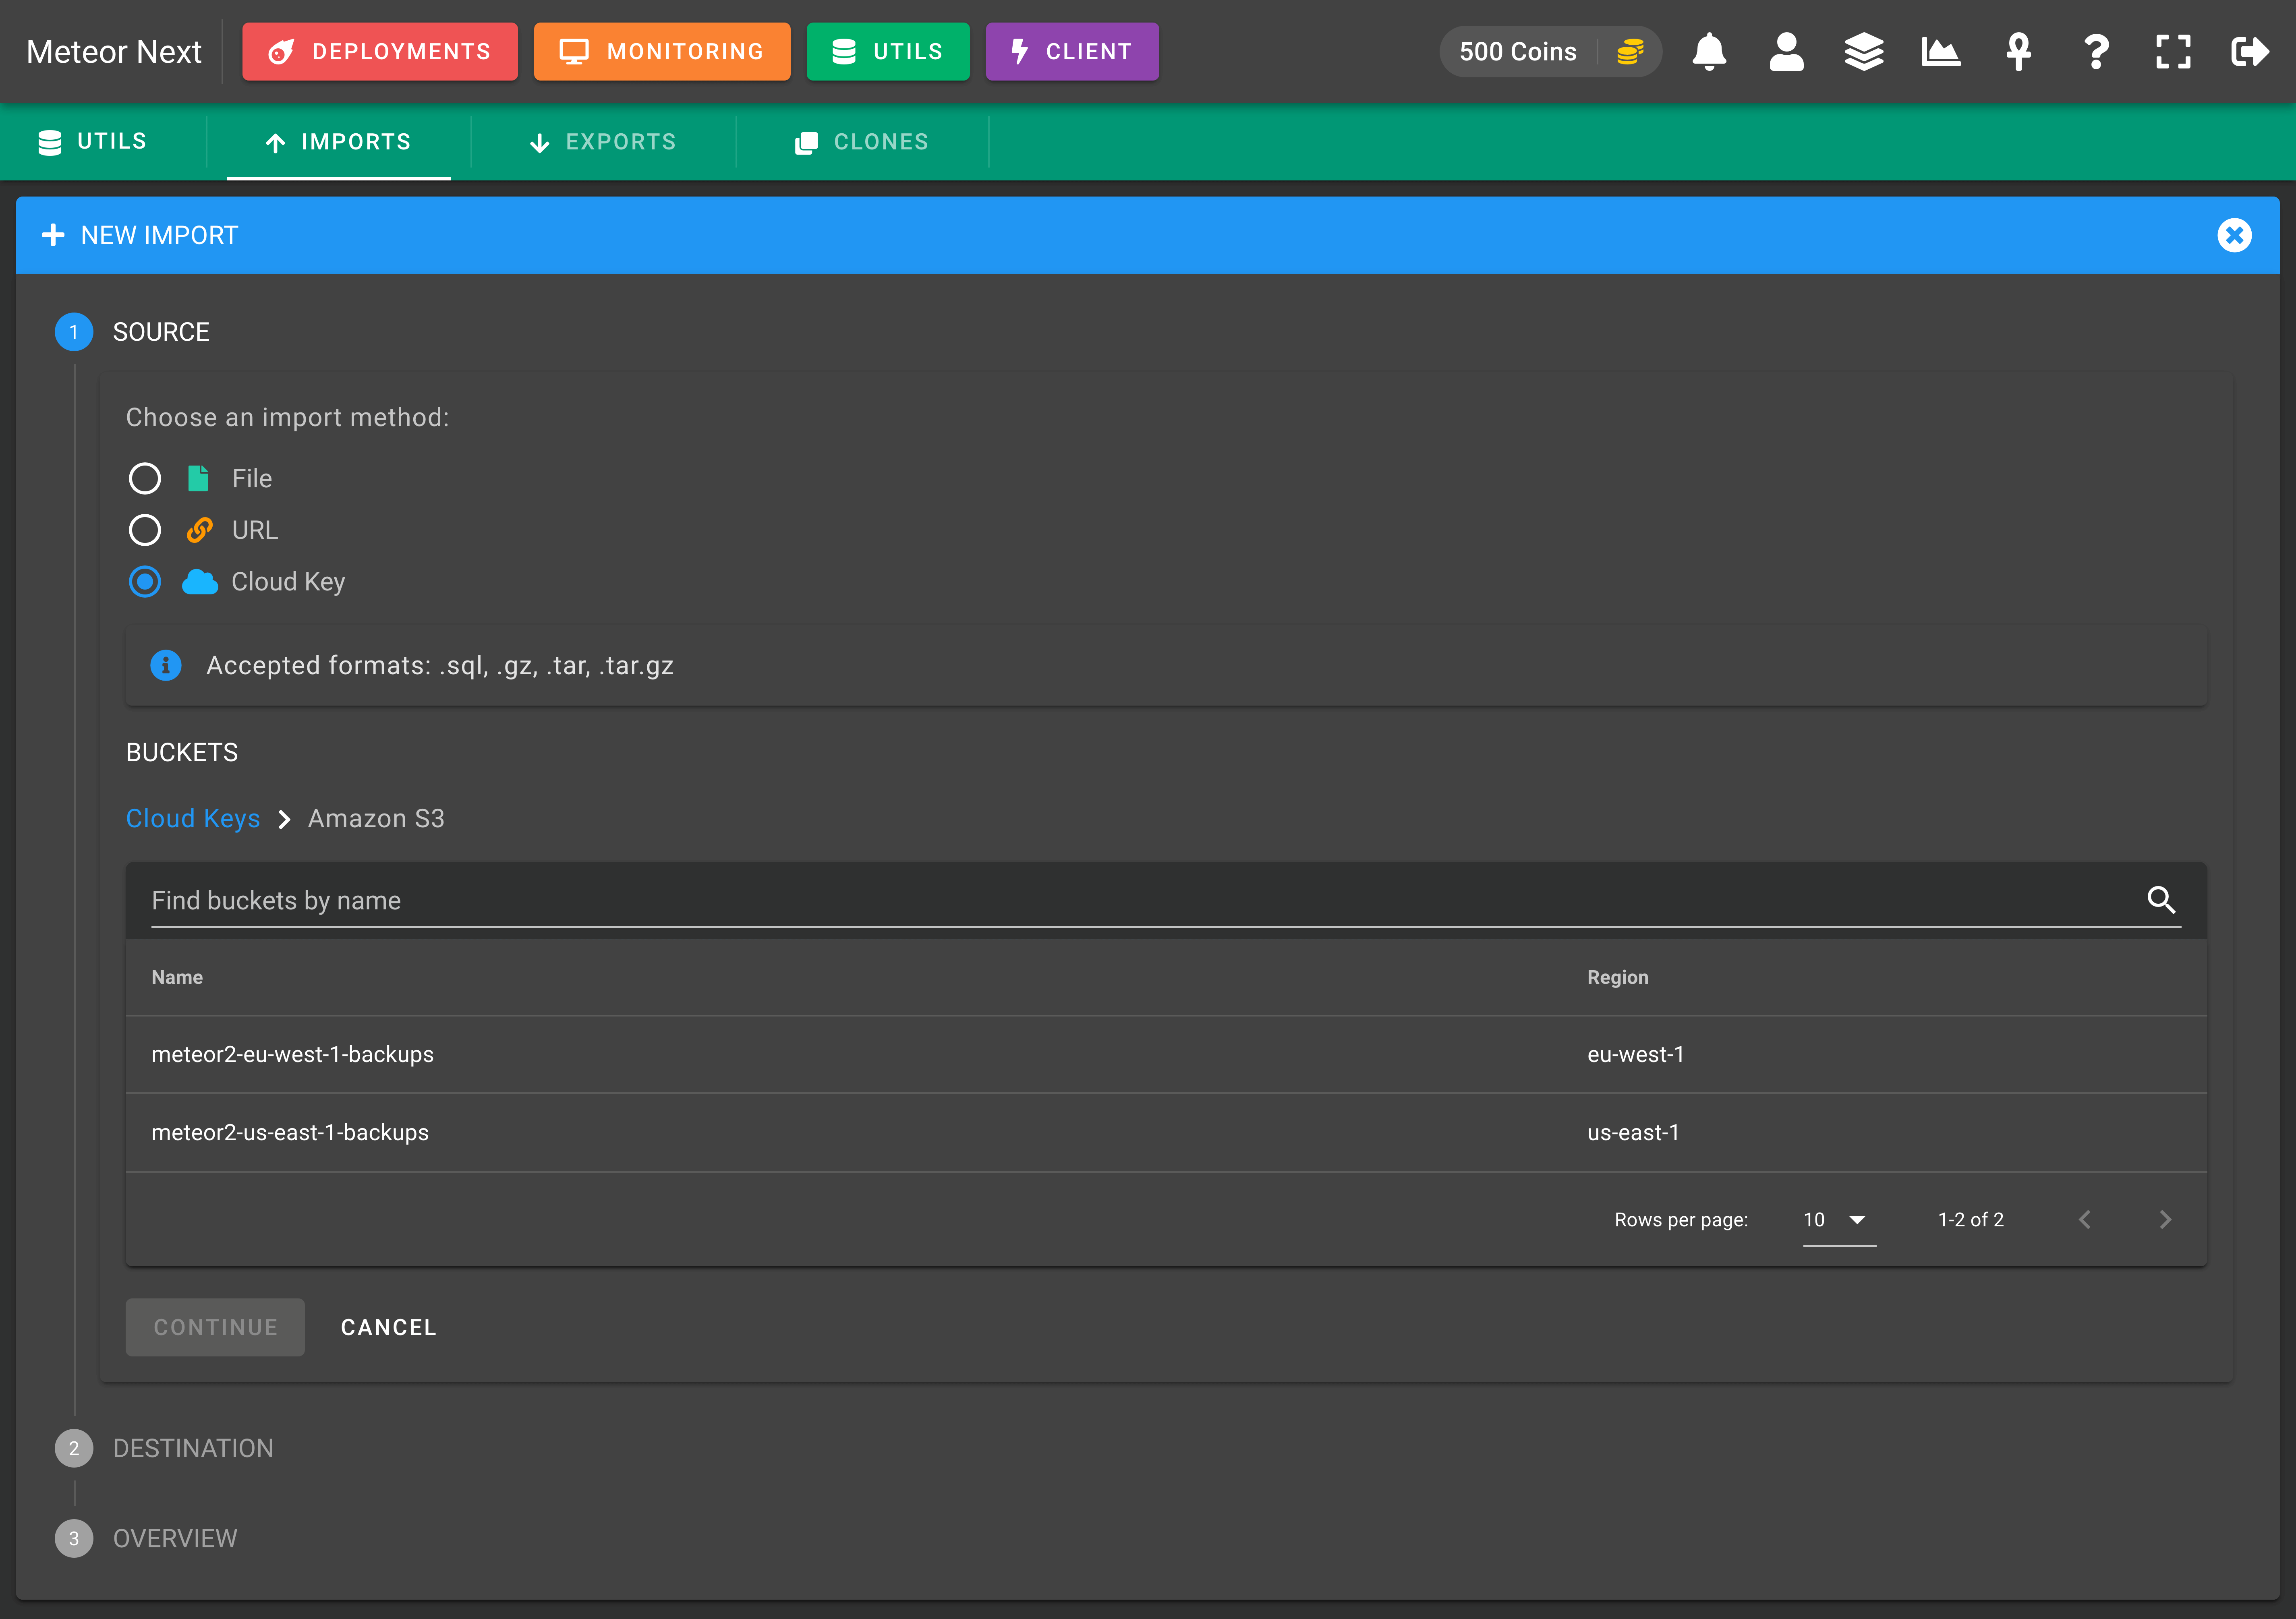
After clicking the Cloud Key, the table will load the buckets containing in the Cloud Key. Choose the bucket that contains the file we want to import.
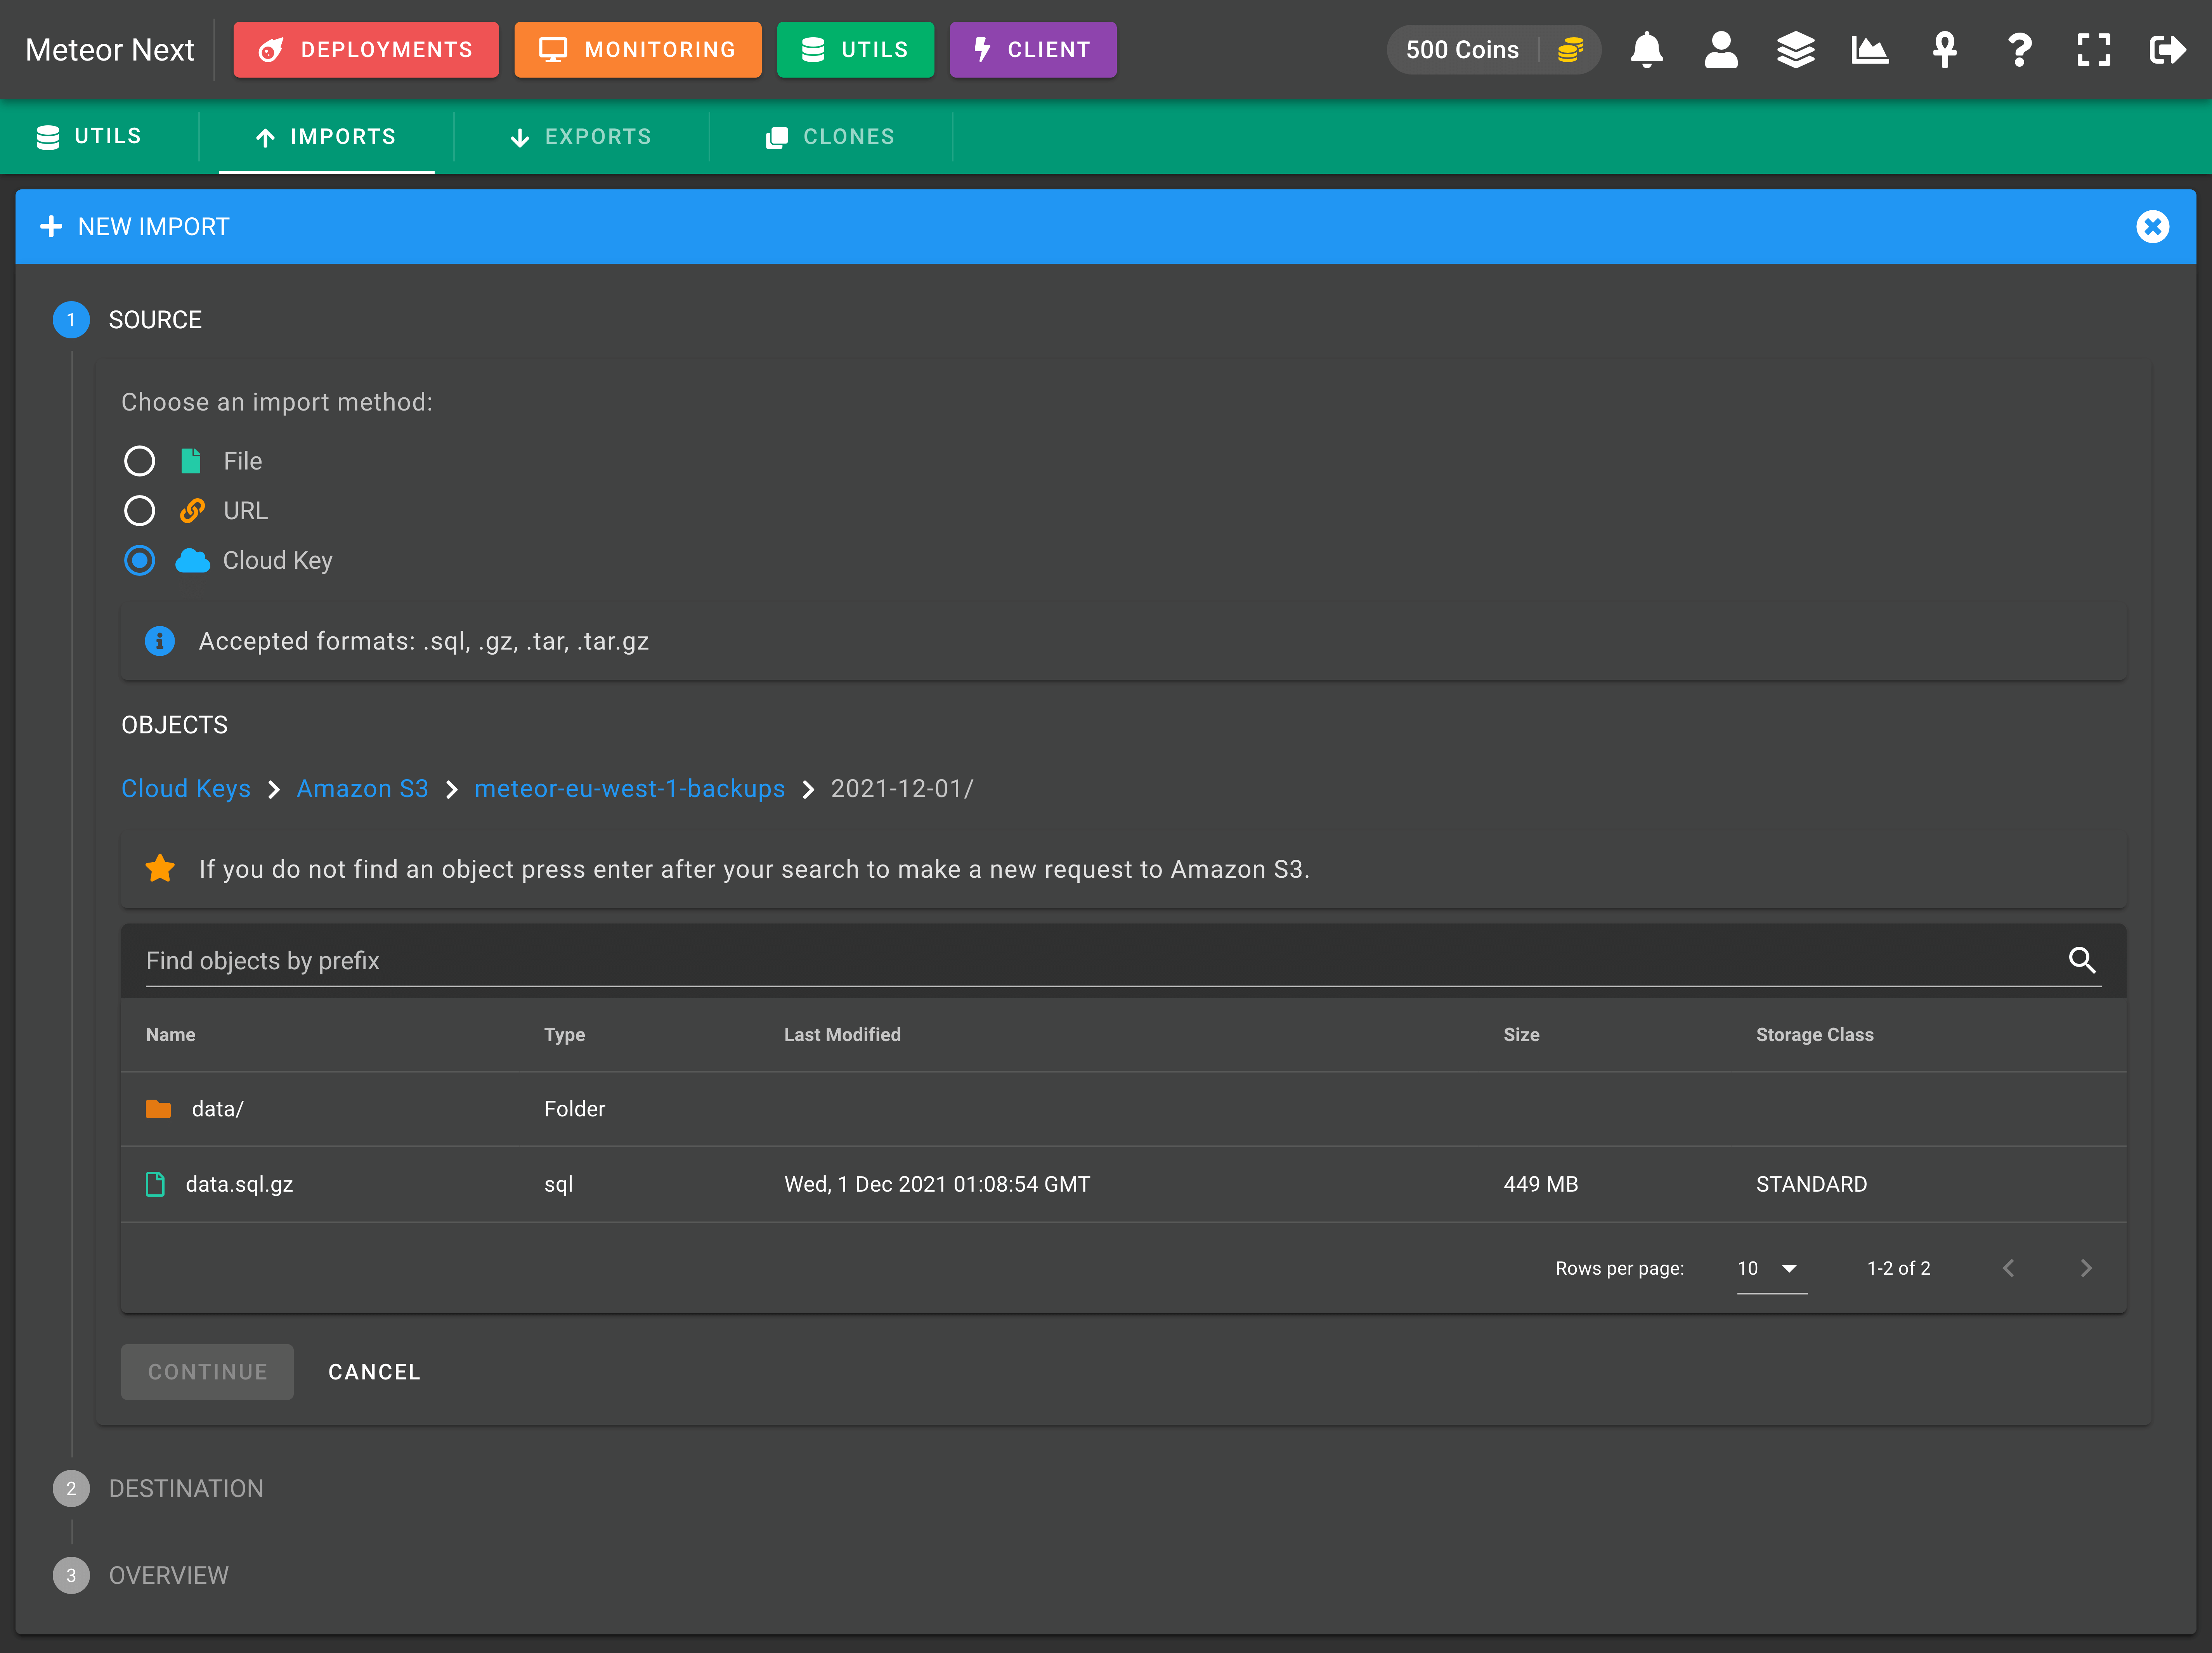
After that, we will be able to navigate through the files into the selected bucket. Choose the file to be imported.
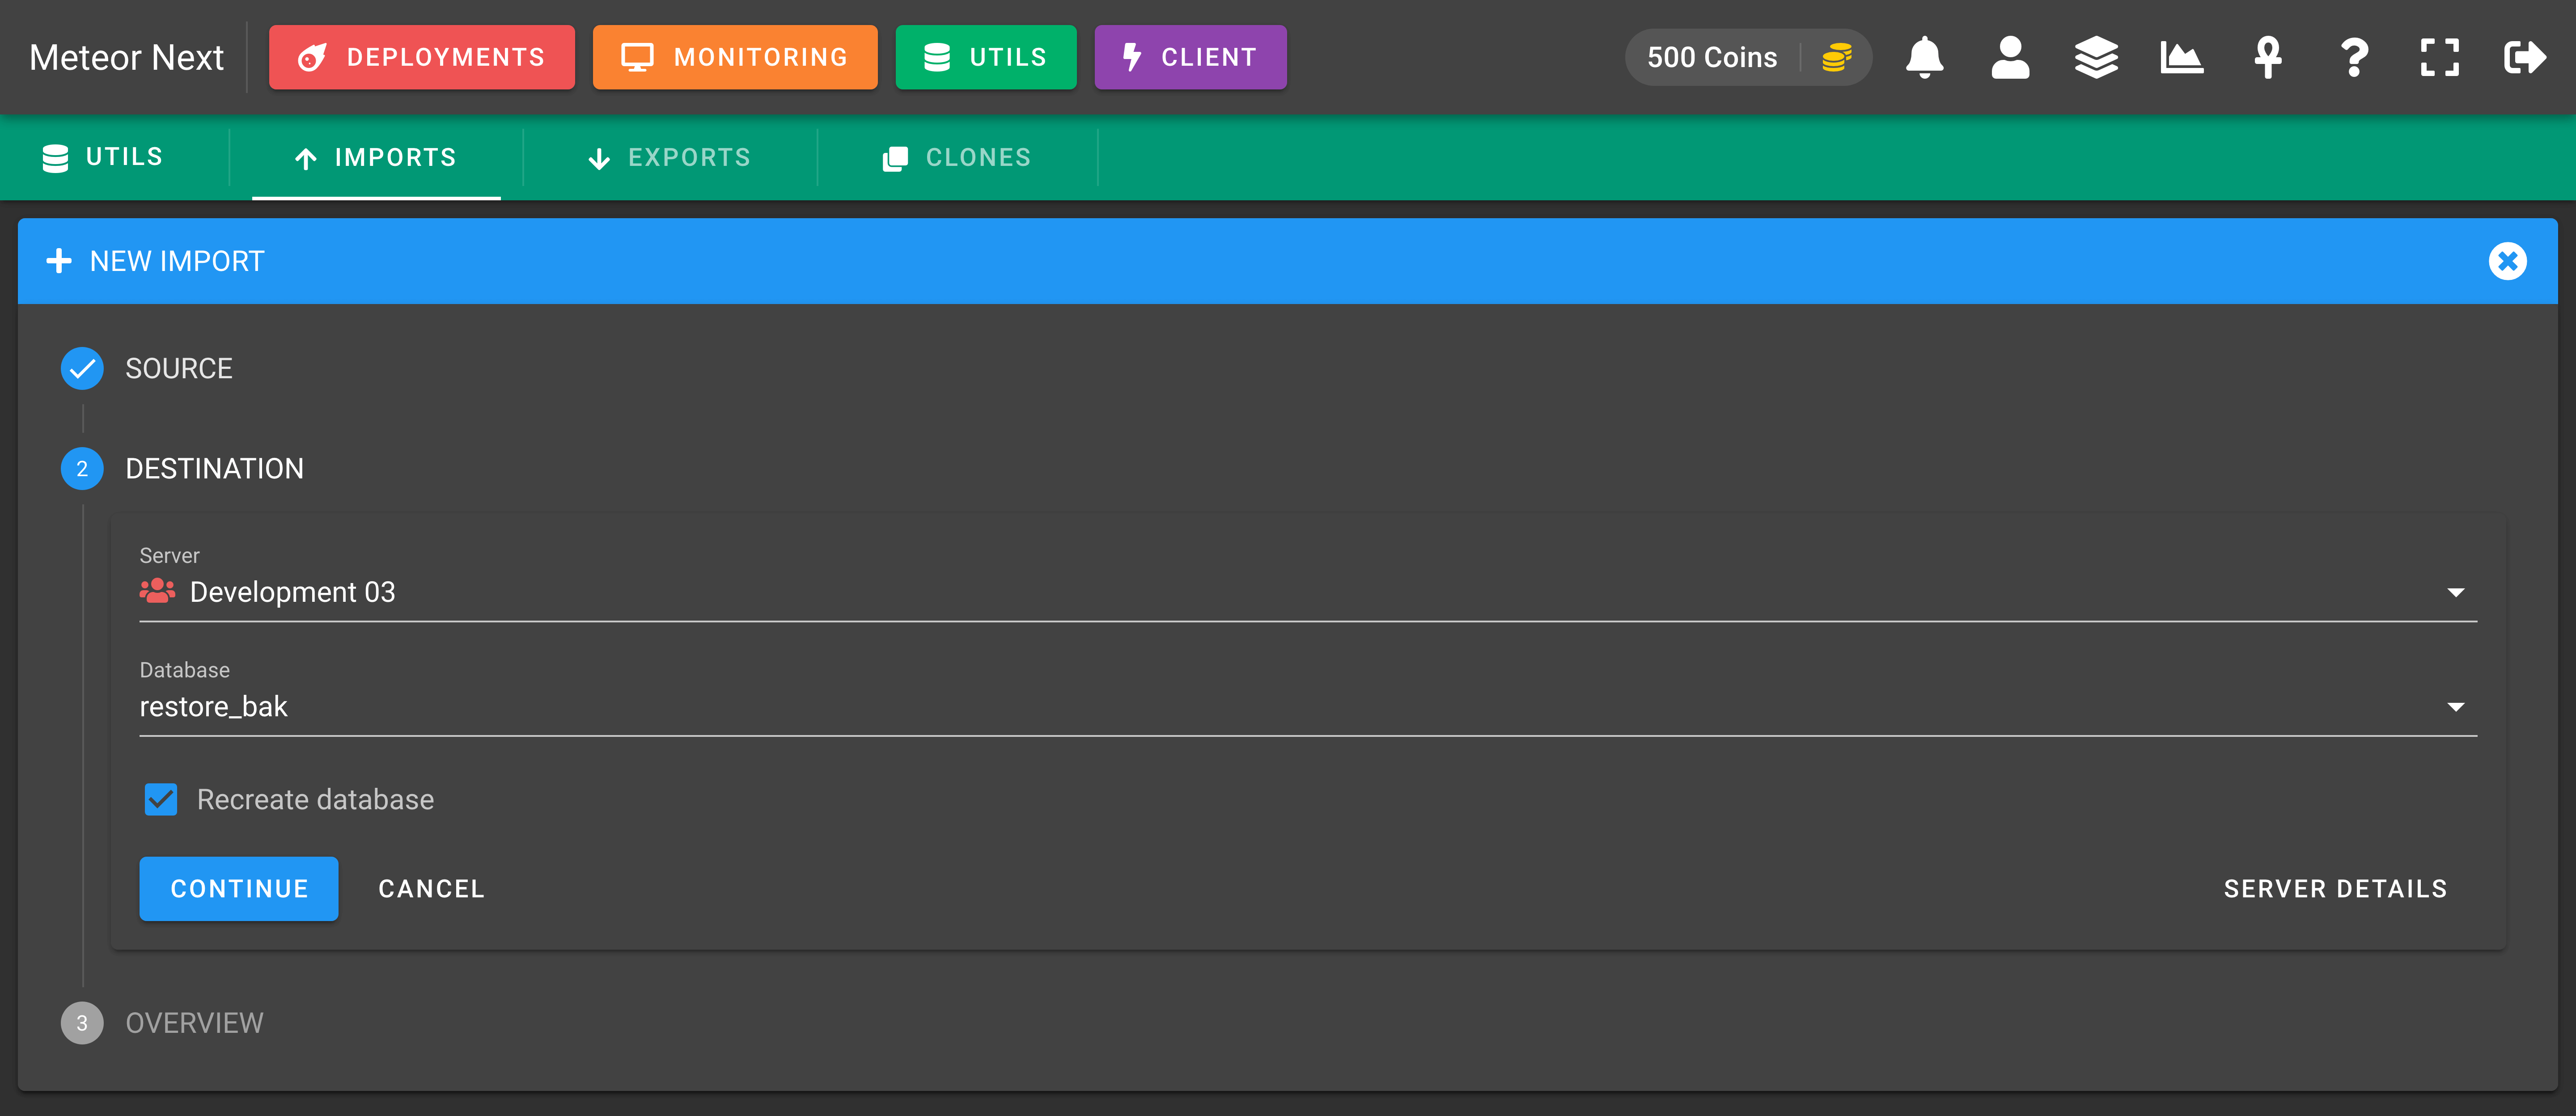
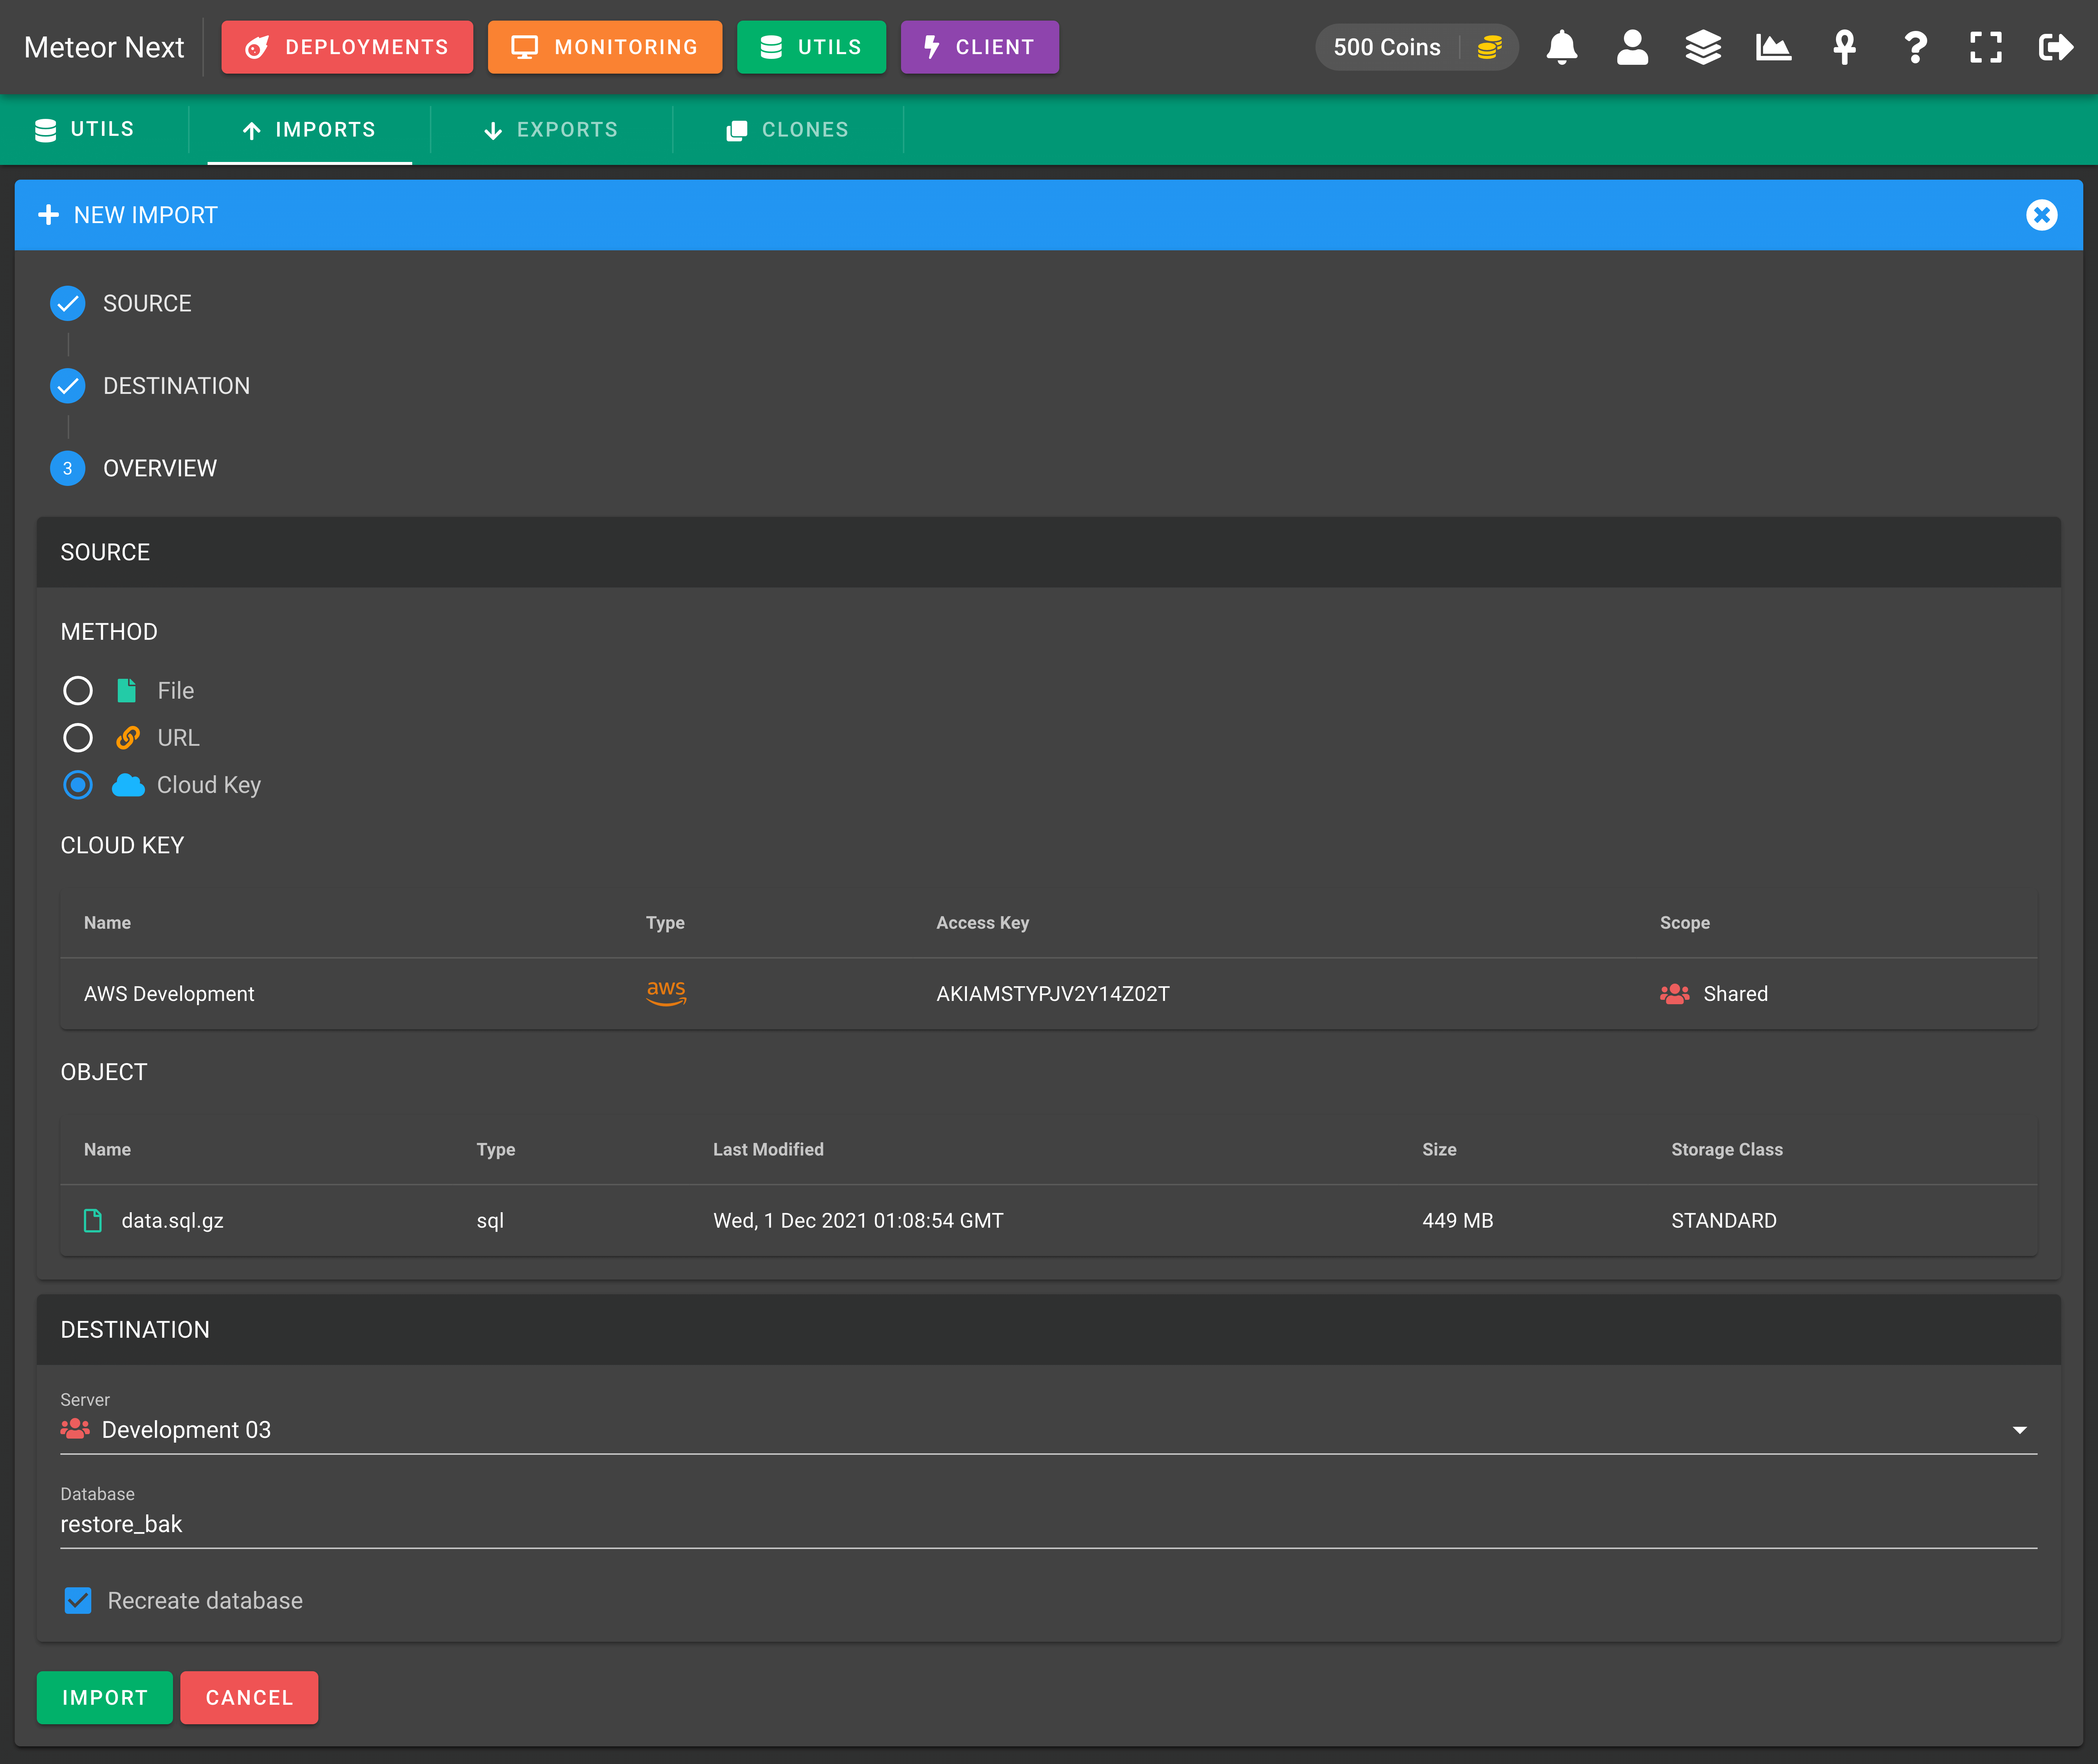
Choose the server and the database name that will be used to import the selected file. If you want to perform a clean import, check the "Recreate" database checkbox. This option deletes the database, creates a new empty one with the same name, and then imports all the schema and data from the specified source.
Finally, a summary will show with all the selected options. Click the IMPORT option to start the import process.
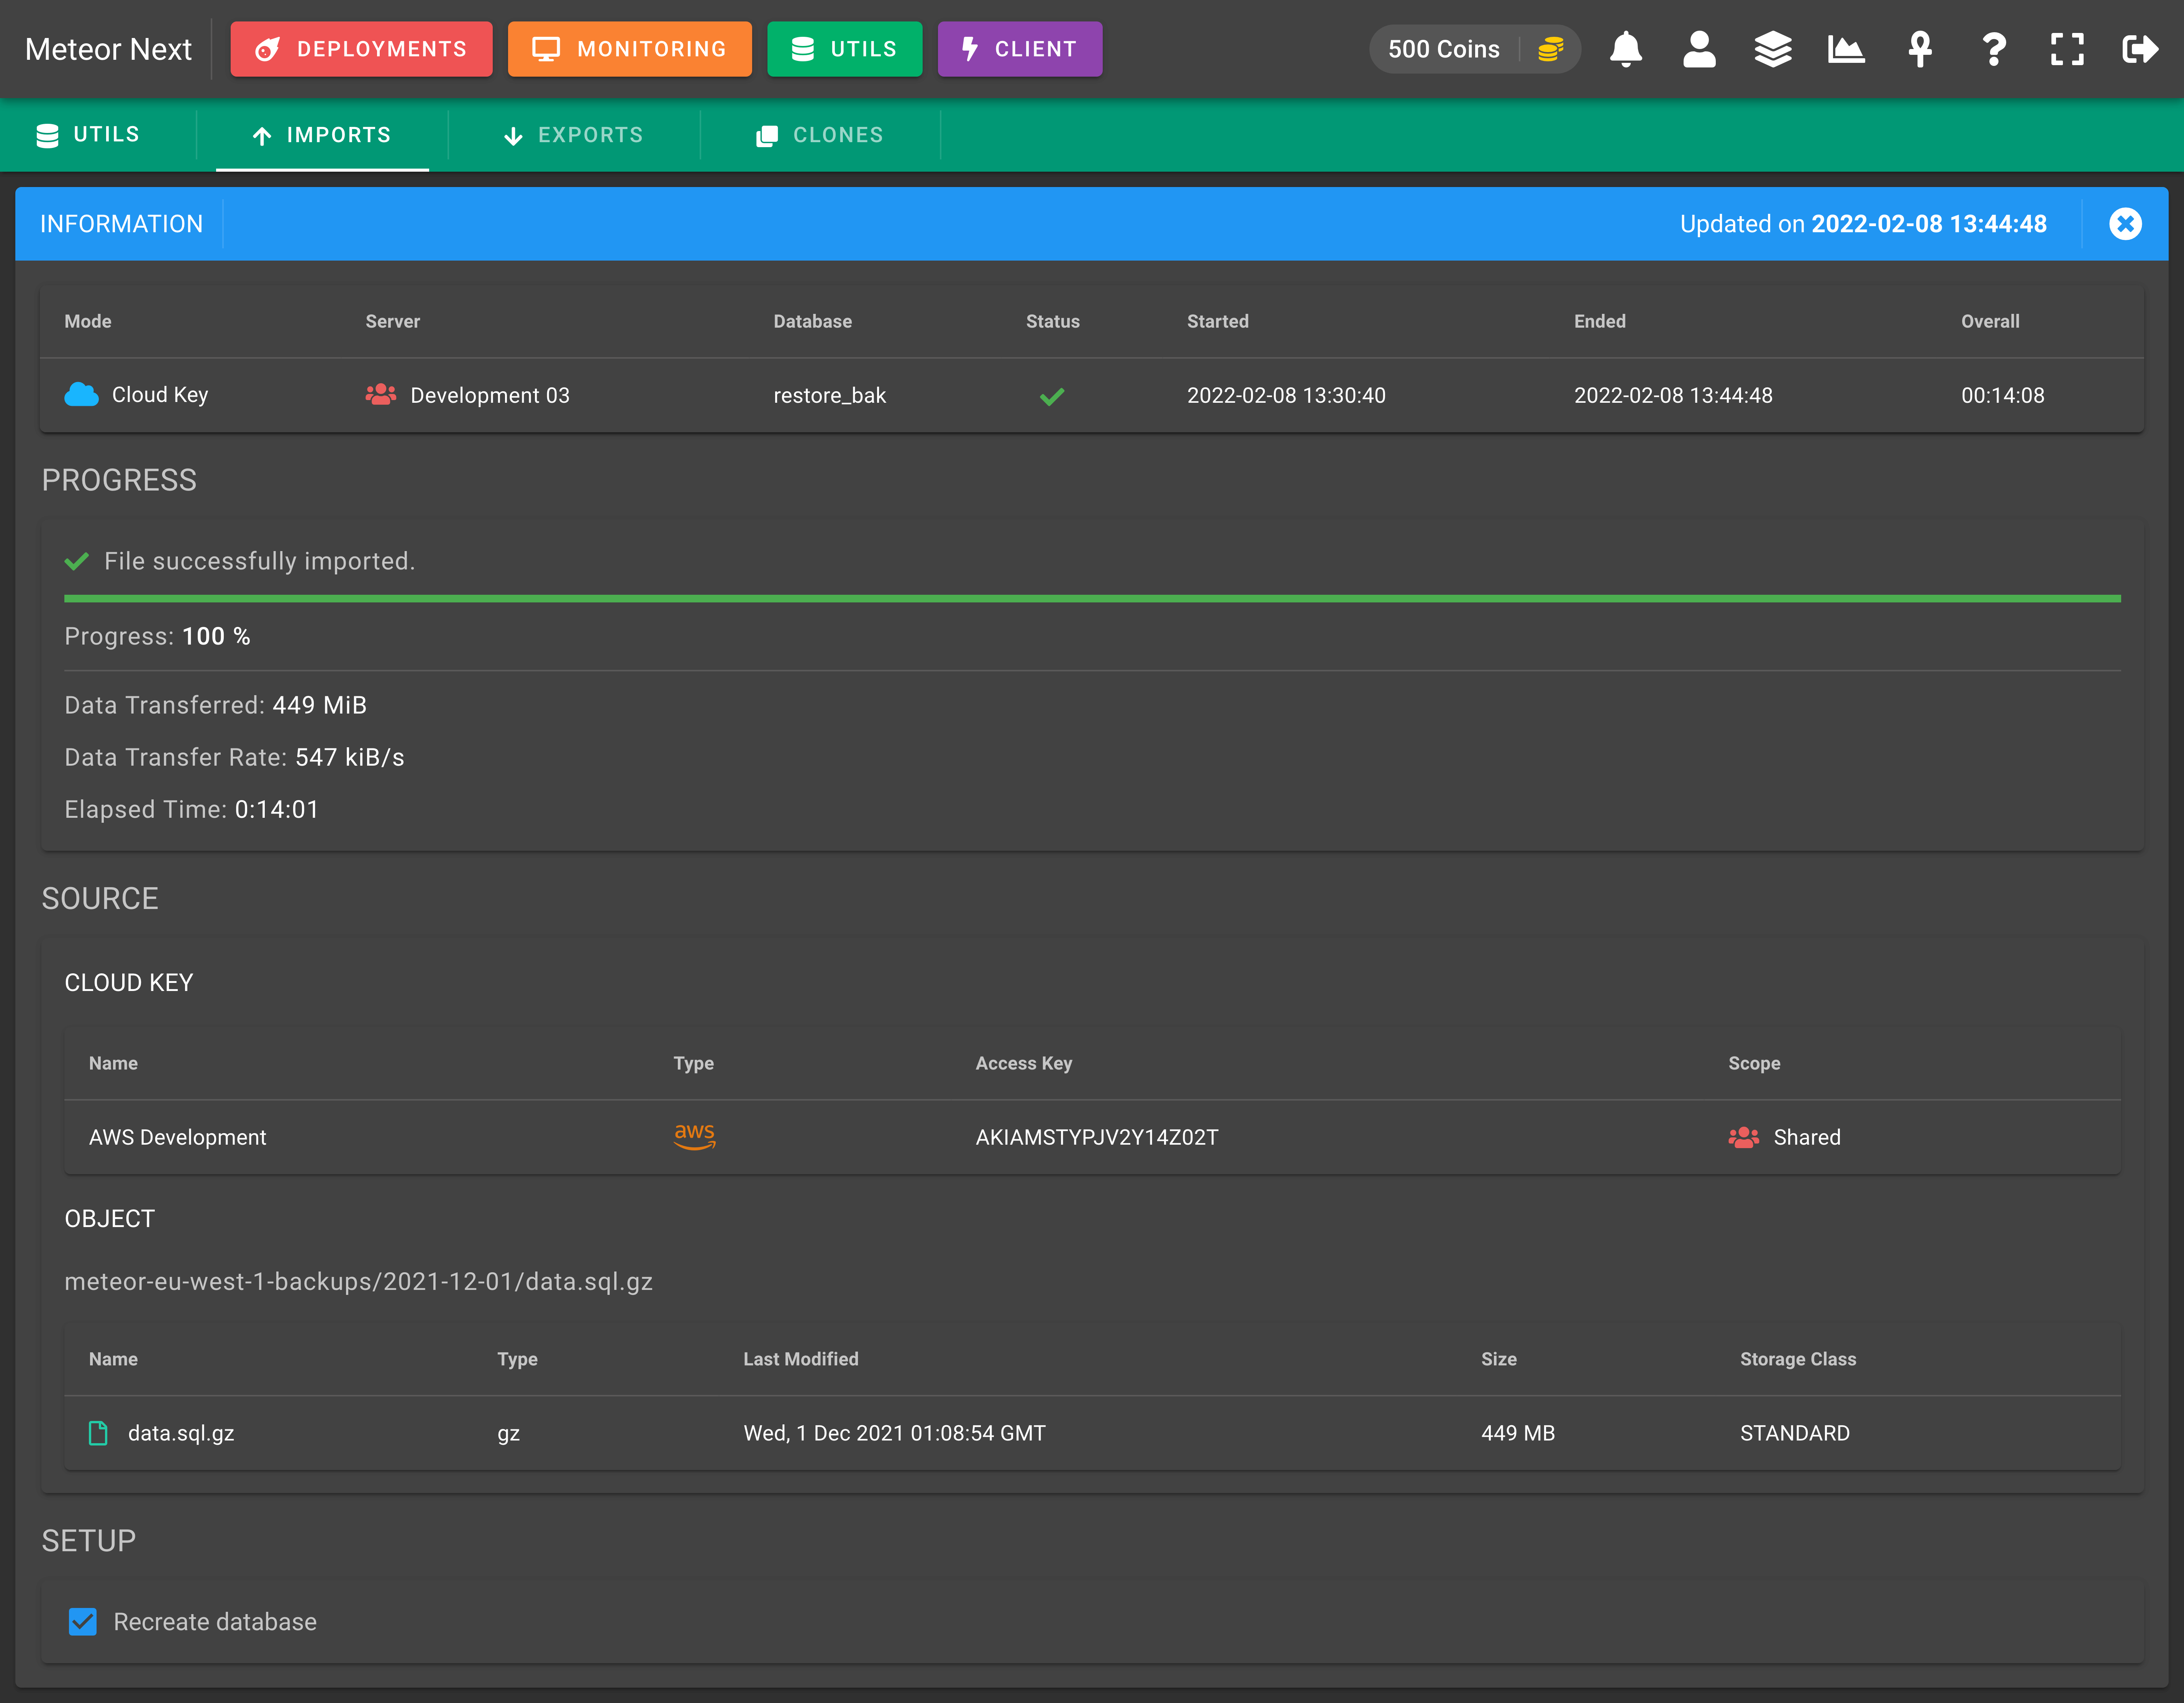
After the process starts, we will be able to track the process.
Importing .tar & tar.gz files
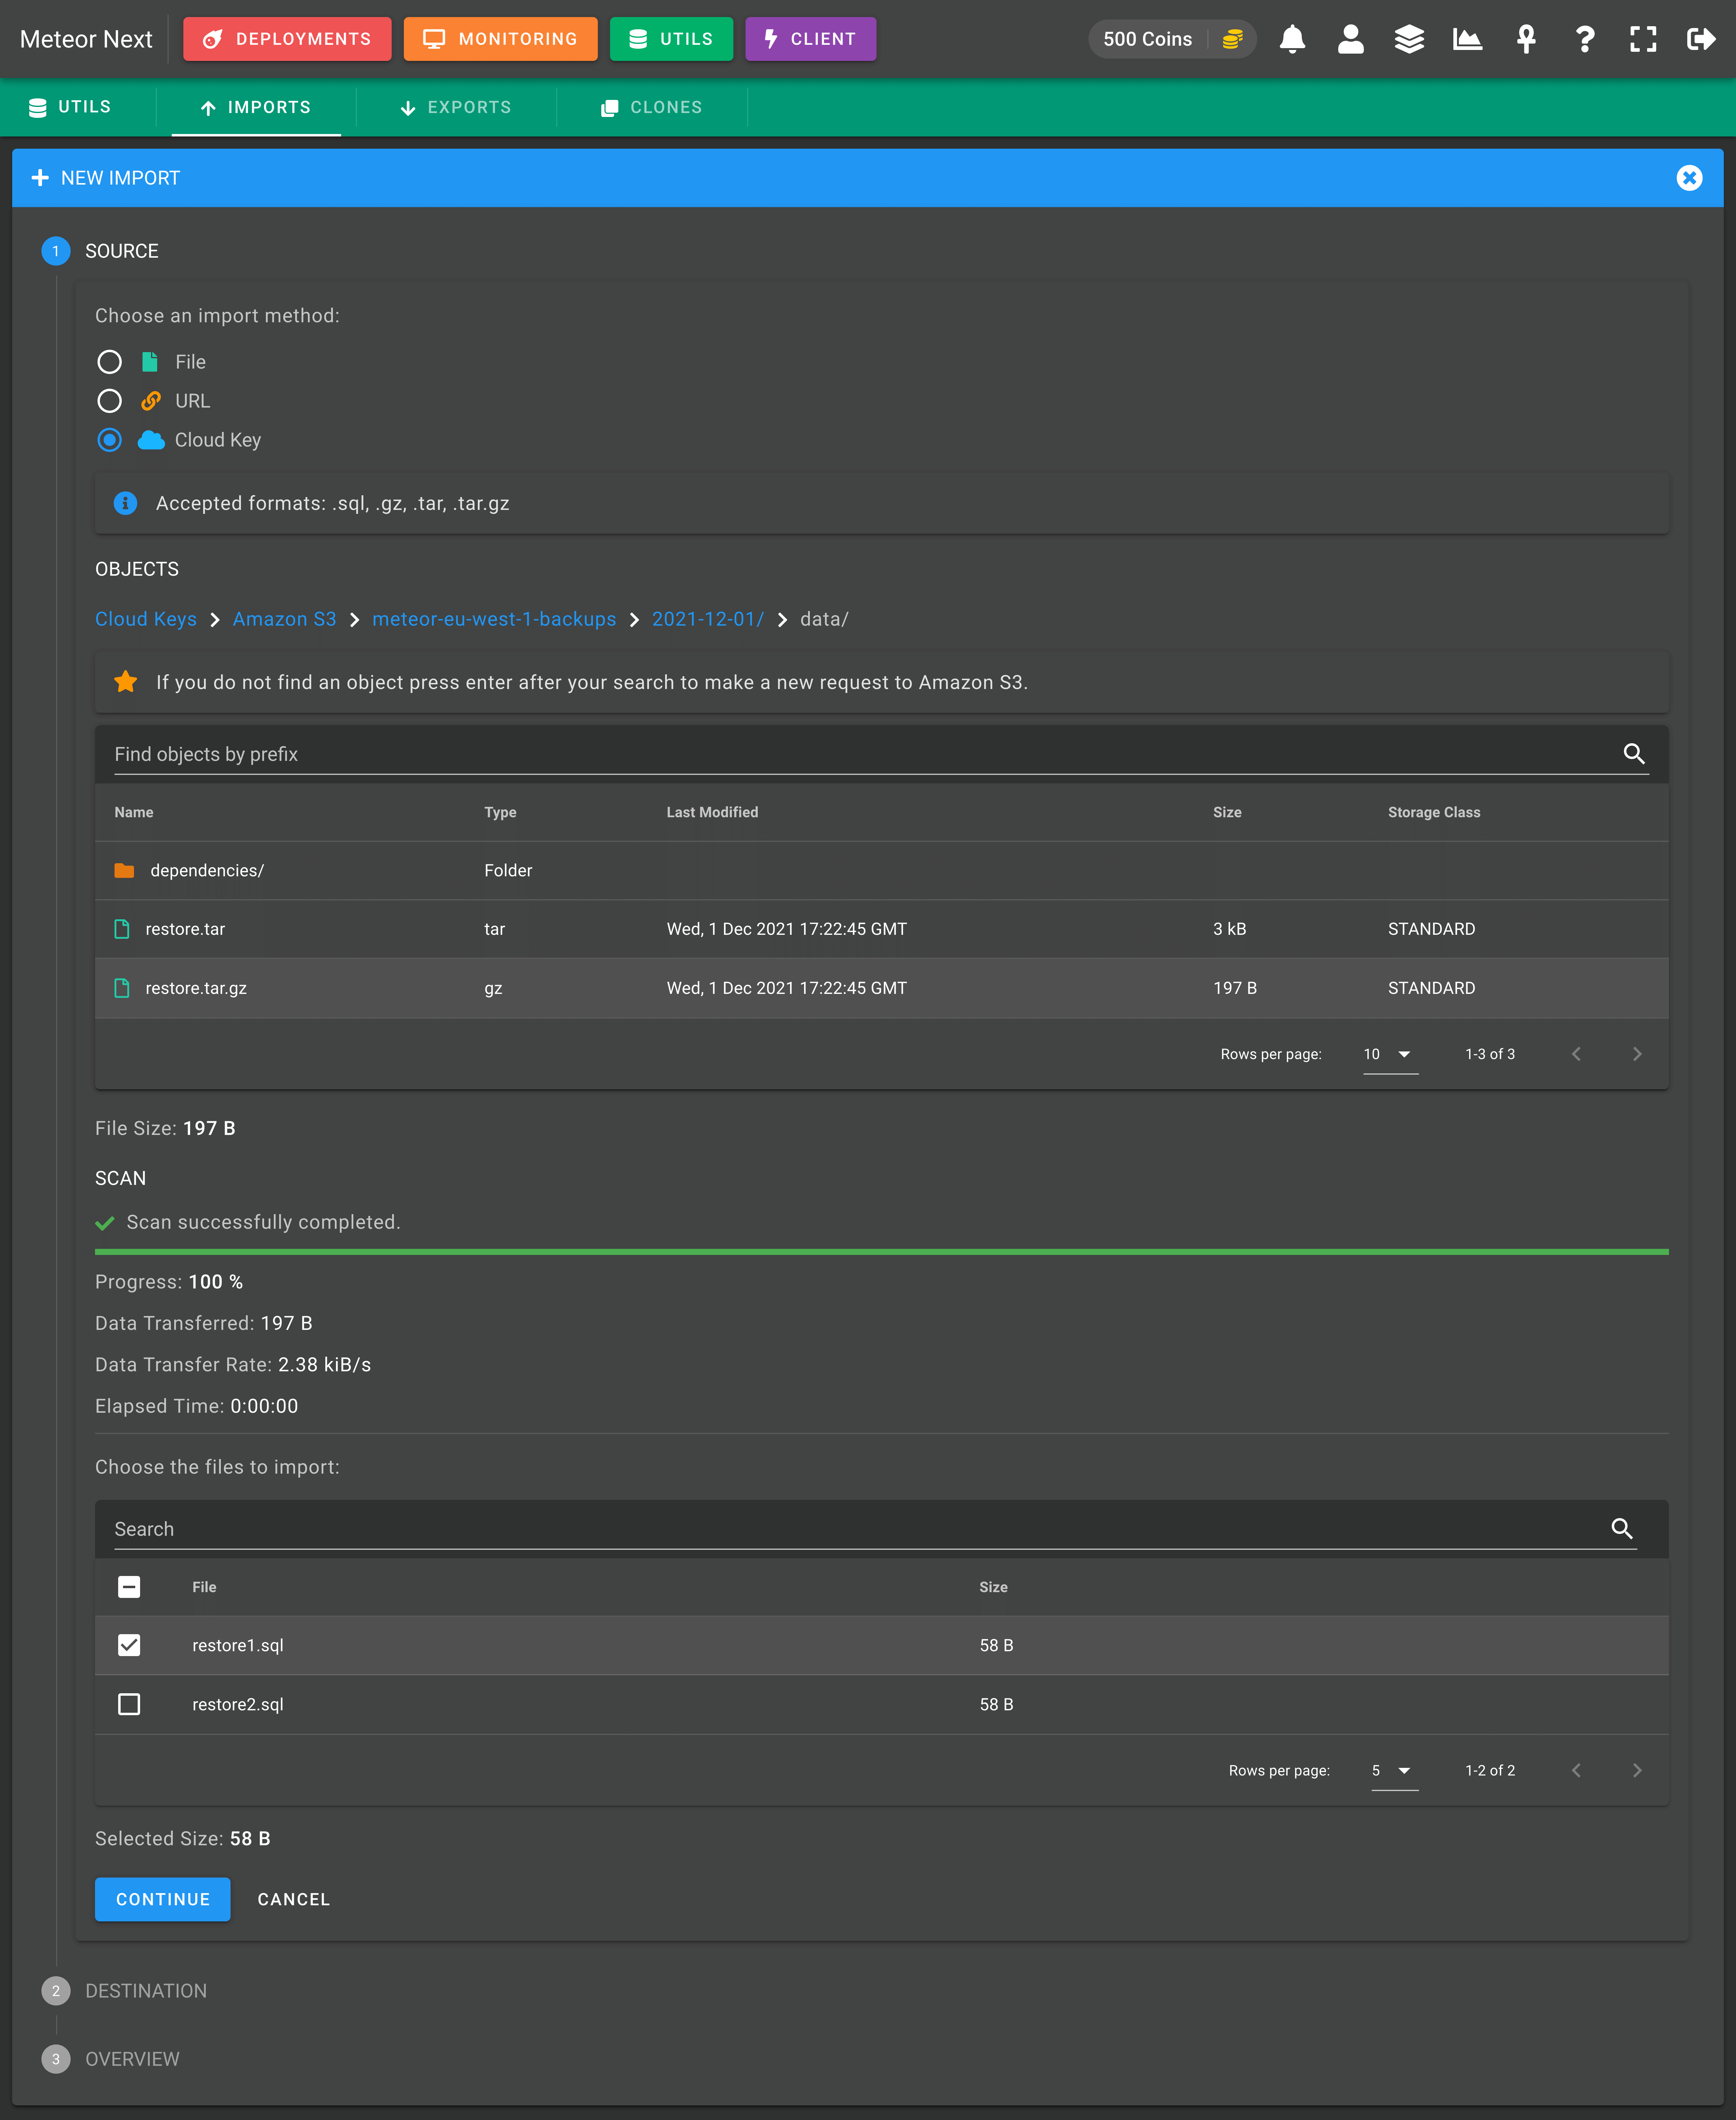
When a .tar or .tar.gz file is selected using either URL or Cloud Key as source, we can optionally choose which files (.sql or .gz) contained into the .tar / .tar.gz we would like to import.
This use case is useful if for example we store the database backups as a .tar.gz file that contains one file per table. Thus, we would be able to import just a table on the fly without having to import the entire database.
The following screenshot shows this feature:
TIP
If you get the following error by importing a .tar / .tar.gz file:
ERROR: ASCII '\0' appeared in the statement, but this is not allowed unless option --binary-mode is enabled and mysql is run in non-interactive mode. Set --binary-mode to 1 if ASCII '\0' is expected. Query: ''.
Compress your files adding the extra environment COPYFILE_DISABLE=1 in front of your tar command.
Example:
# Compress the sql folder into .tar file
COPYFILE_DISABLE=1 tar -cvf sql.tar sql

# Compress the sql folder into .tar.gz file
COPYFILE_DISABLE=1 tar -czvf sql.tar.gz sql
Infrastructure
The underlying process of the Import is similar to how the Deployments work. Basically, the import process is performed at the region where the destination server is located. In this way the delay between regions is avoided.
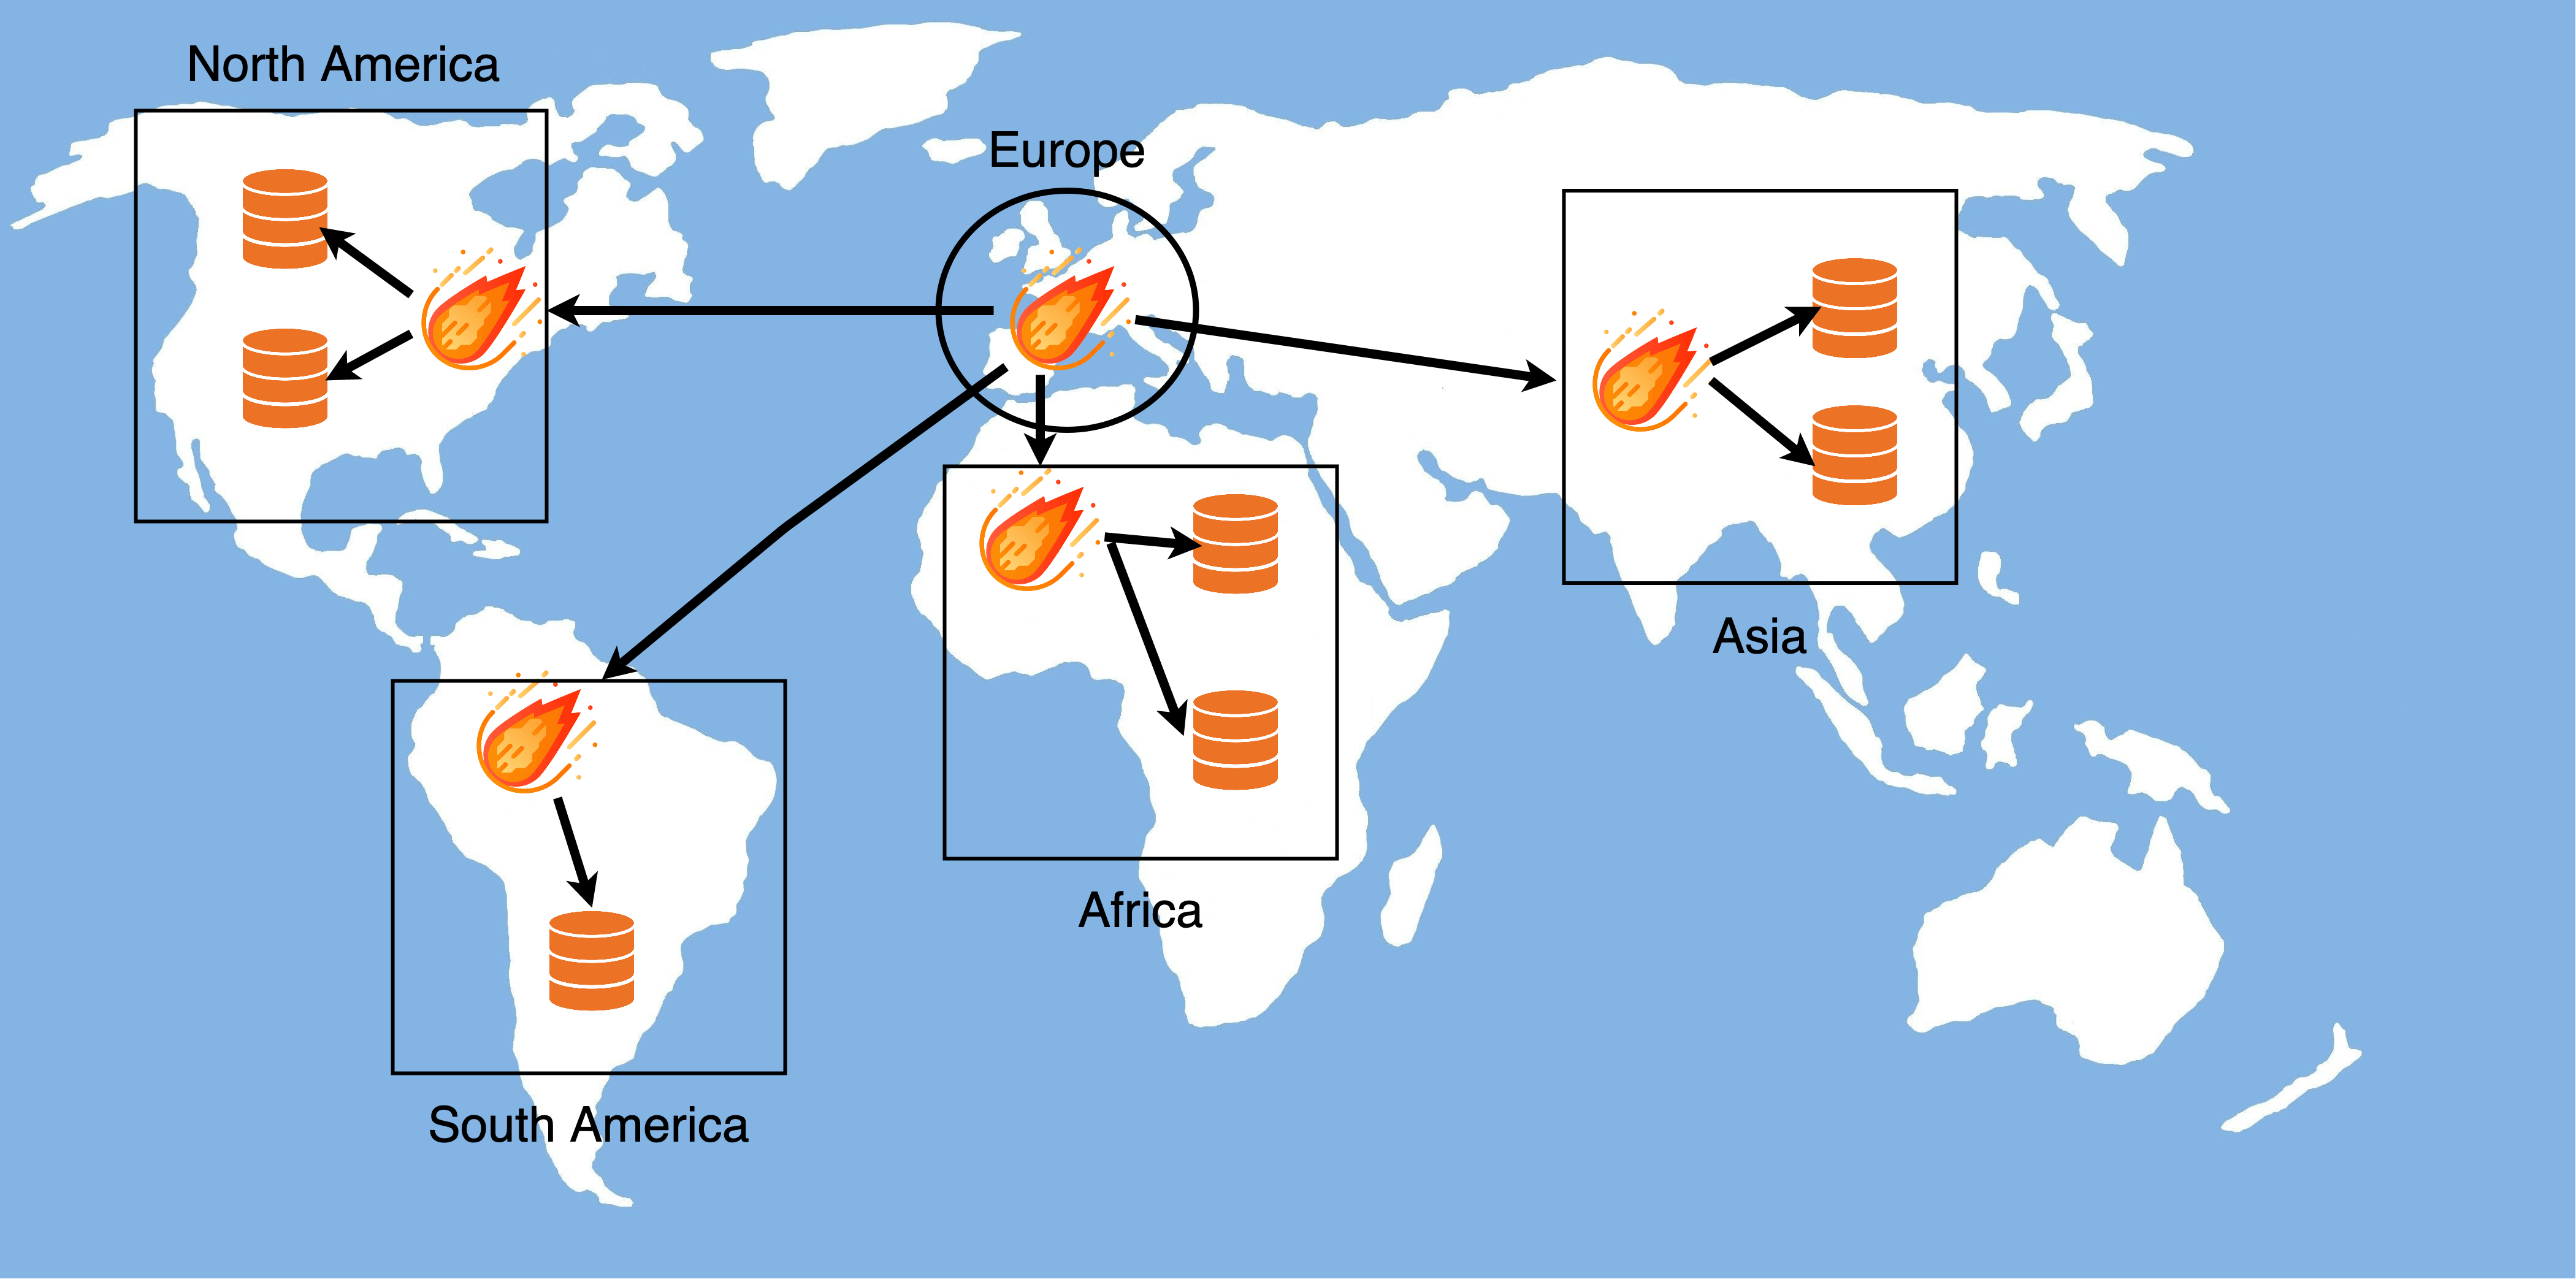
To also reduce drastically the execution time needed to finish an import, all the process is performed in a single pipe. So the file retrieval, the decompression and the import is performed in a single computing unit. Bear in mind also that by using URL or Cloud Key as a source method, the file to be imported is never downloaded to the disk. So you won't have to worry about having as much disk space for your file to be imported.
Exports
This section is used to export databases and tables from any server.

These are all the different columns we can choose to show or hide.
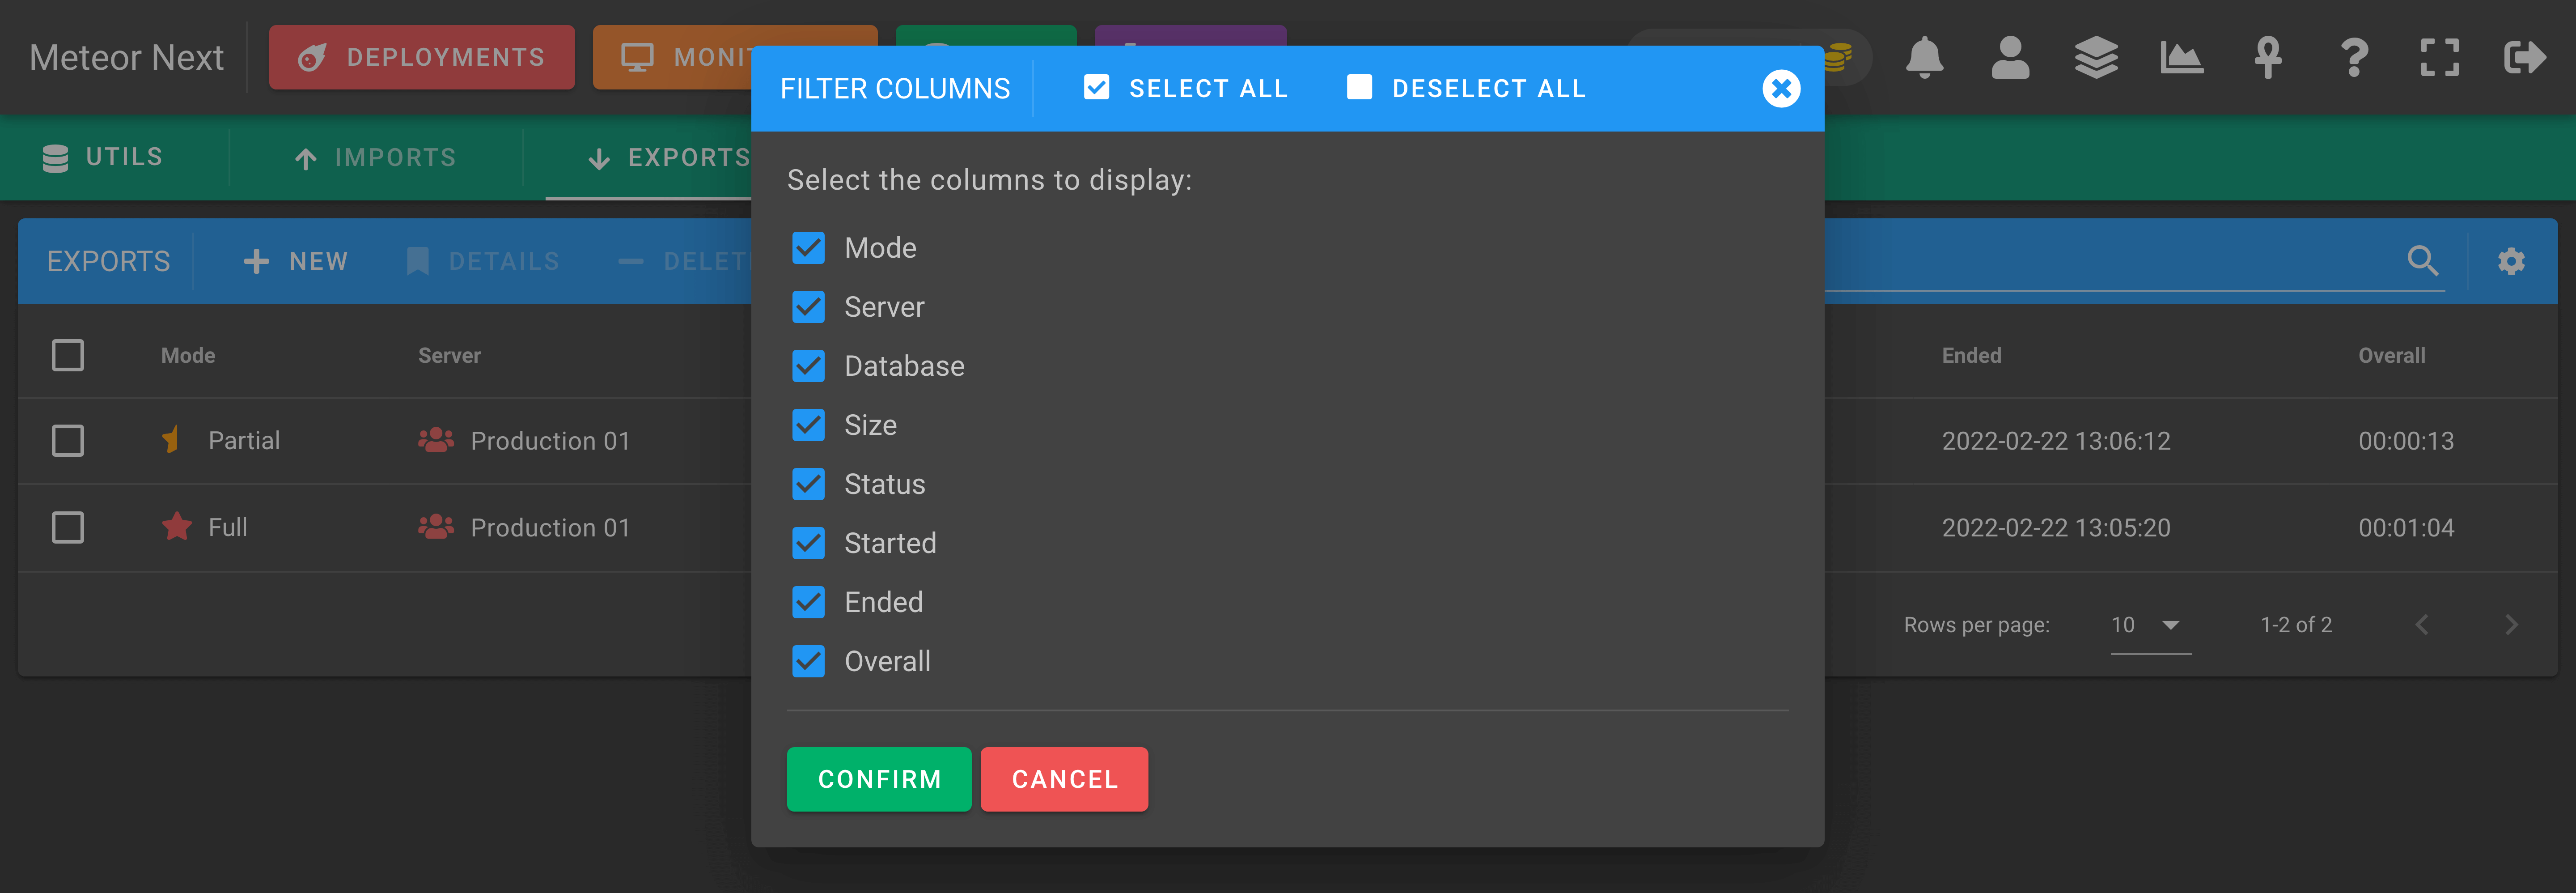
Meteor Next accepts two exporting modes:
- Full Exports: To export entirely a database with all their objects (tables, views, triggers, functions, procedures).
- Partial Exports: To export only some tables of a database.
Full Exports
This mode is used to export entirely a database with all their objects (tables, views, triggers, functions, procedures).
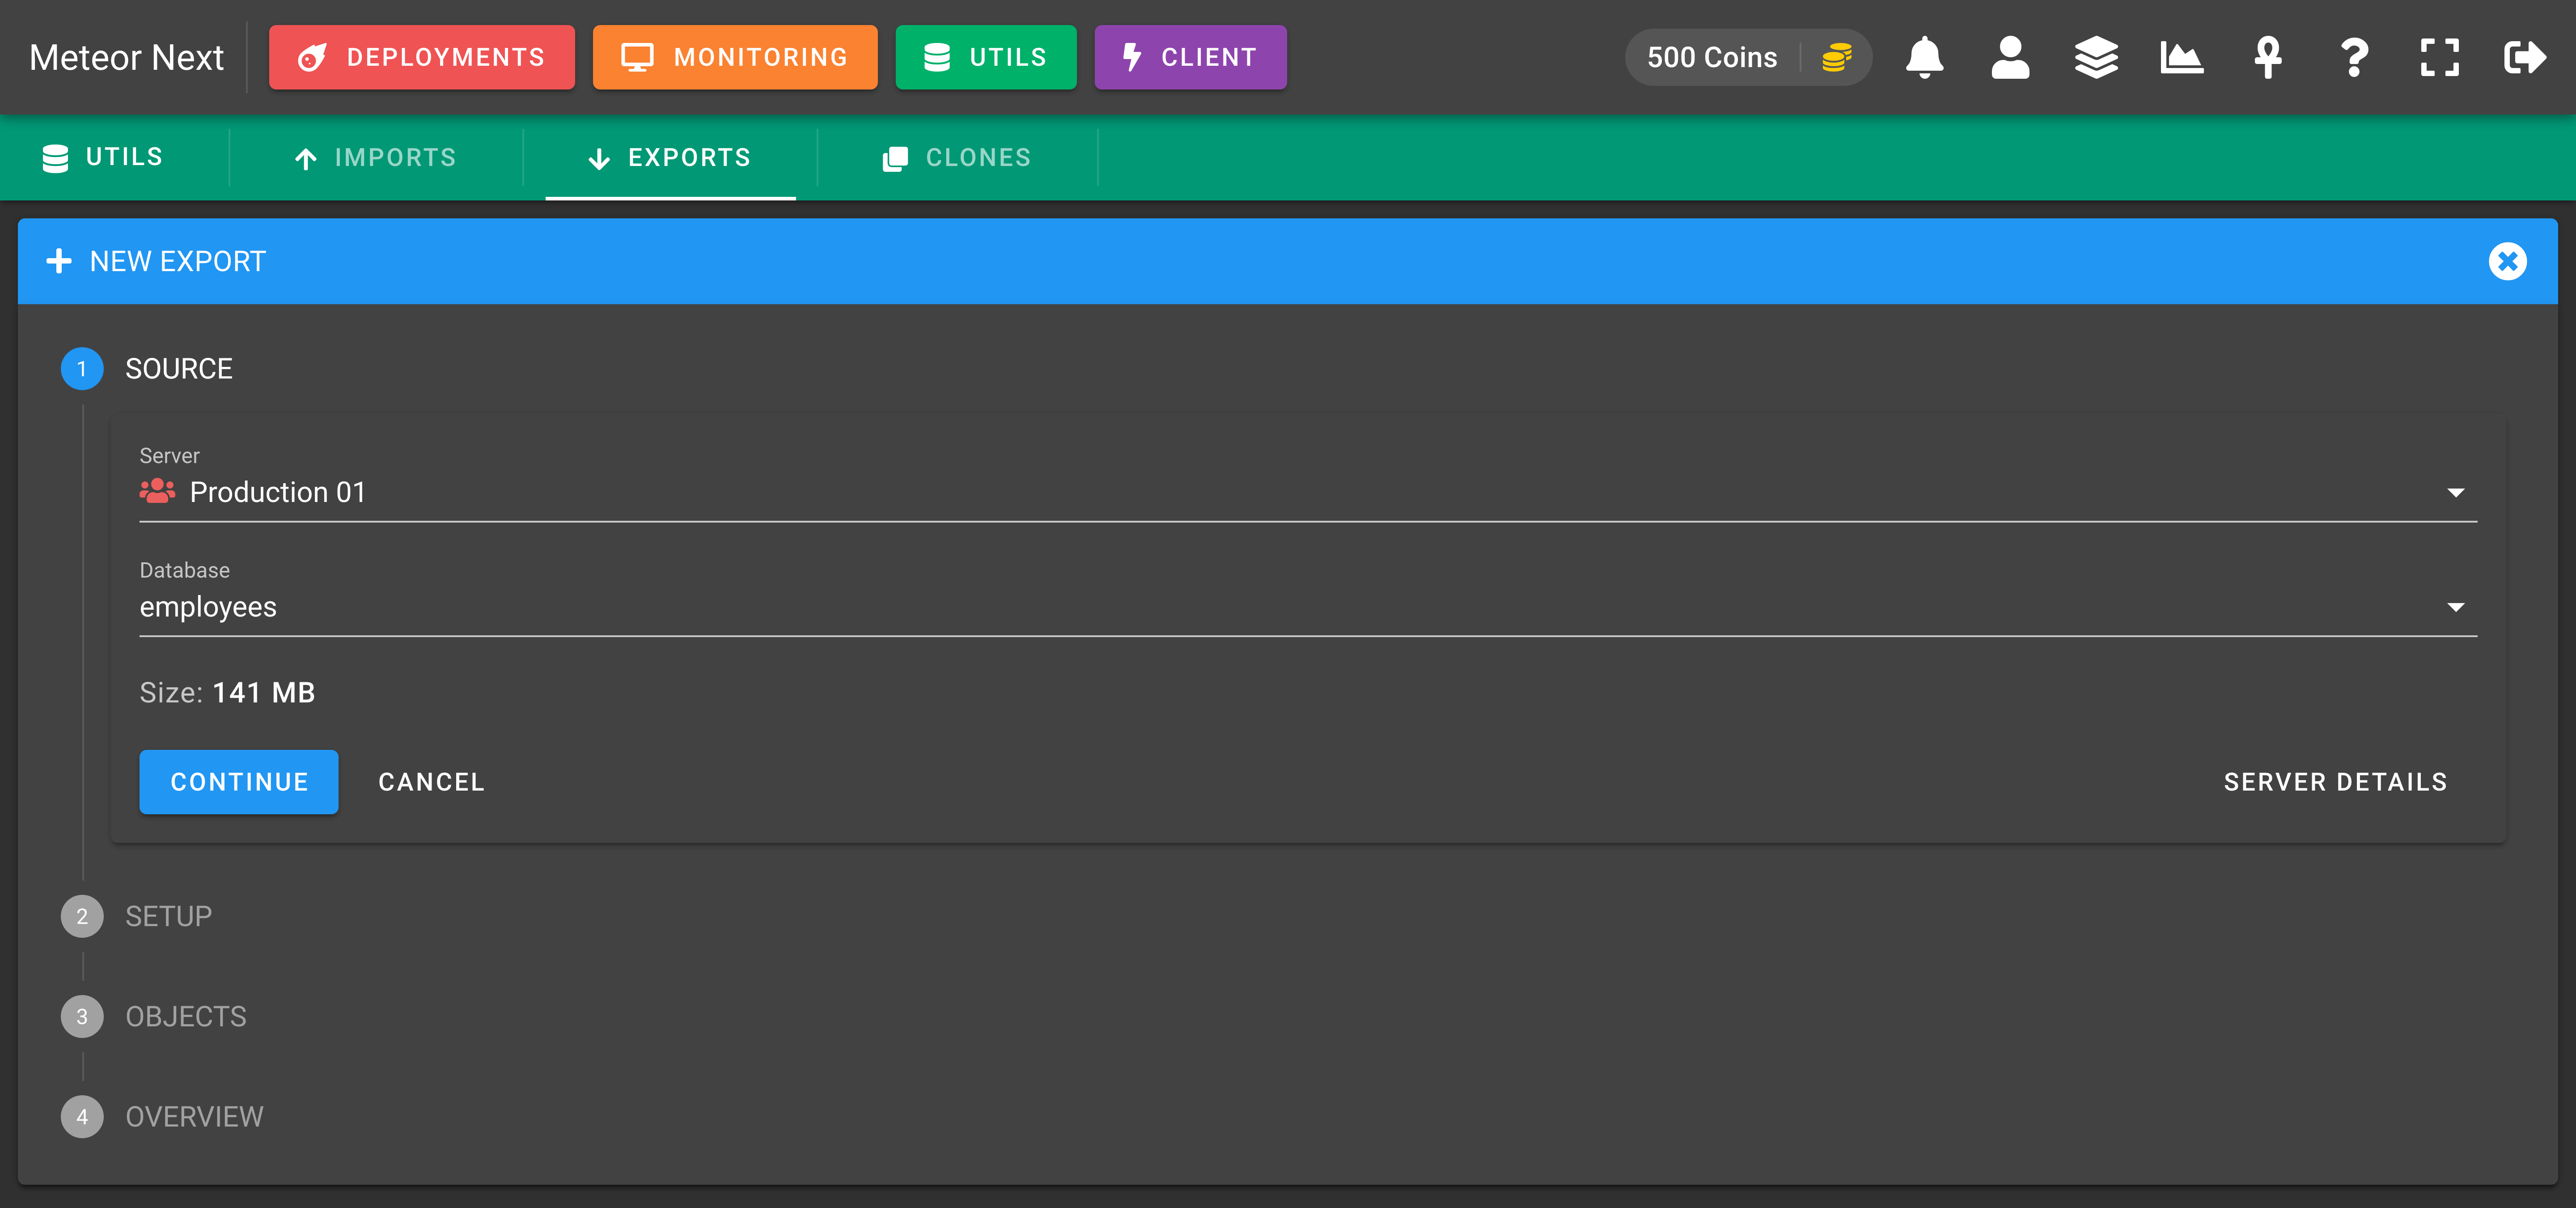
First choose the server and the database to be exported.
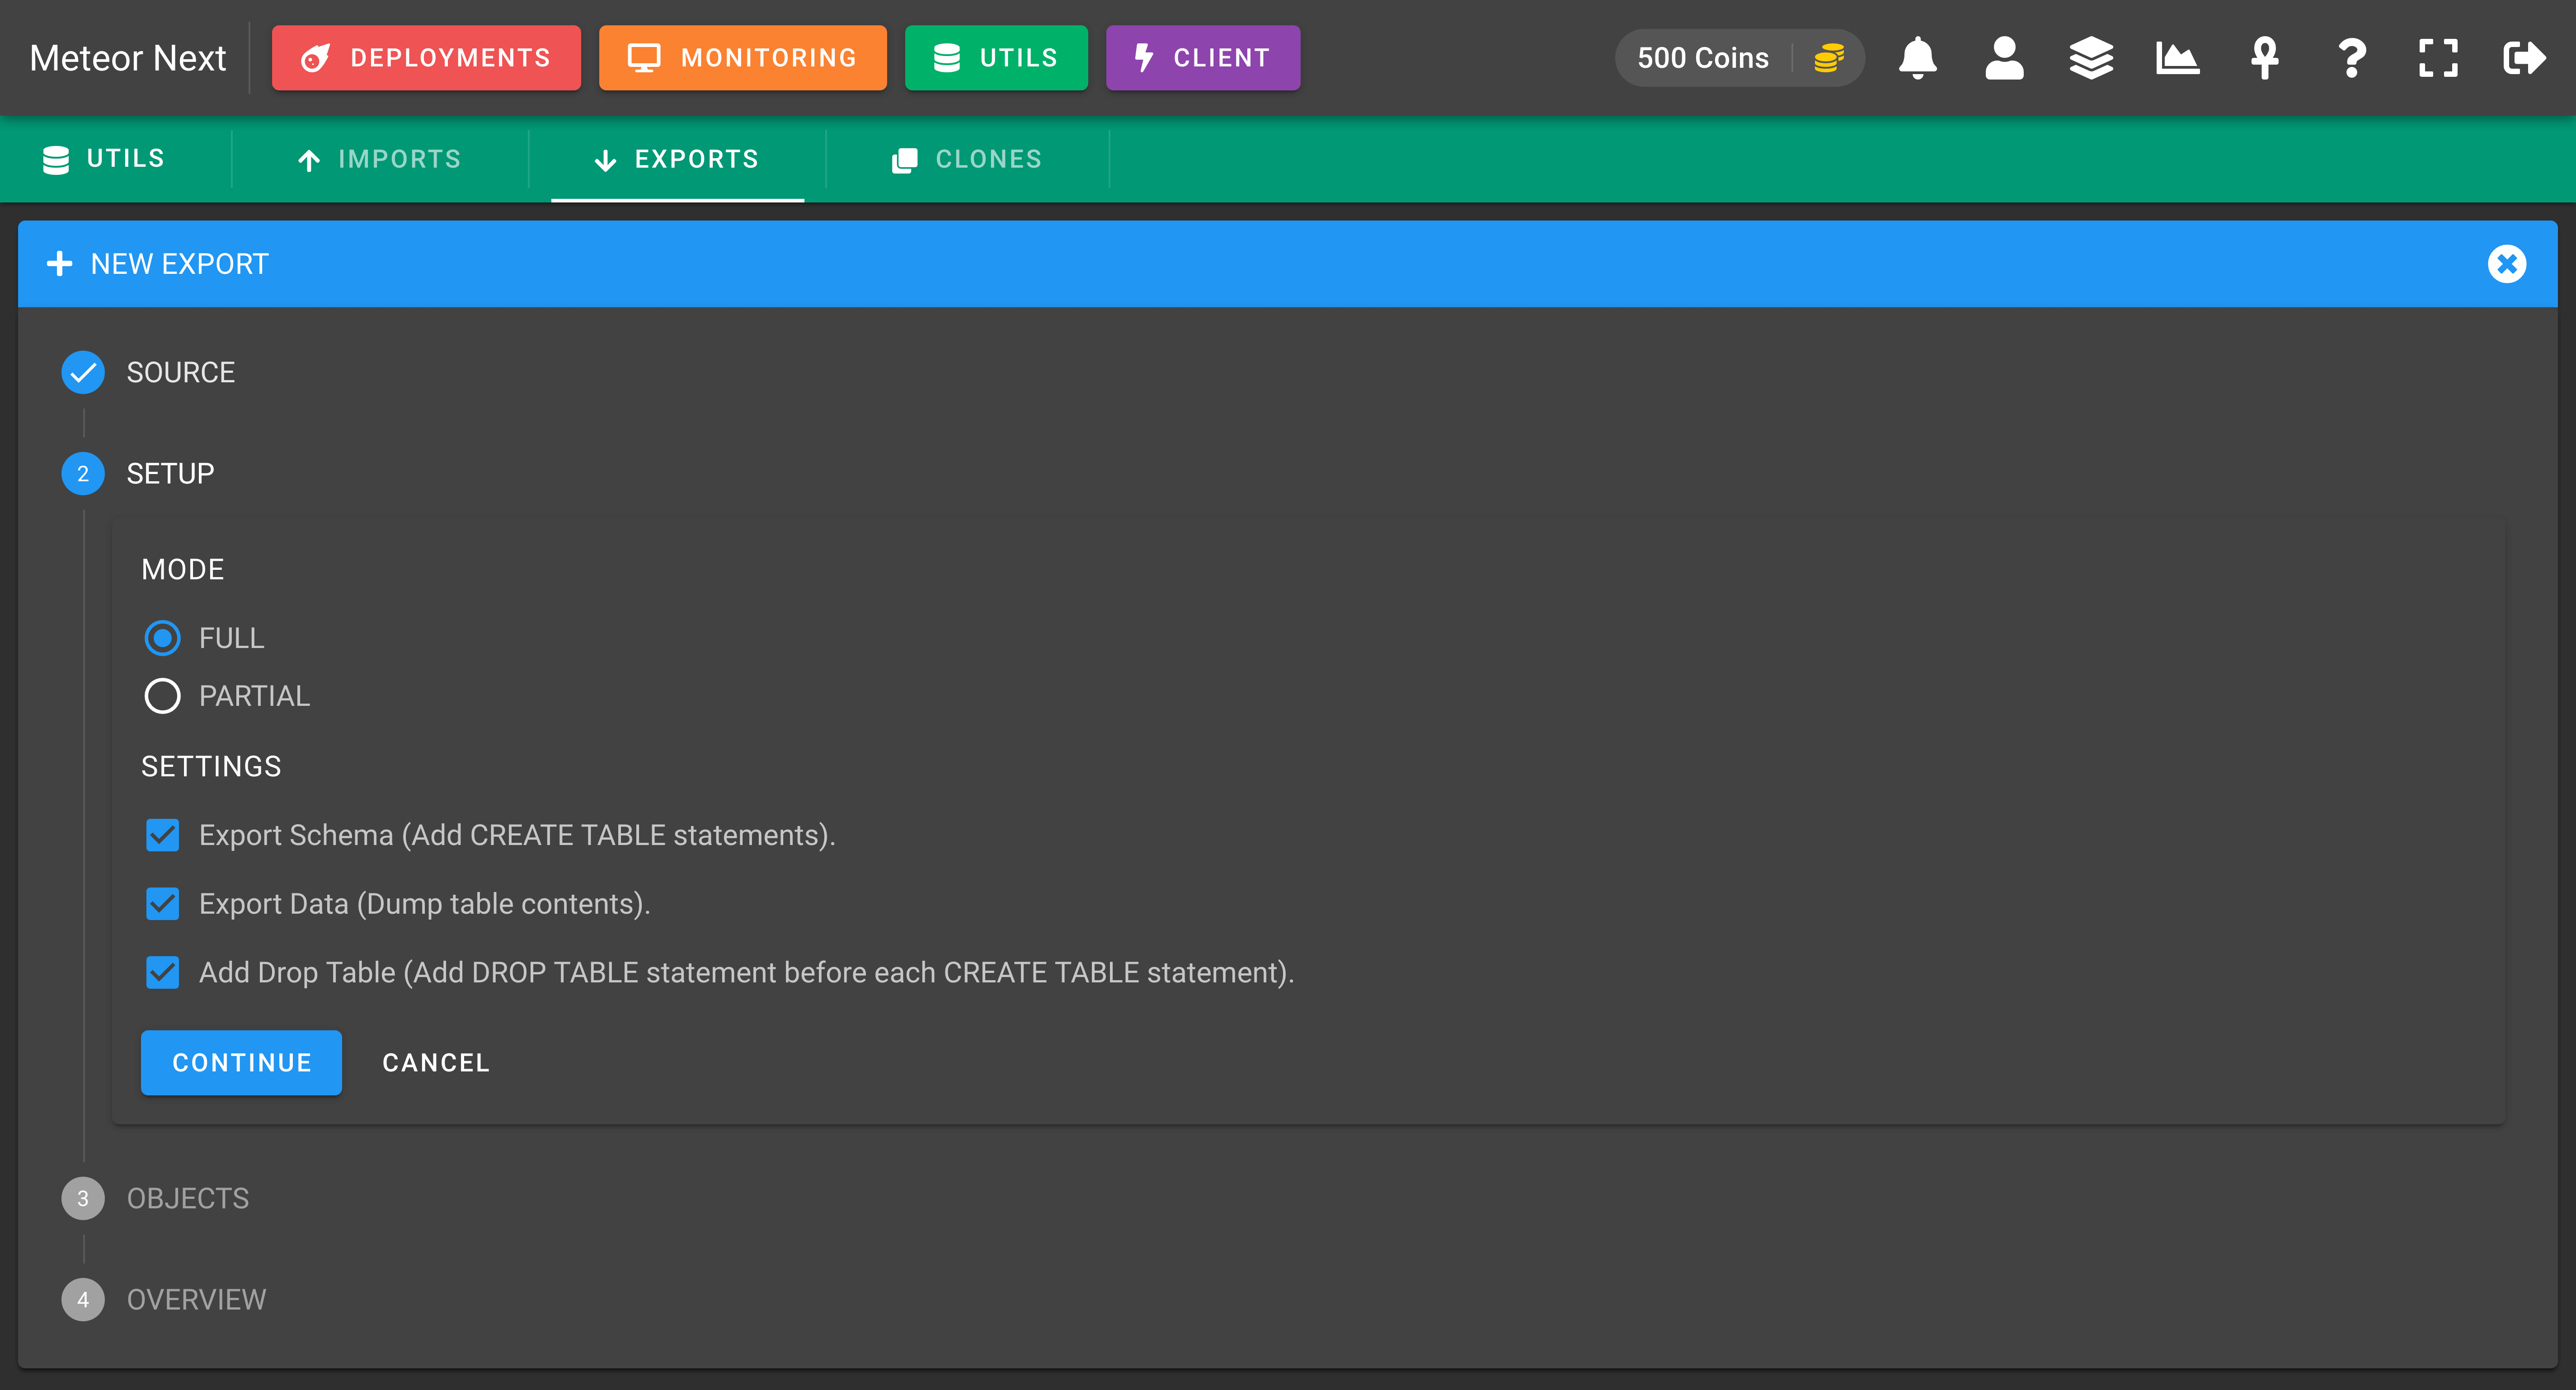
In the next step, you can choose some settings. You can leave it as it is. Click CONTINUE.
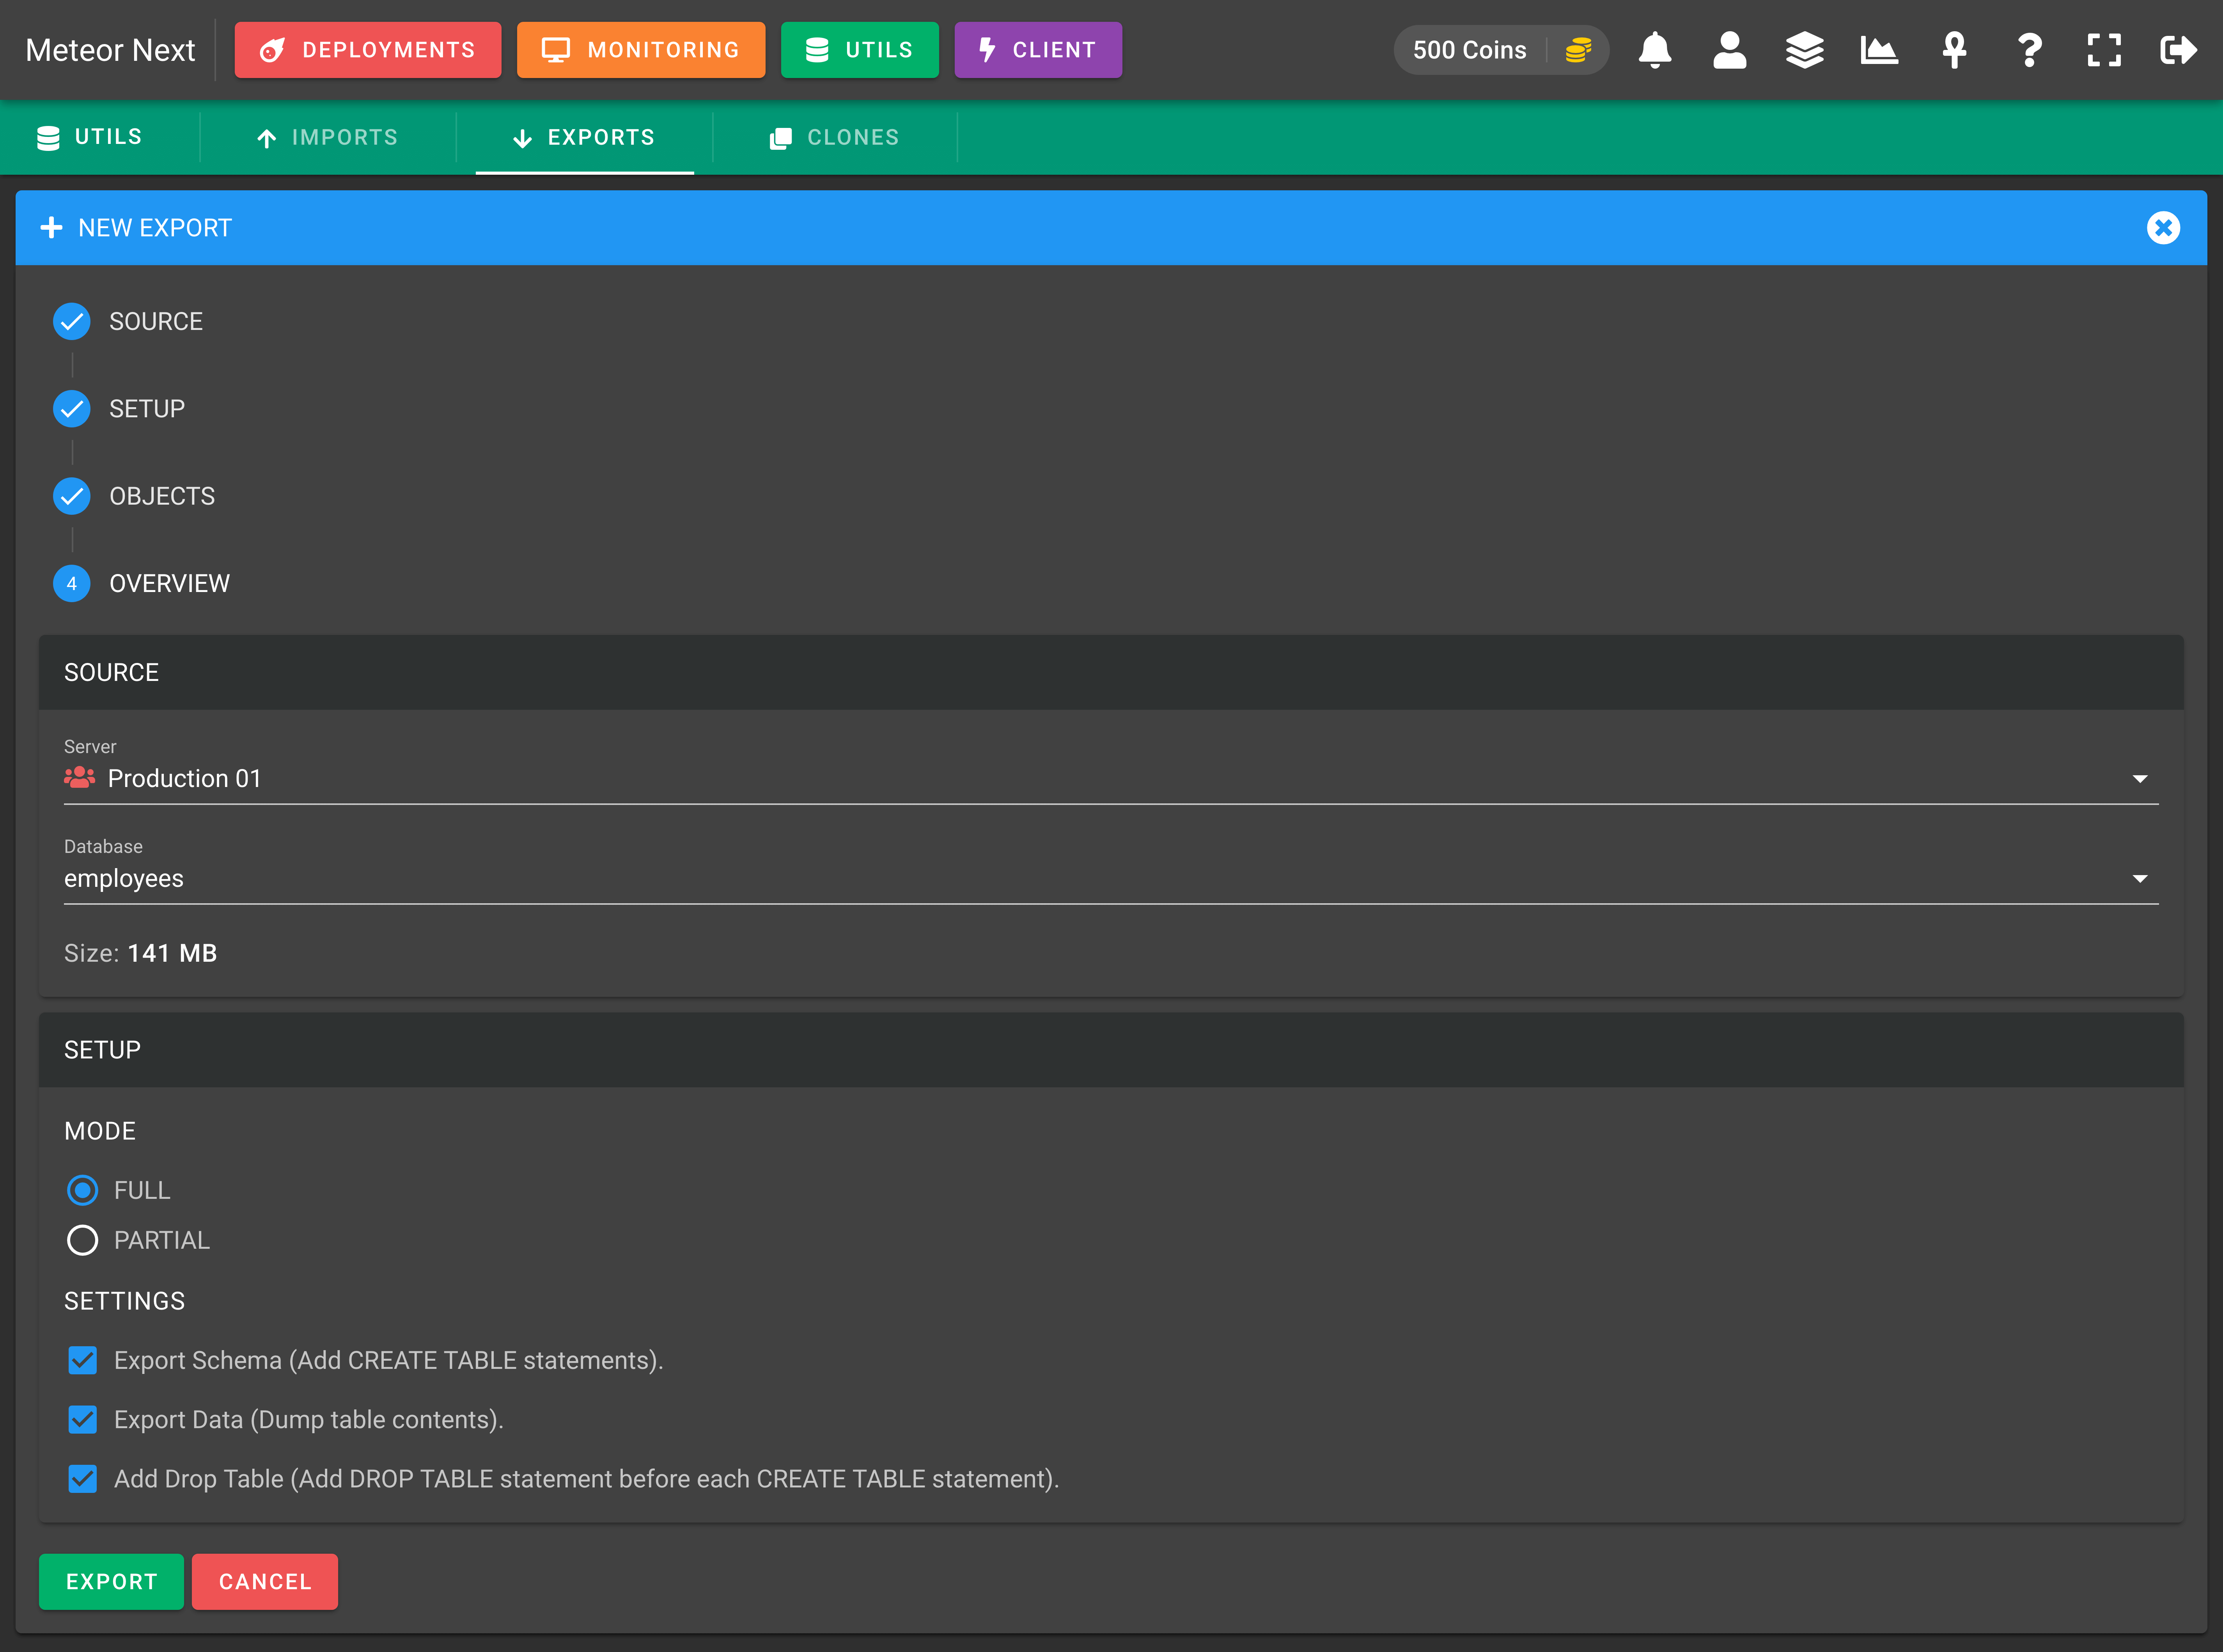
Notice that the OBJECTS step will be skipped since this one it's only used with the mode = Partial. After reviewing all fields, click EXPORT and the process will start.
You will be redirected to another window showing the exporting process. When the process finishes, the DOWNLOAD EXPORT button will appear. Click this button, and you will be able to download it.

Partial Exports
This mode is used to export only some tables of a database.
First choose the server and the database to be exported.

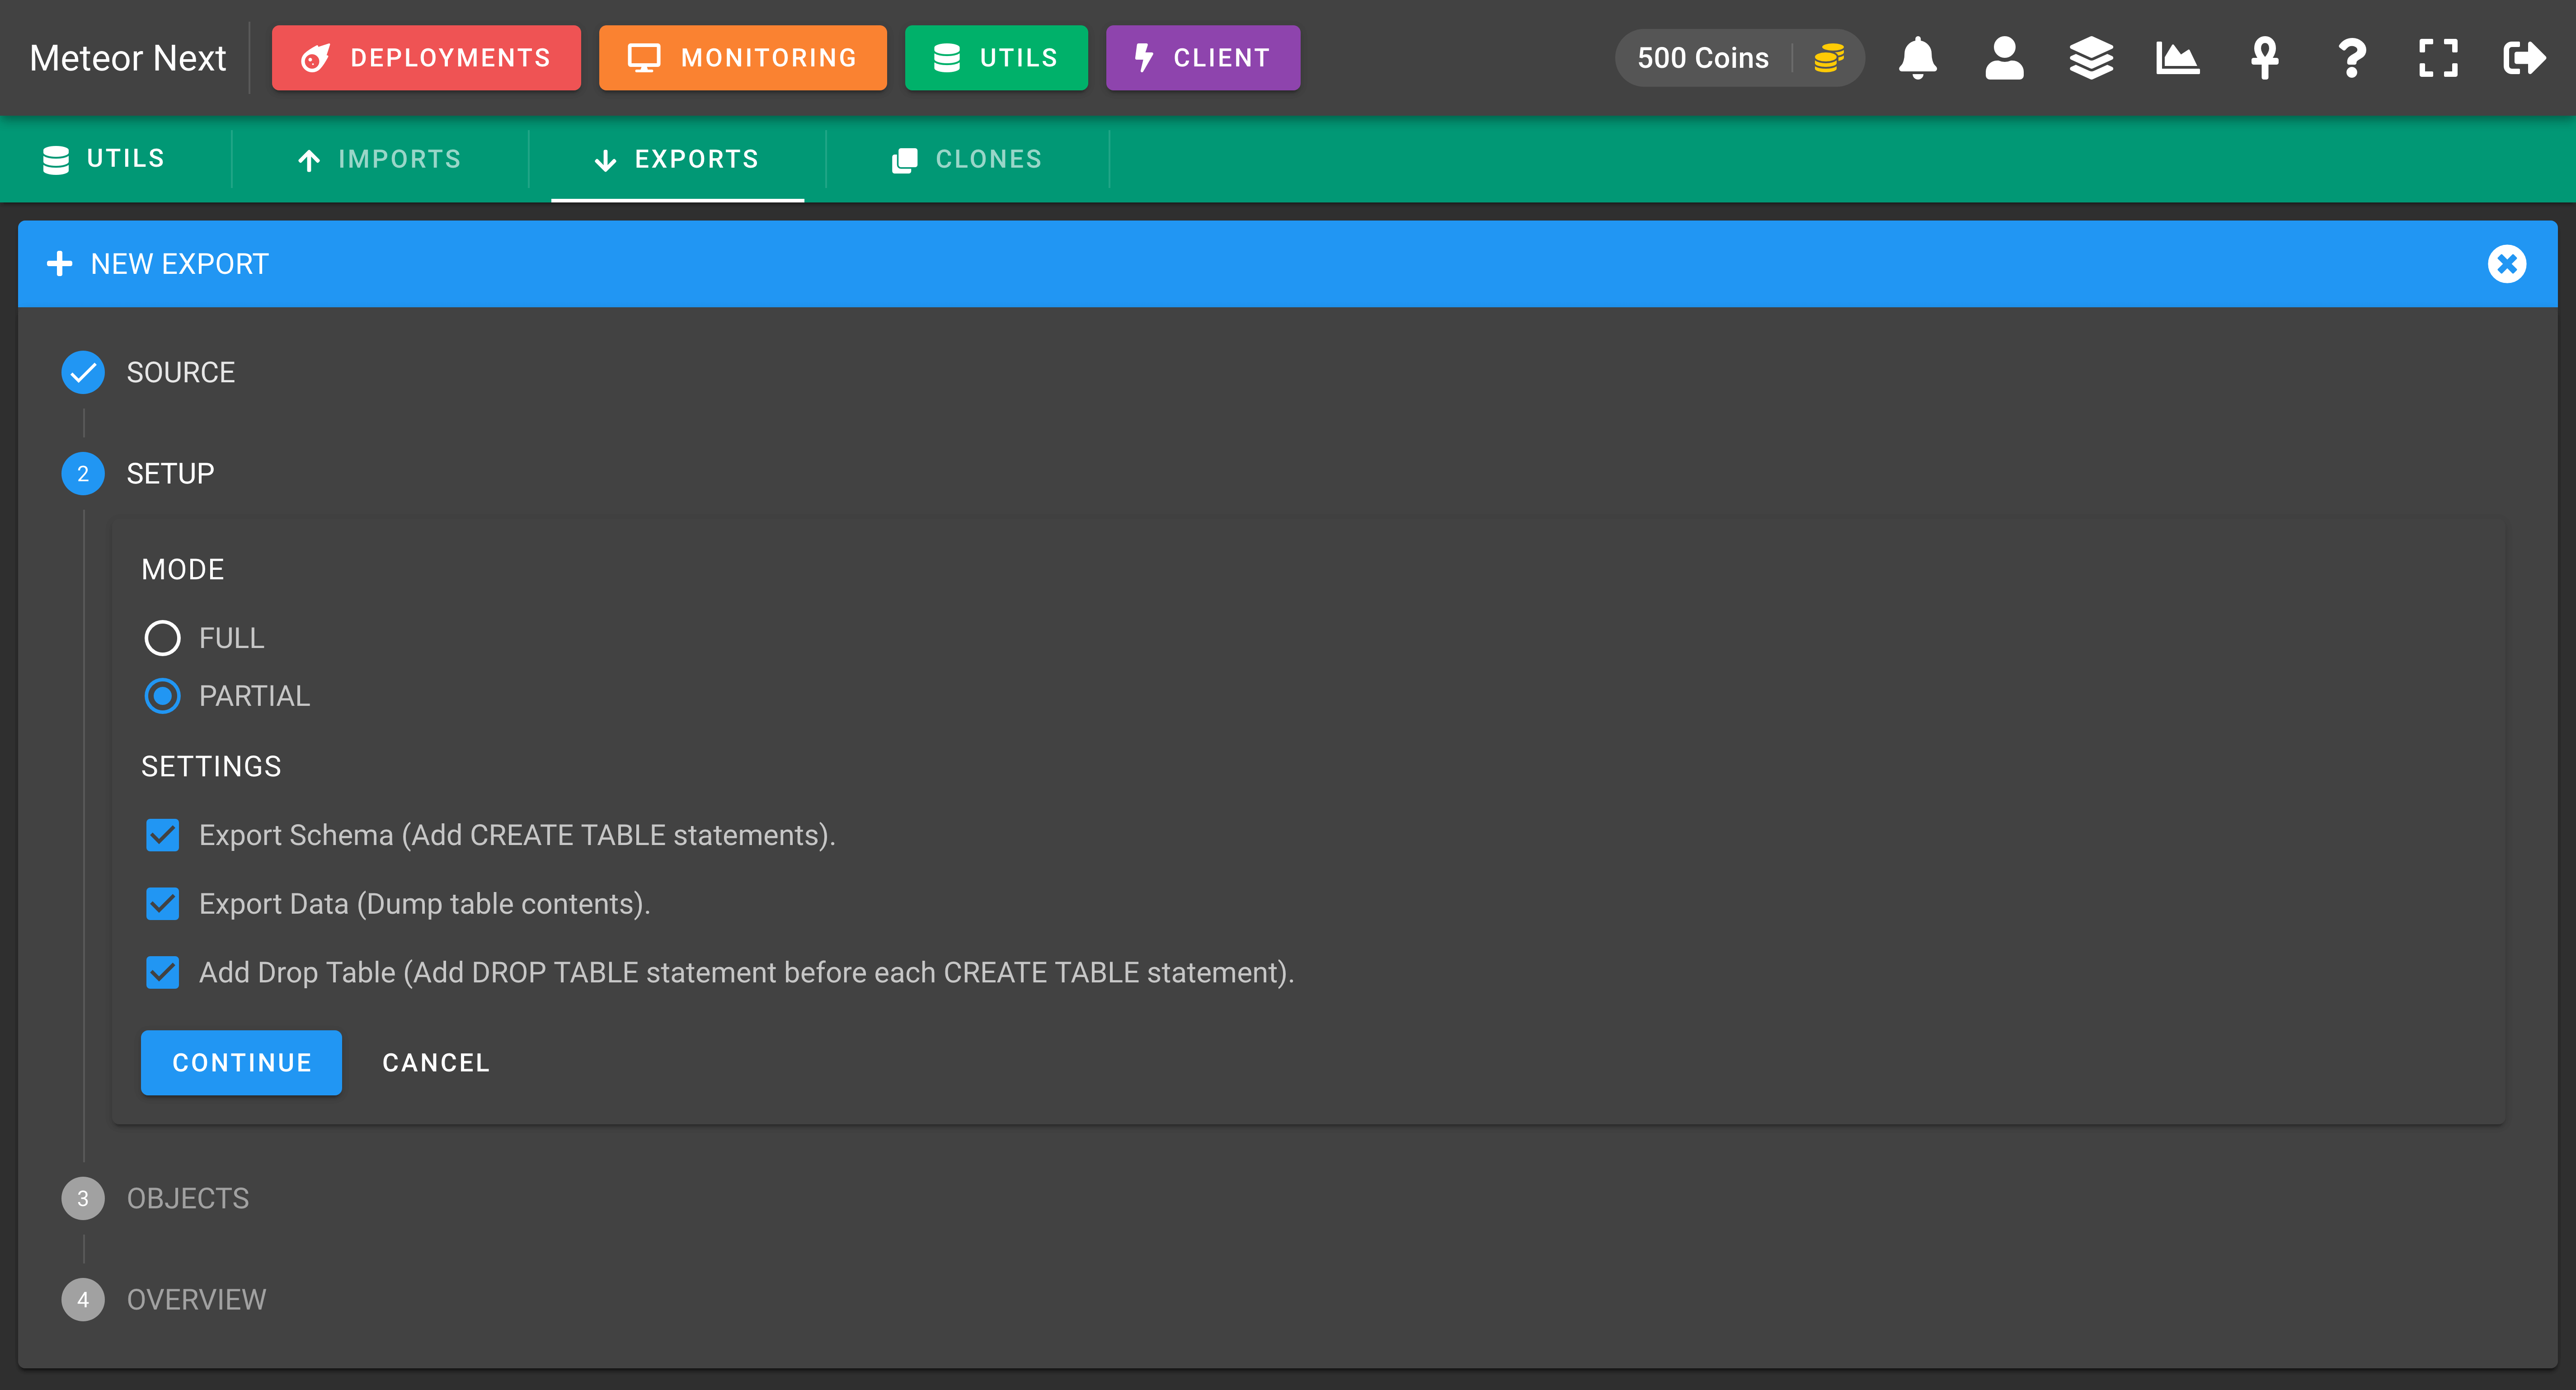
In the next step, you can choose some settings. Choose the Partial mode.
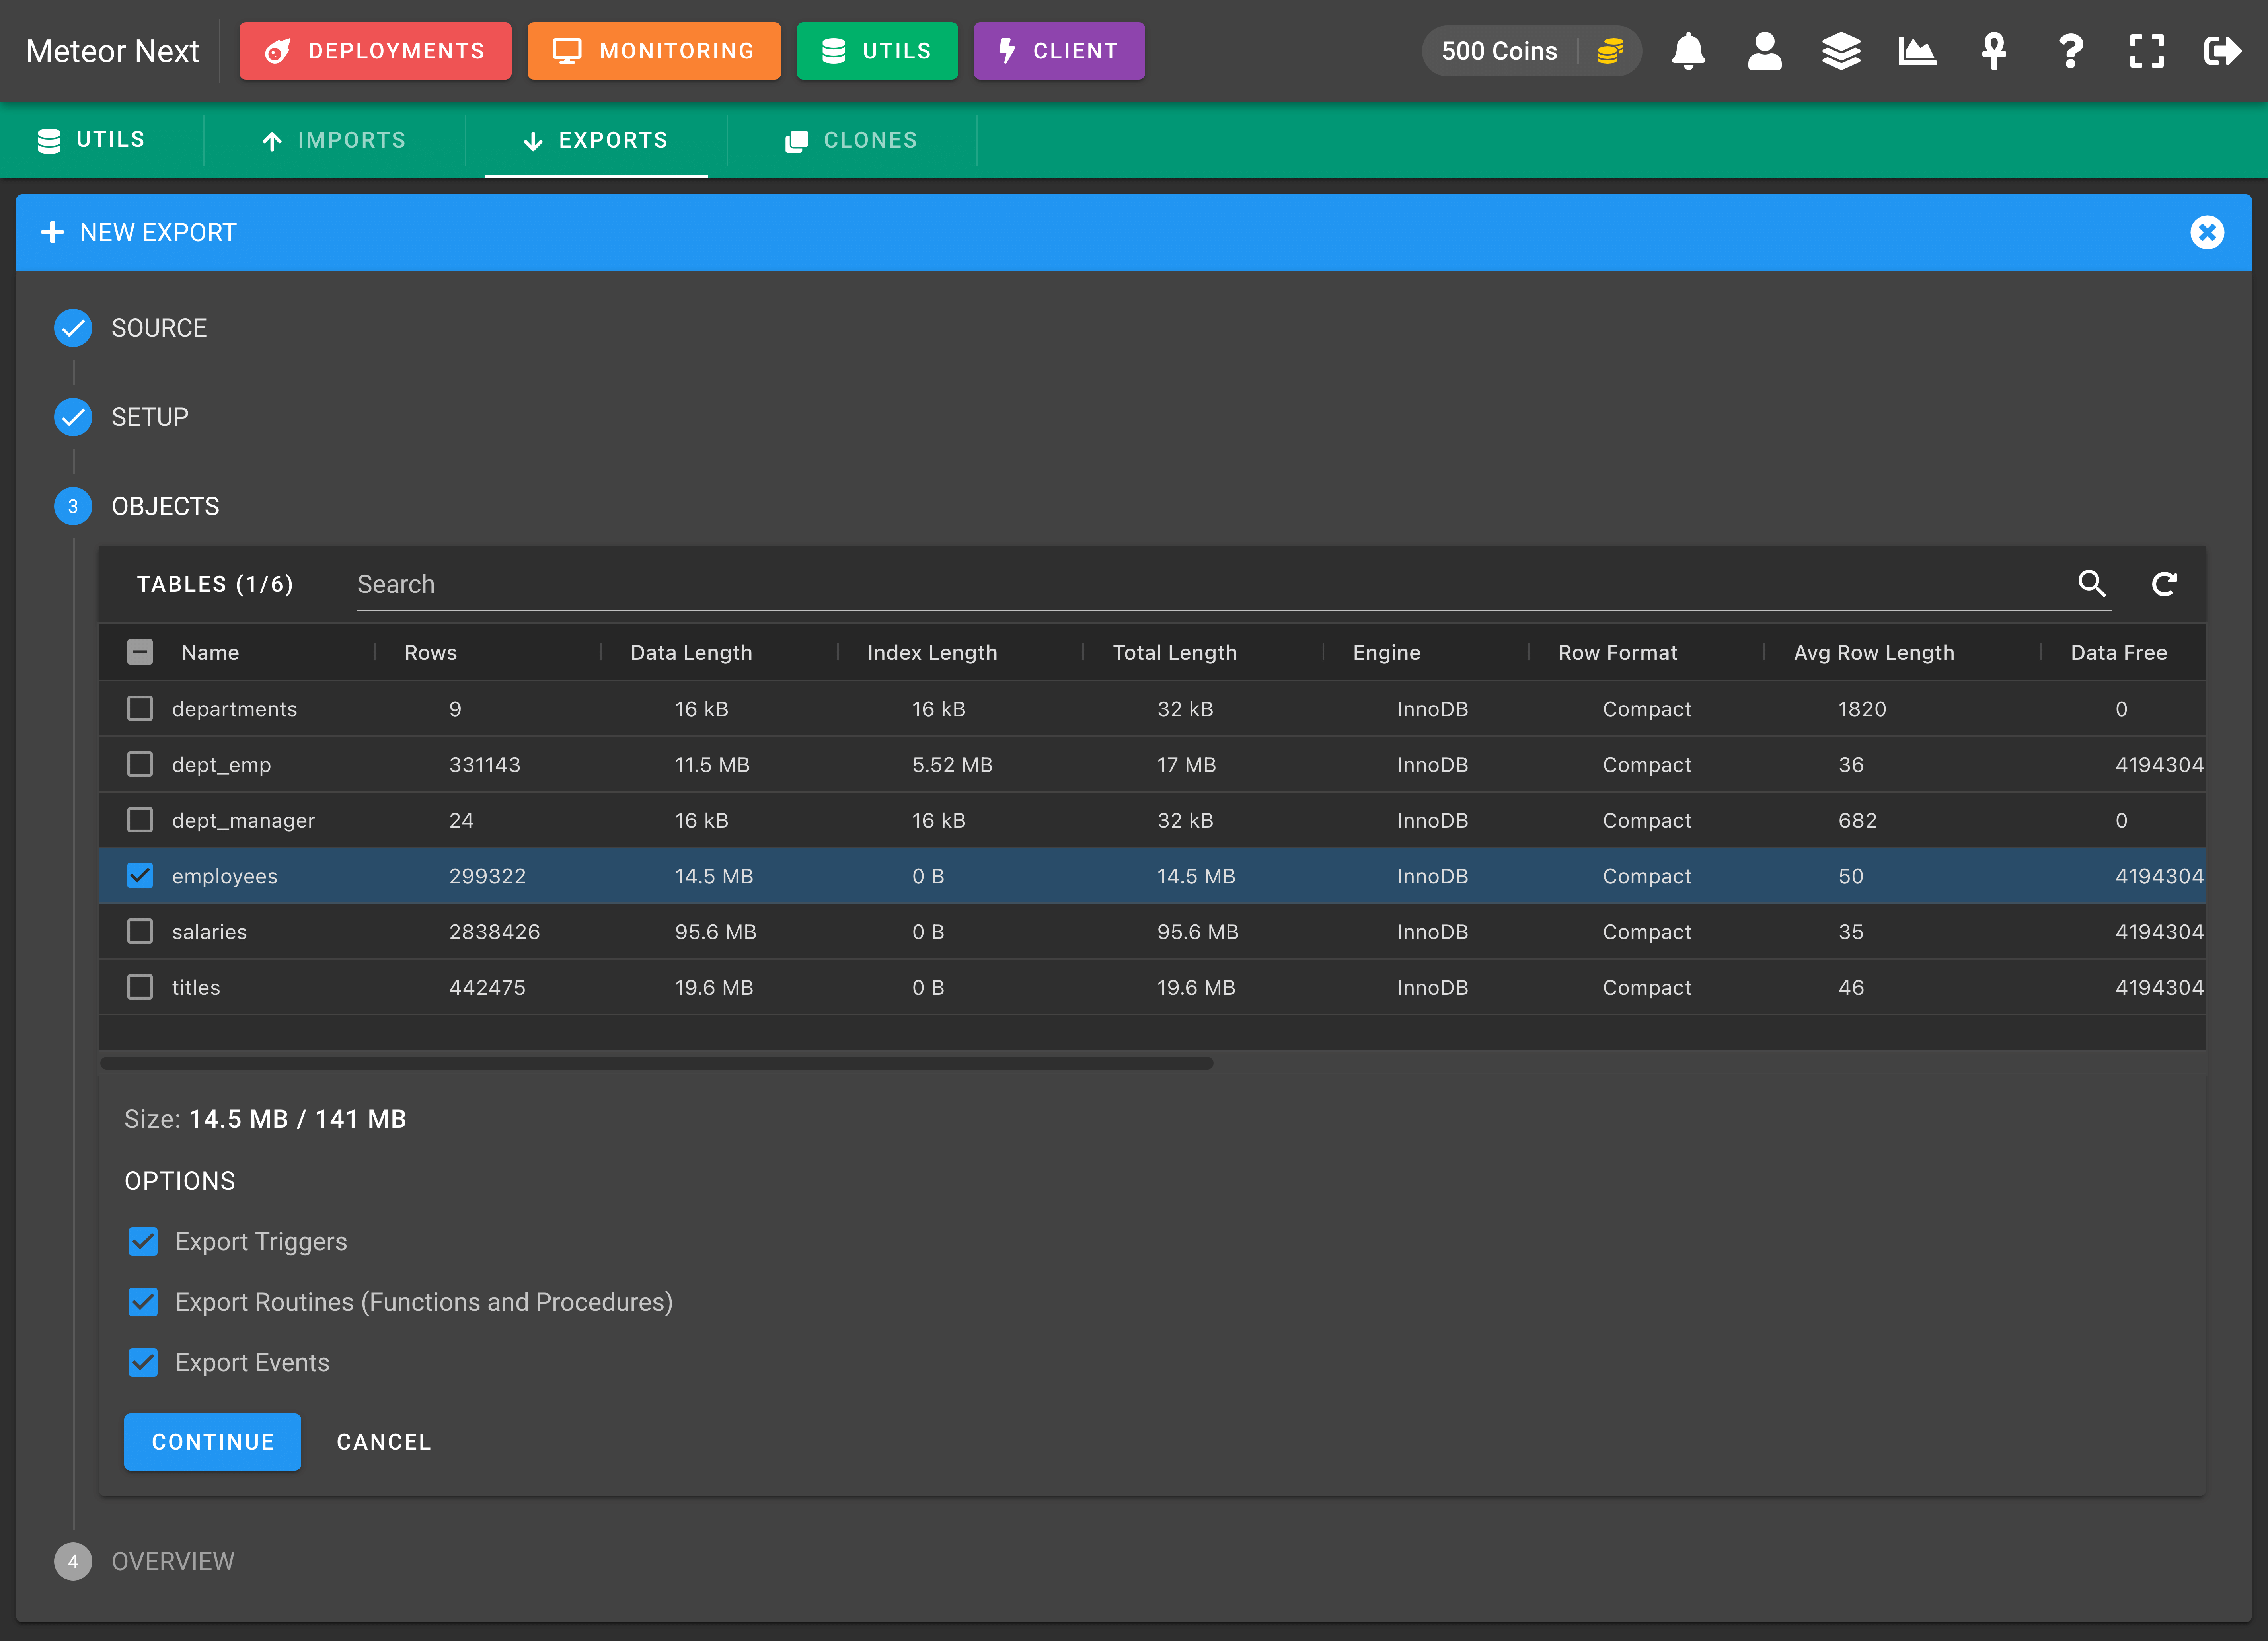
Here, you will be able to select which tables you want to export. Also, you will be able to choose some optional settings to also export the triggers, routines and events.
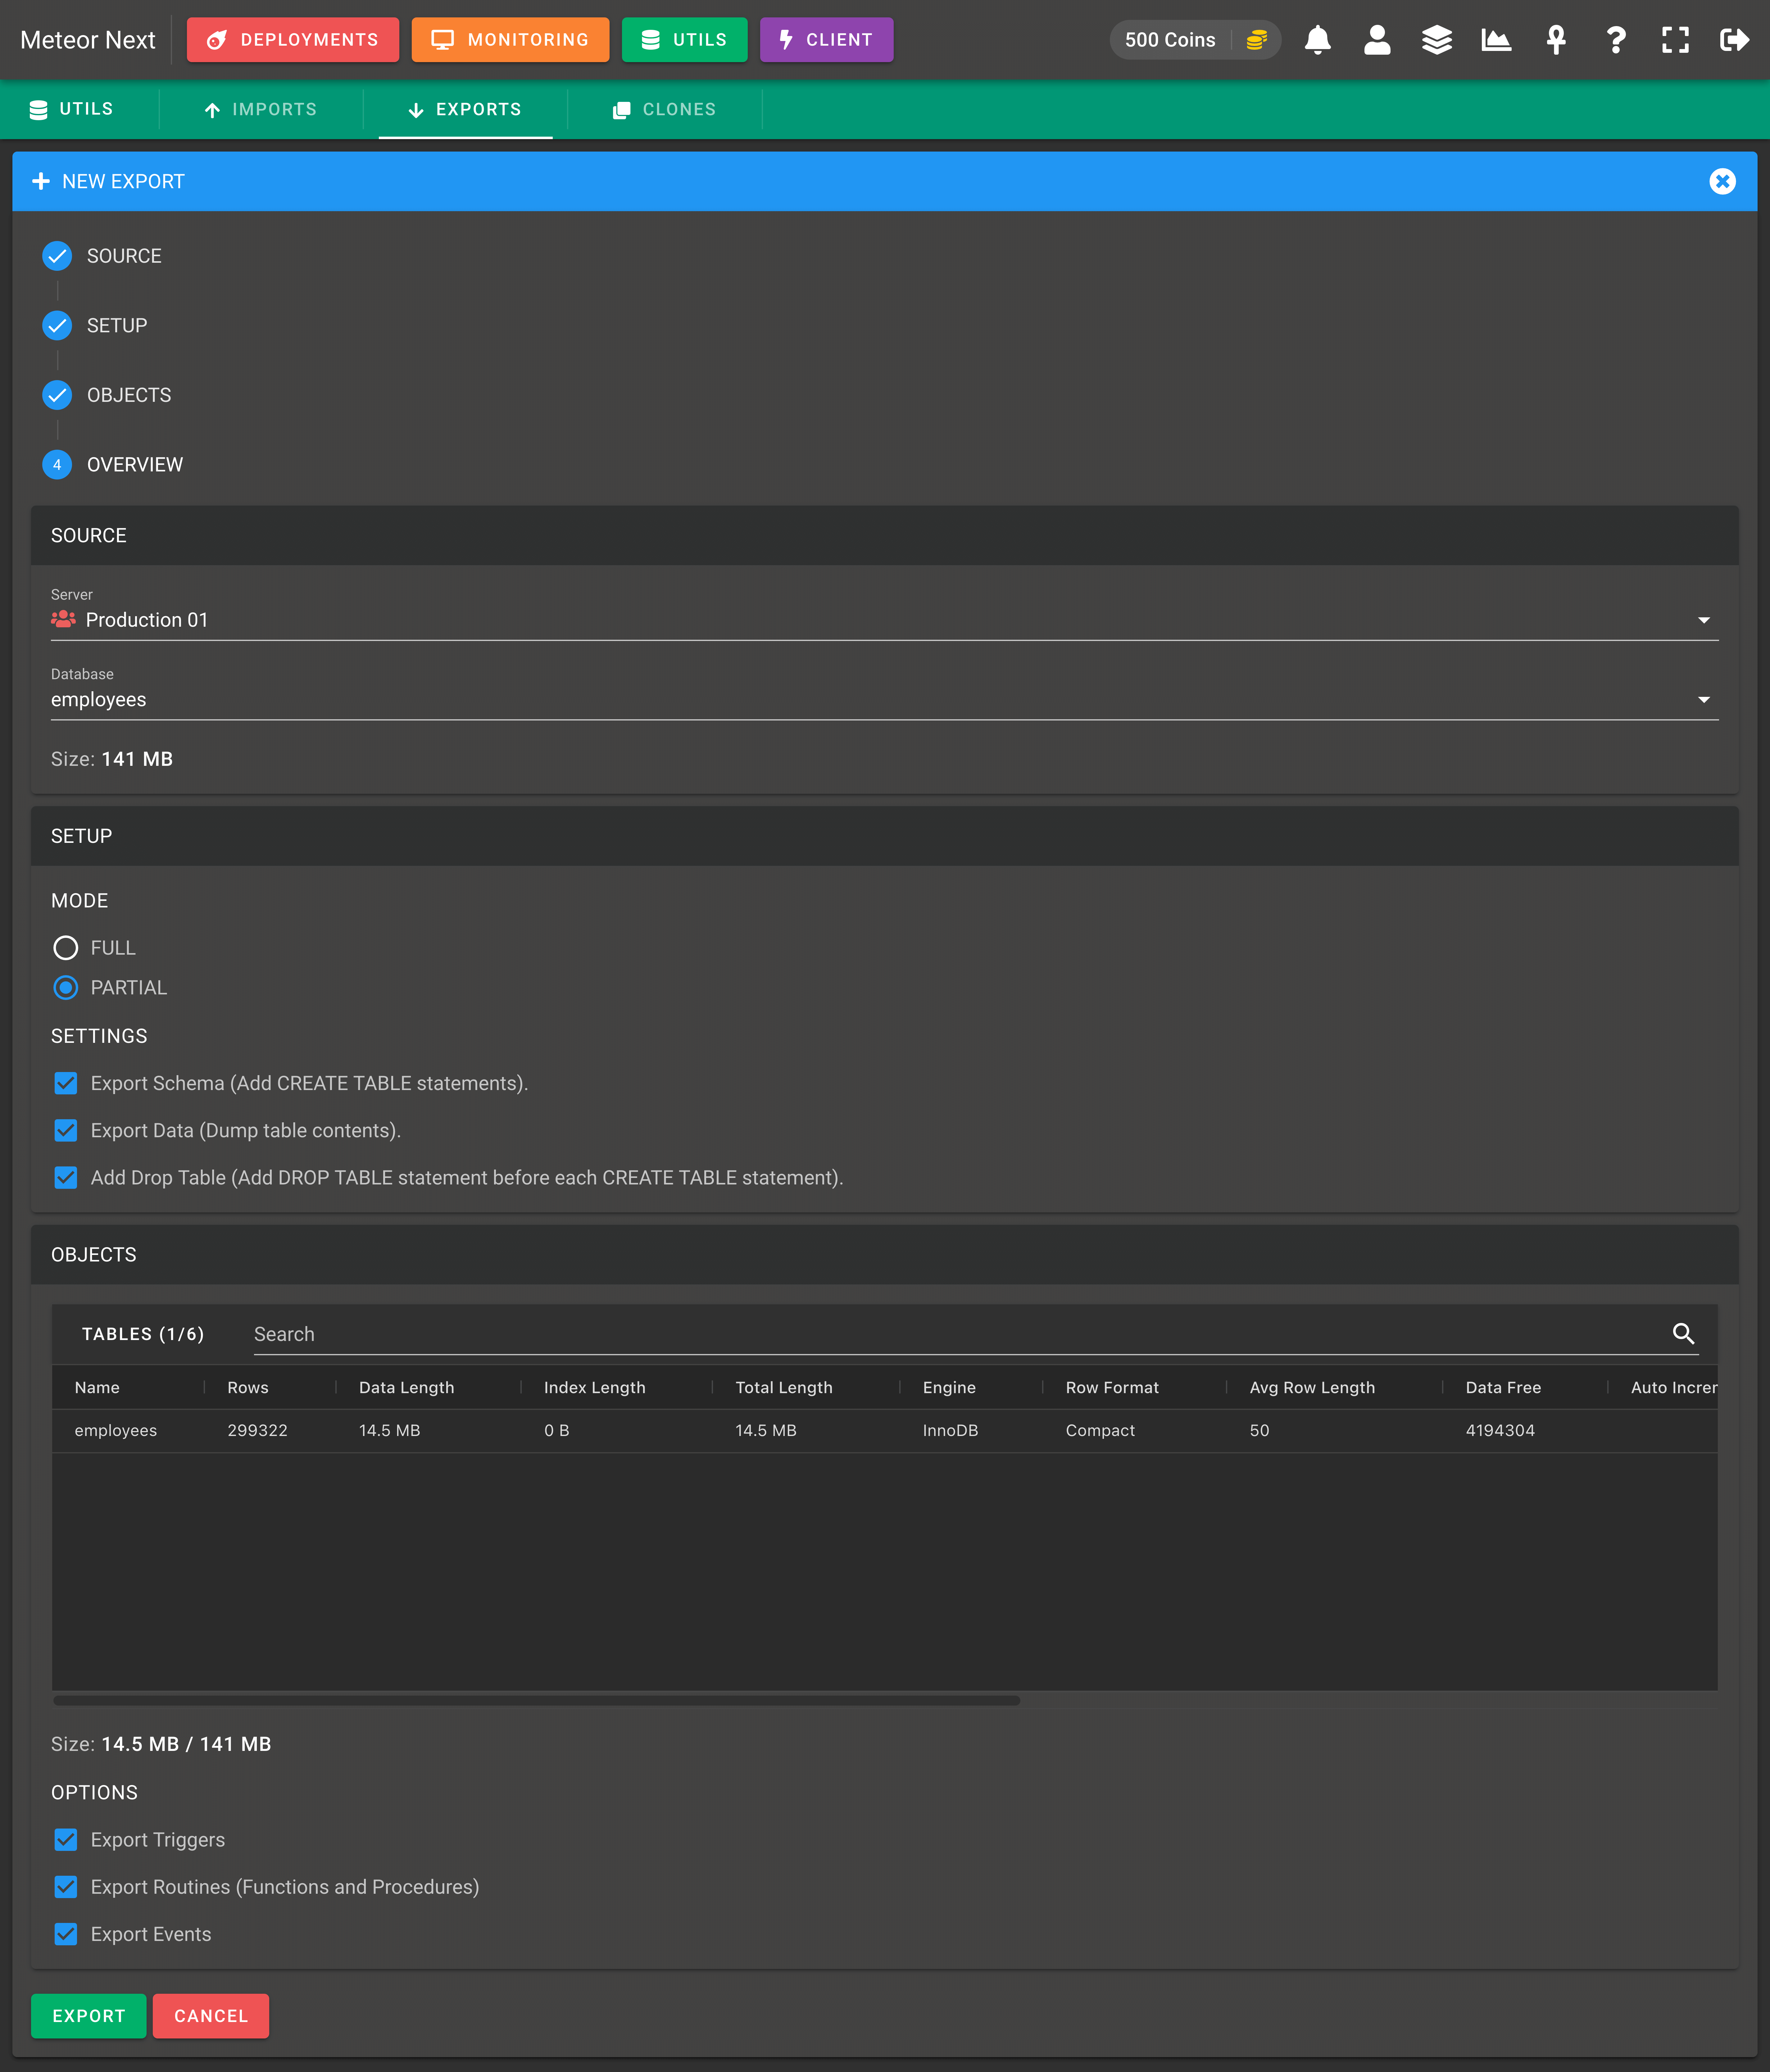
The last step will appear an overview. After reviewing all fields, click EXPORT and the process will start.
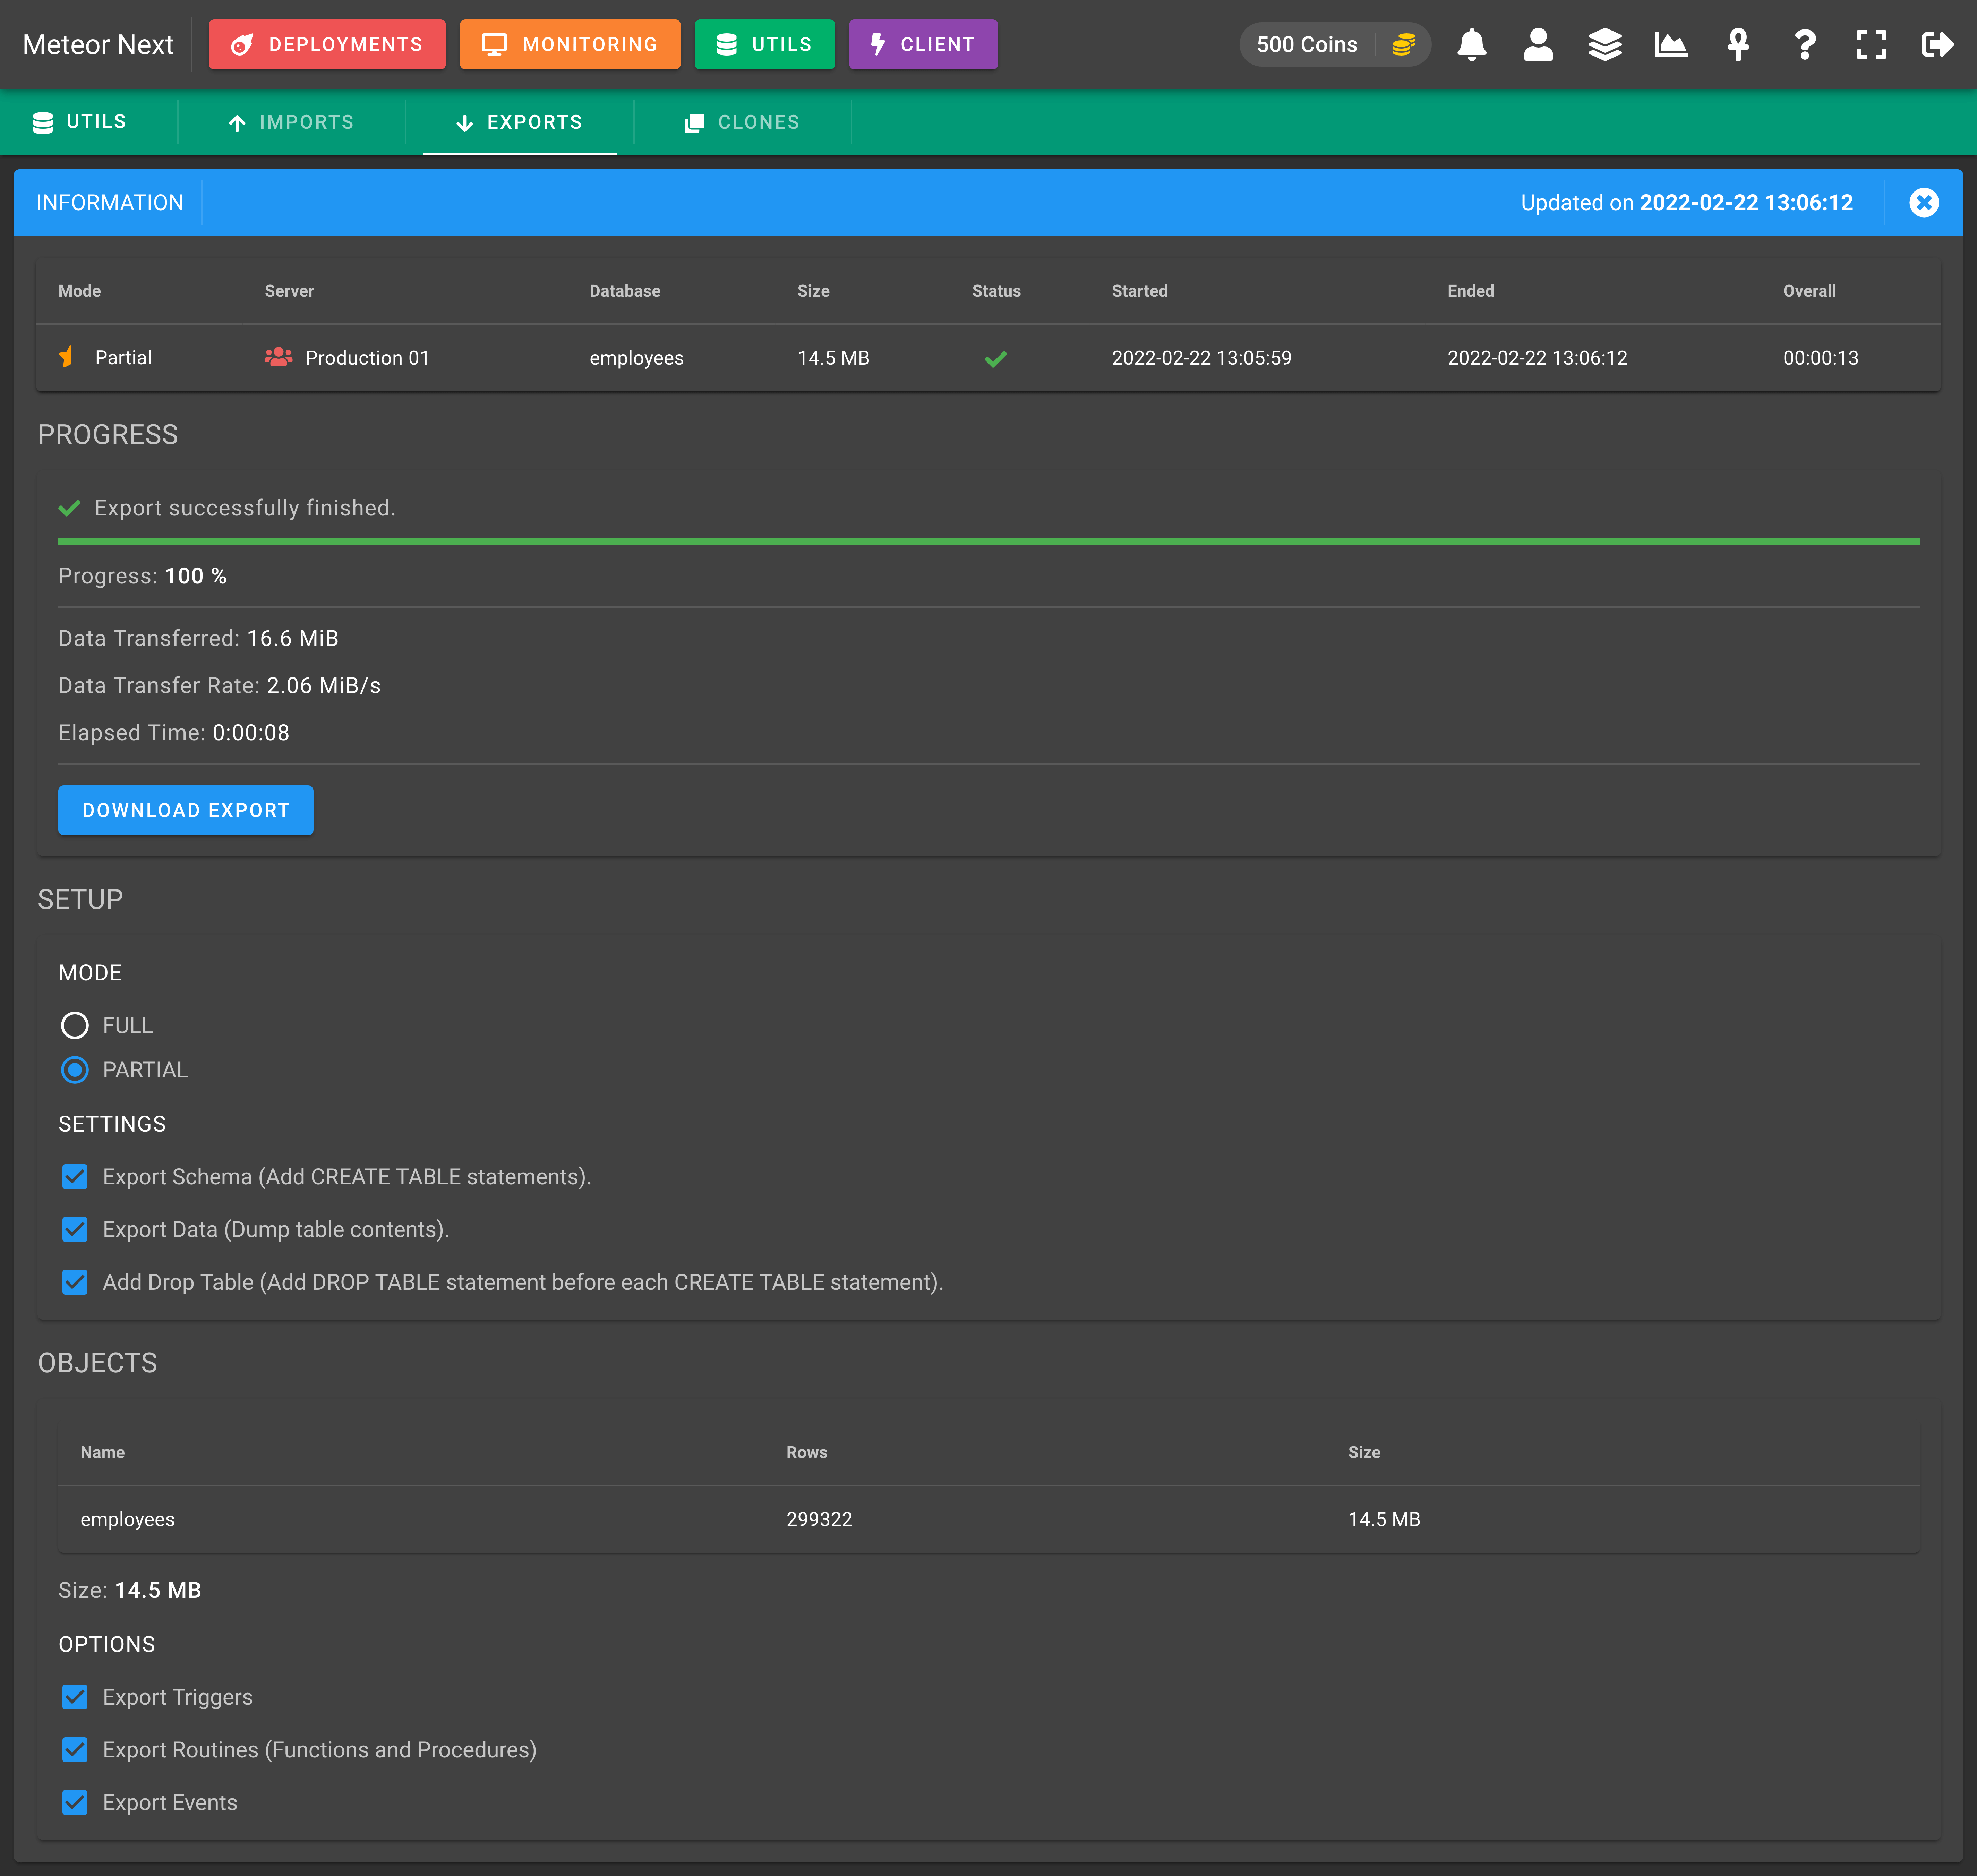
You will be redirected to another window showing the exporting process. When the process finishes, the DOWNLOAD EXPORT button will appear. Click this button, and you will be able to download it.
Infrastructure
The underlying process of the Export is similar to how the Deployments work. Basically, the export process is performed at the region where the destination server is located. In this way, the delay between regions is avoided.

To also reduce drastically the execution time needed to finish an export, all the process is performed in a single pipe and the file is automatically uploaded into Amazon S3. In this way the file to be exported is never downloaded to the disk.
When the exporting process finishes, a presigned URL is generated which we can use to download the file directly from Amazon S3.
Clones
This section is used to copy databases and tables from any server to any other server.

These are all the different columns we can choose to show or hide.
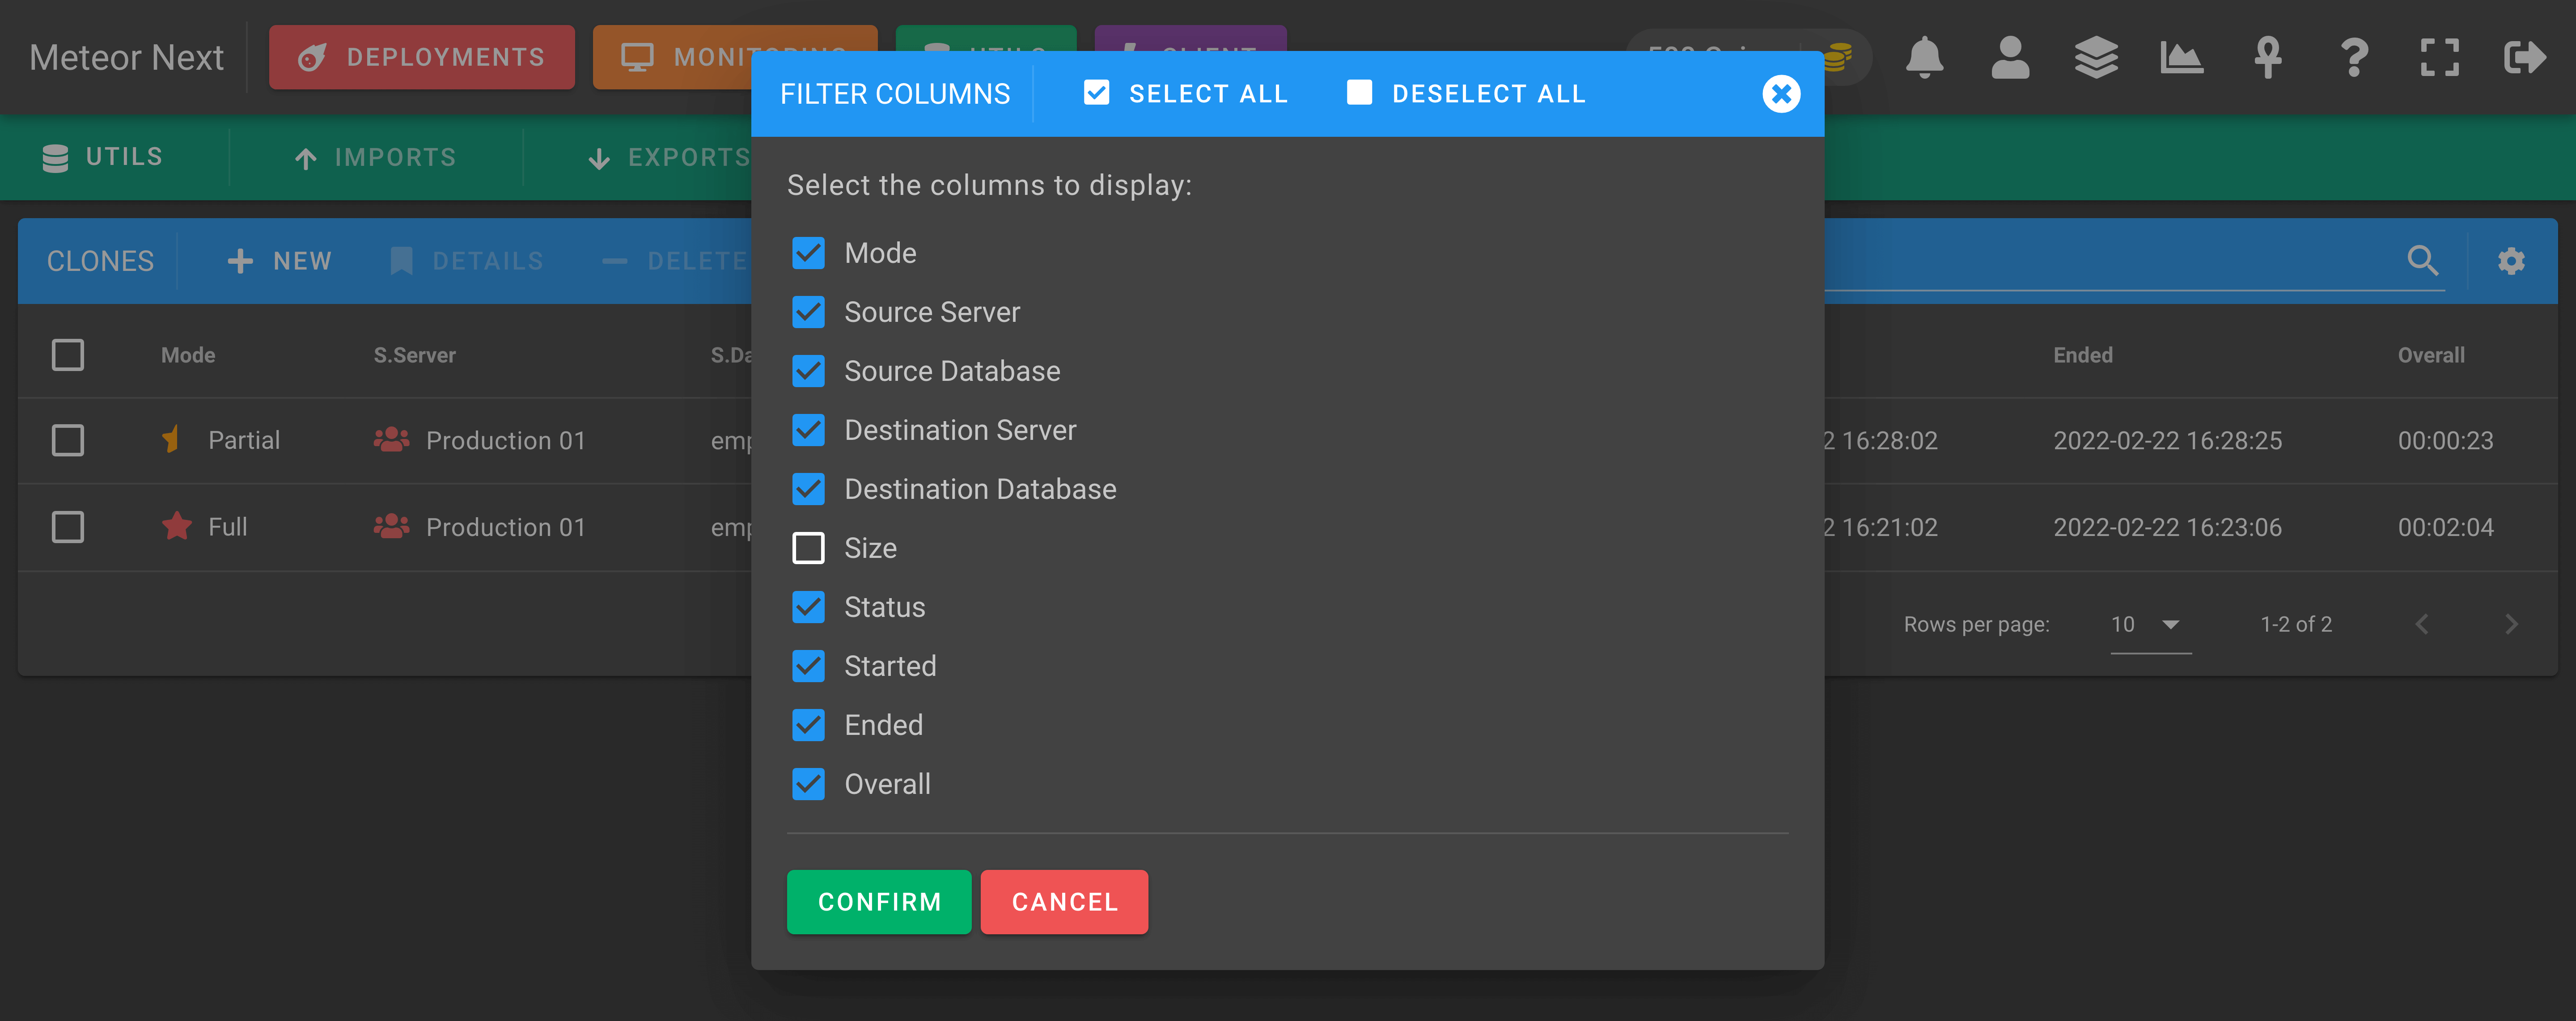
Meteor Next accepts two cloning modes:
- Full Clones: To clone entirely a database with all their objects (tables, views, triggers, functions, procedures).
- Partial Clones: To clone only some tables of a database.
Full Clones
This mode is used to clone entirely a database with all their objects (tables, views, triggers, functions, procedures).
First choose the source server and database to be cloned.
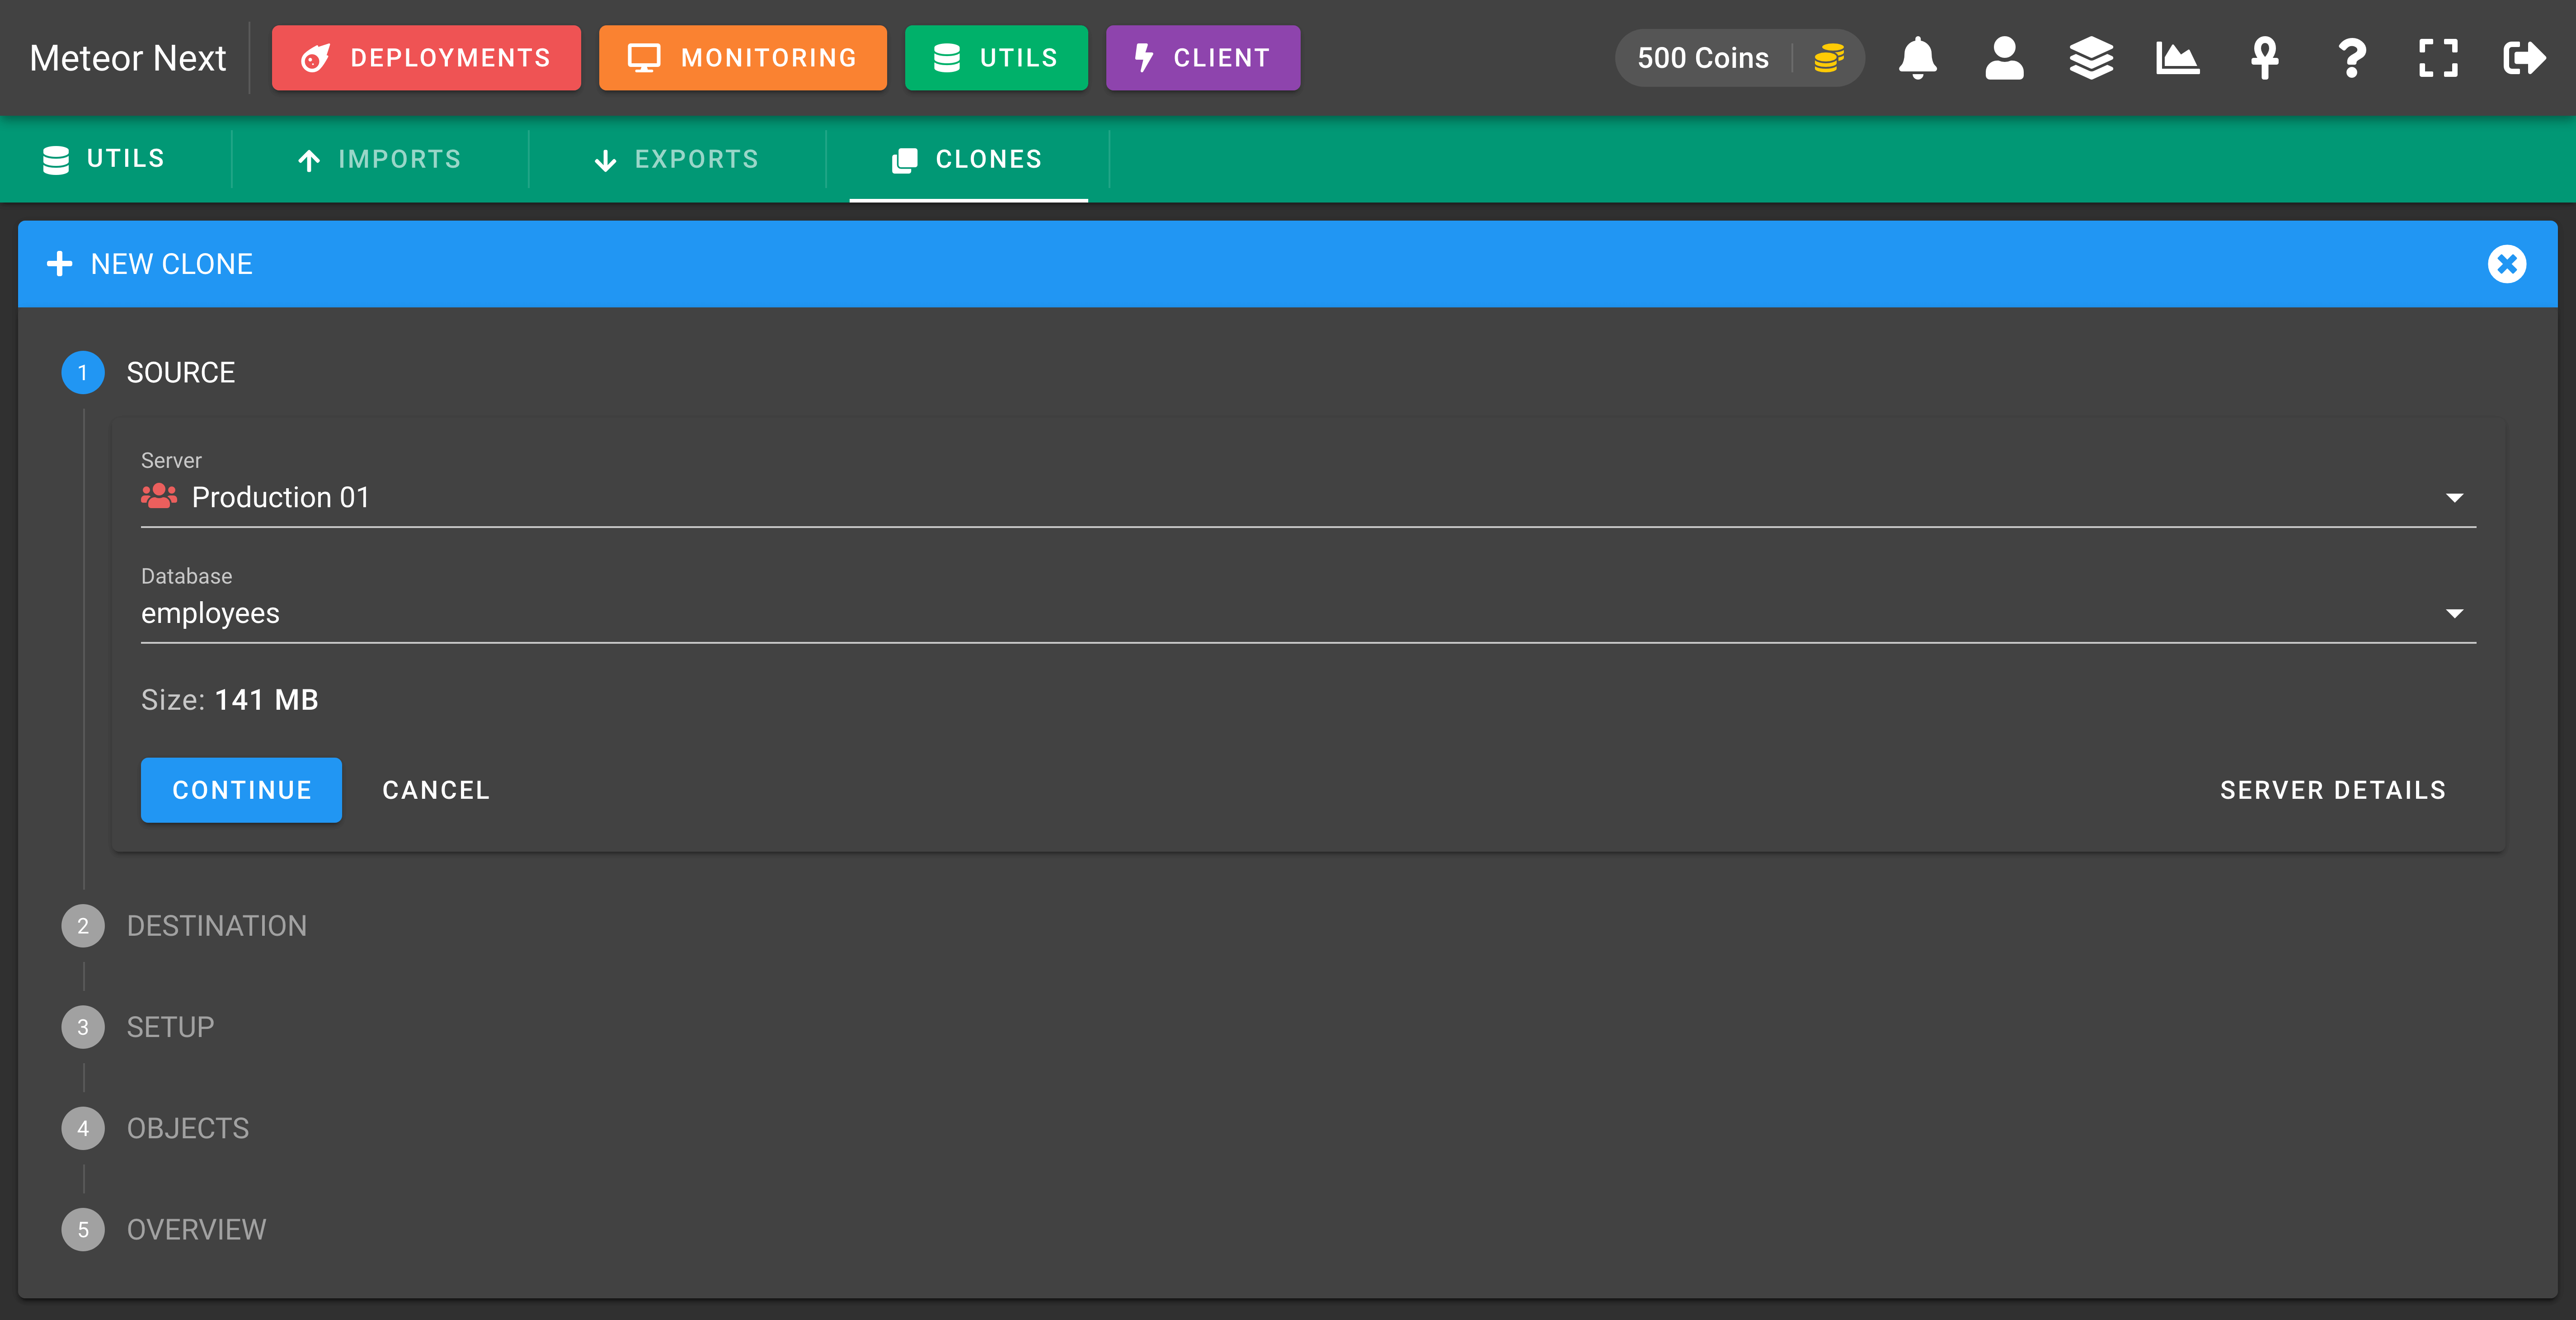
Here choose the destination server and database to be cloned.
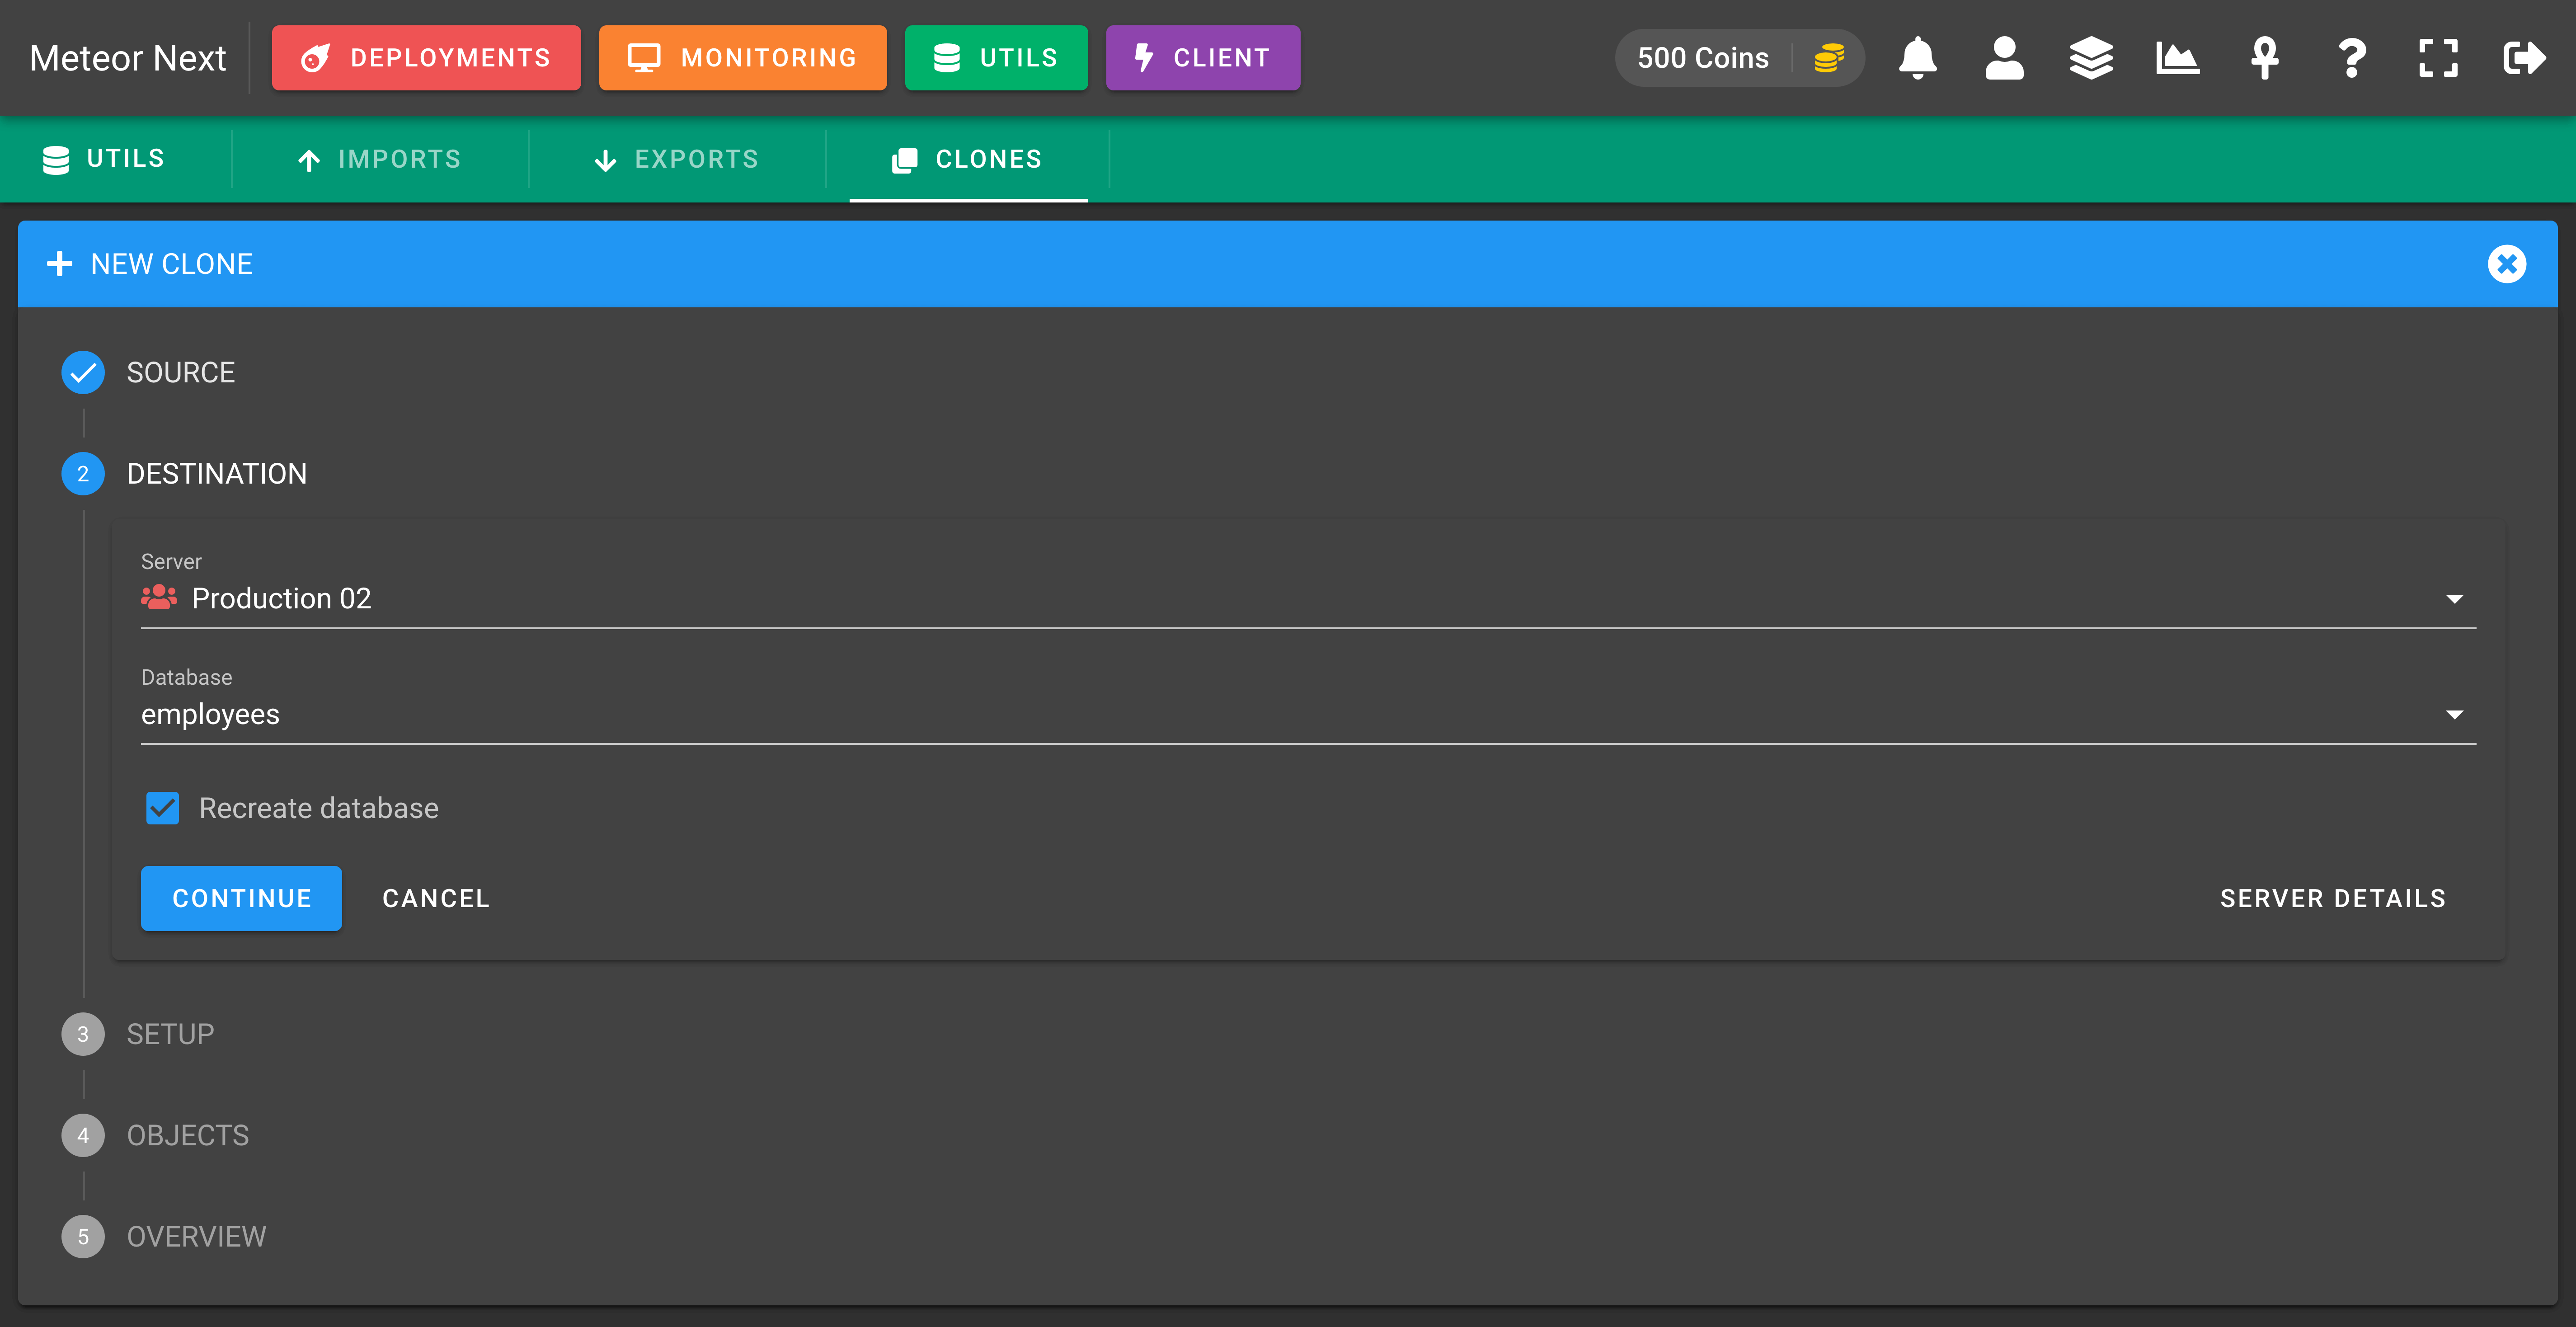
In the next step, you can choose some settings. You can leave it as it is. Click CONTINUE.
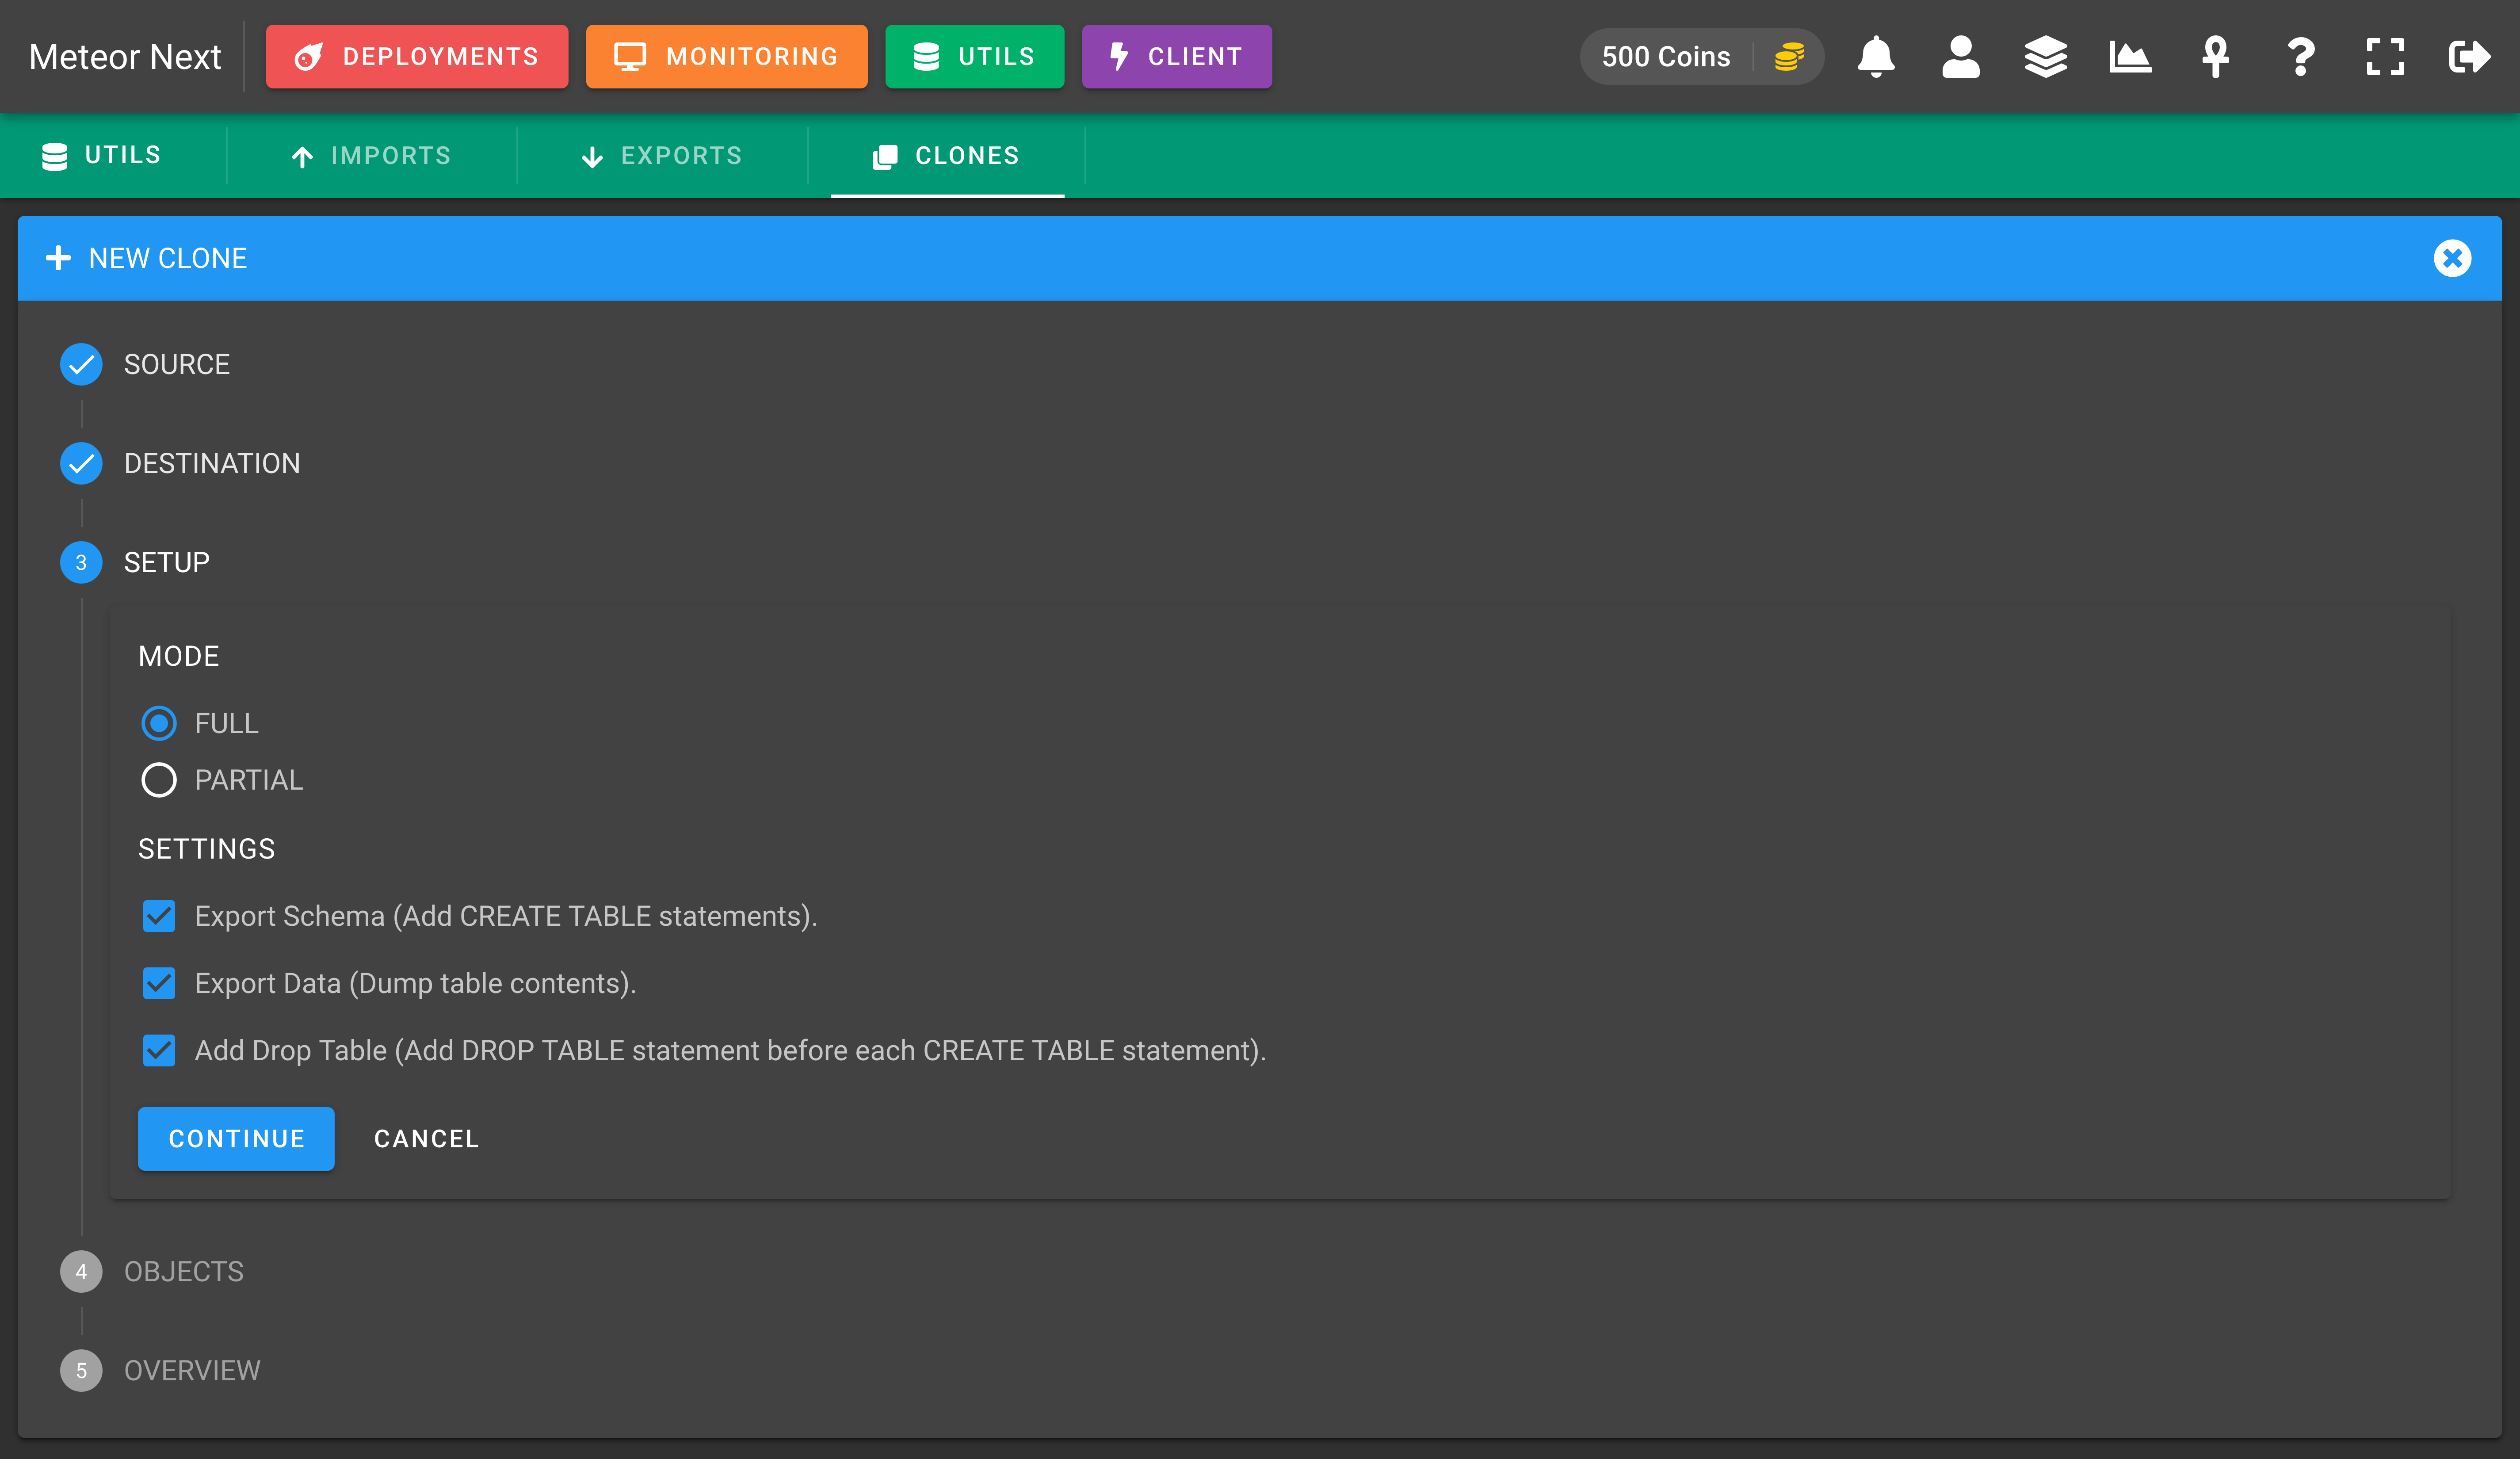
Notice that the OBJECTS step will be skipped since this one it's only used with the mode = Partial. After reviewing all fields, click CLONE and the process will start.
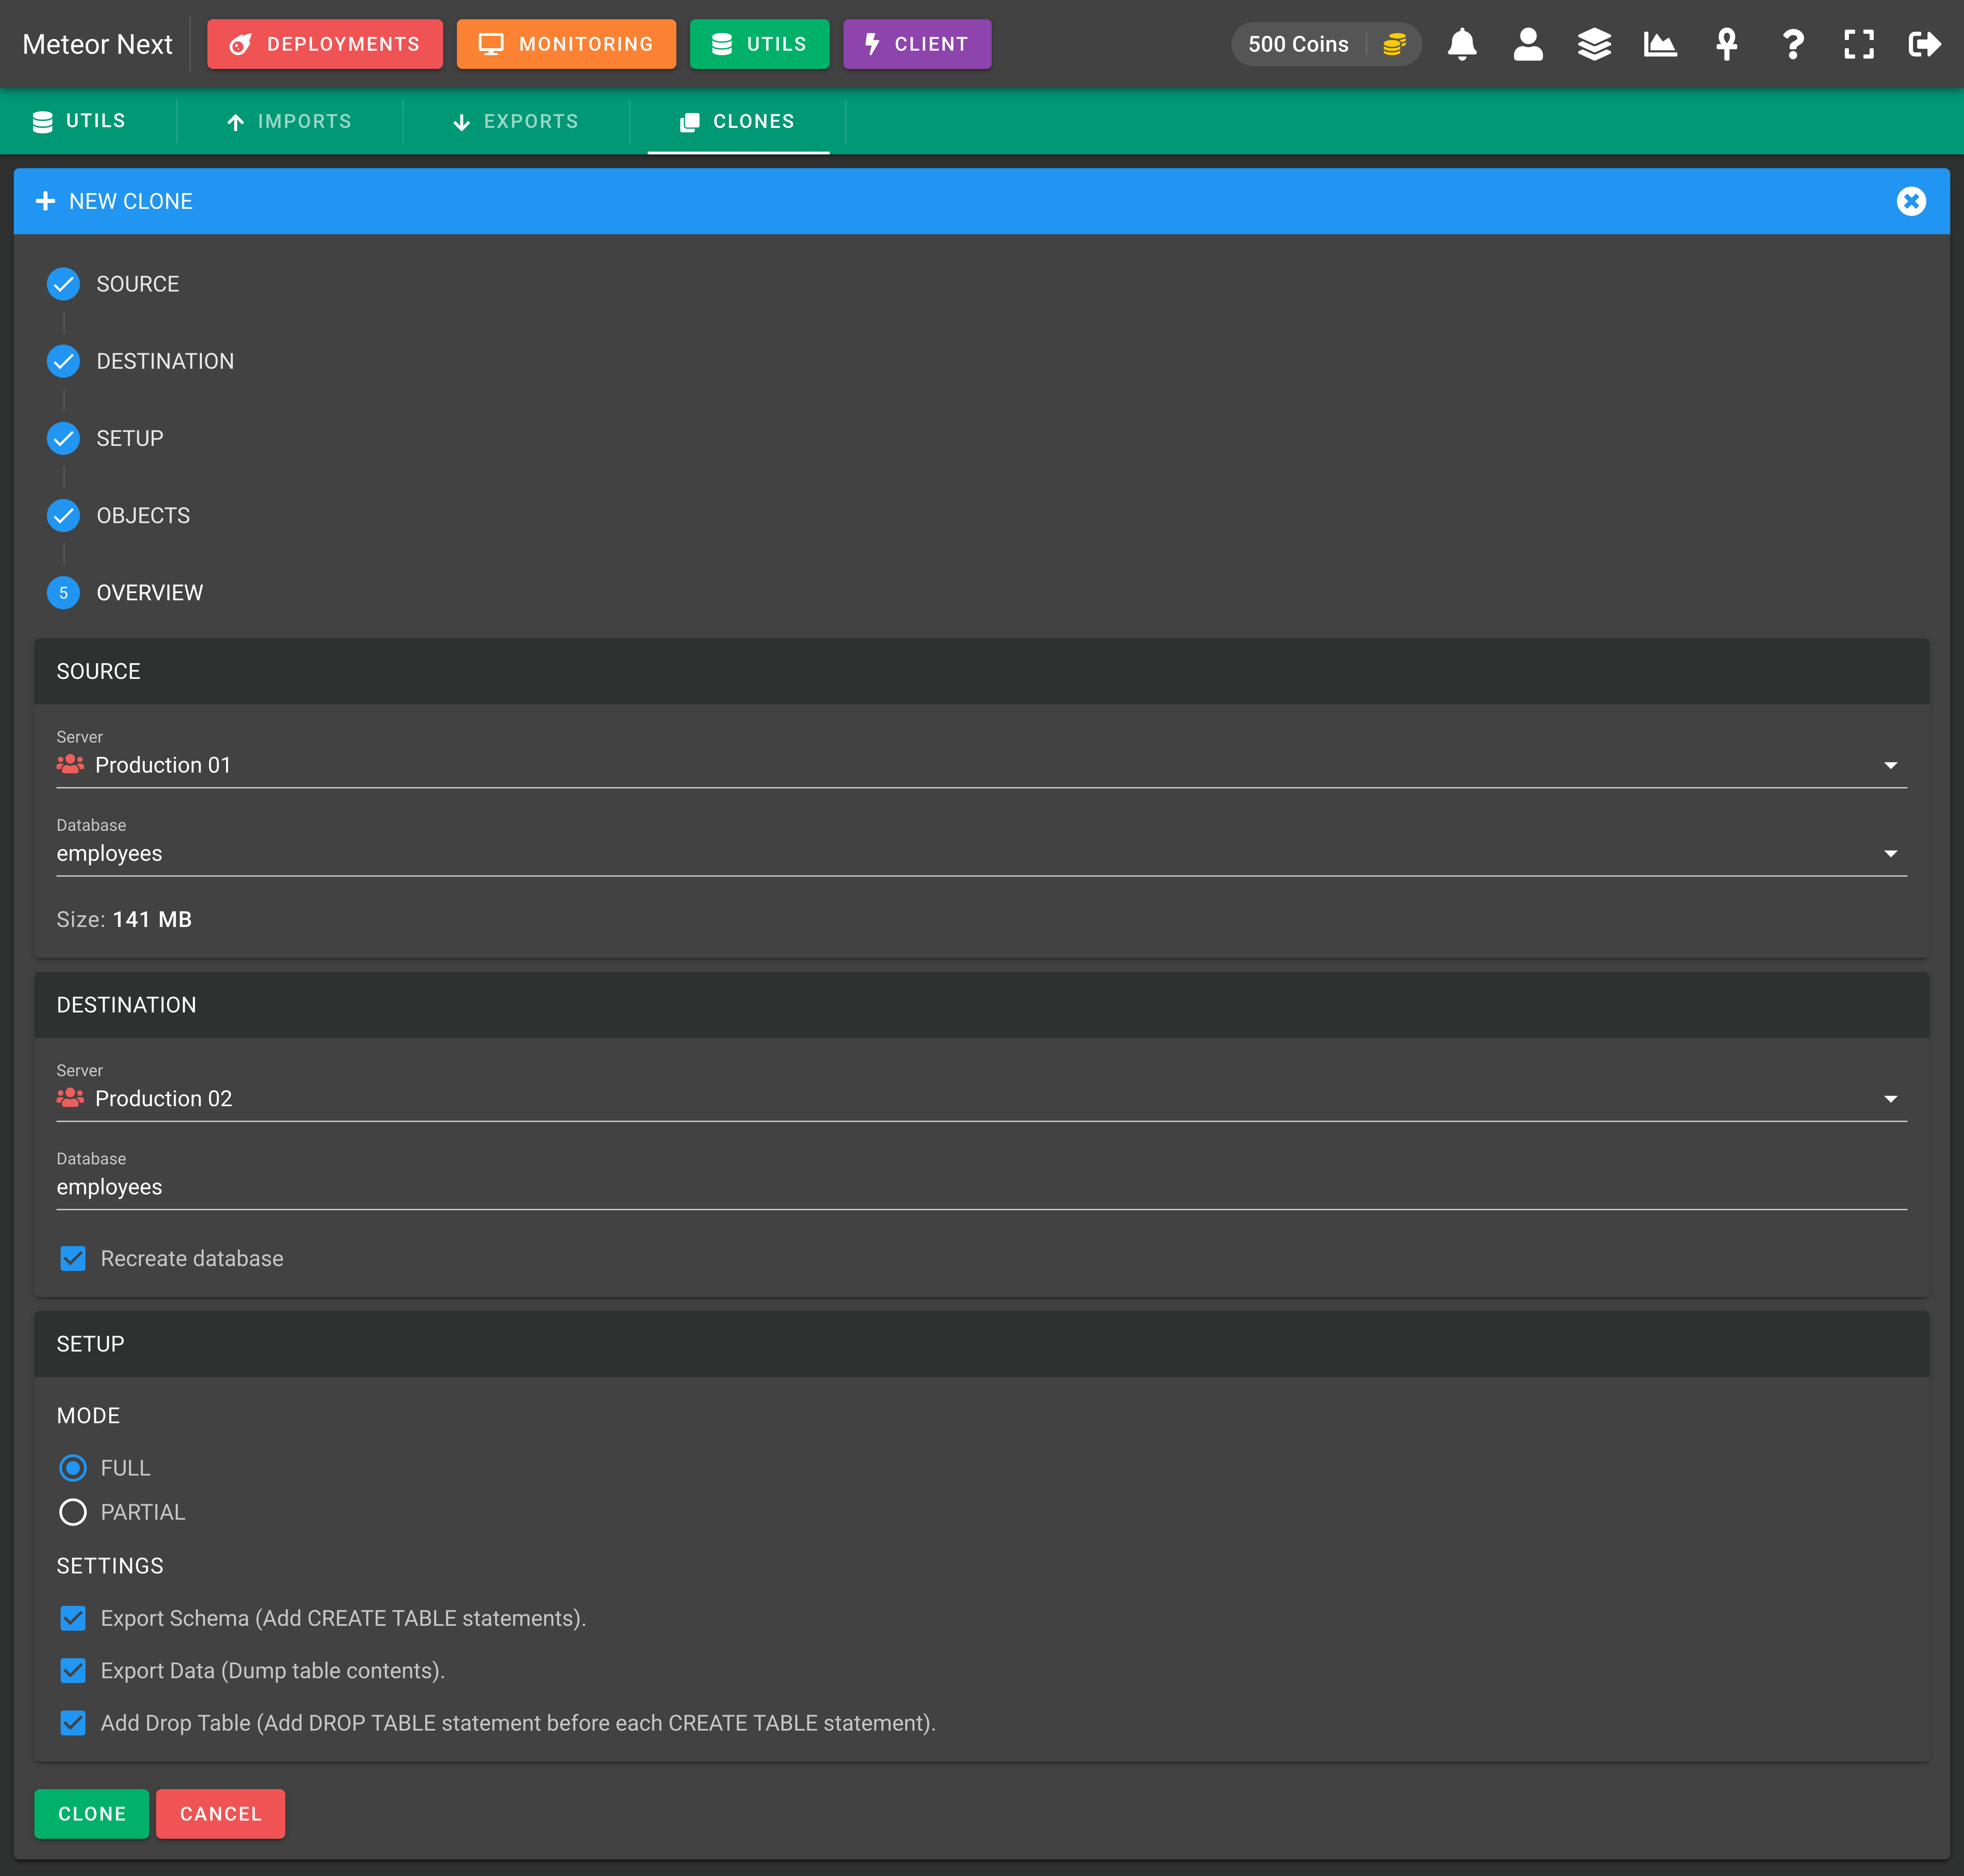
You will be redirected to another window showing the cloning process.

Partial Clones
This mode is used to clone only some tables of a database.
First choose the server and the database to be cloned.

Here, choose the destination server and database to be cloned.

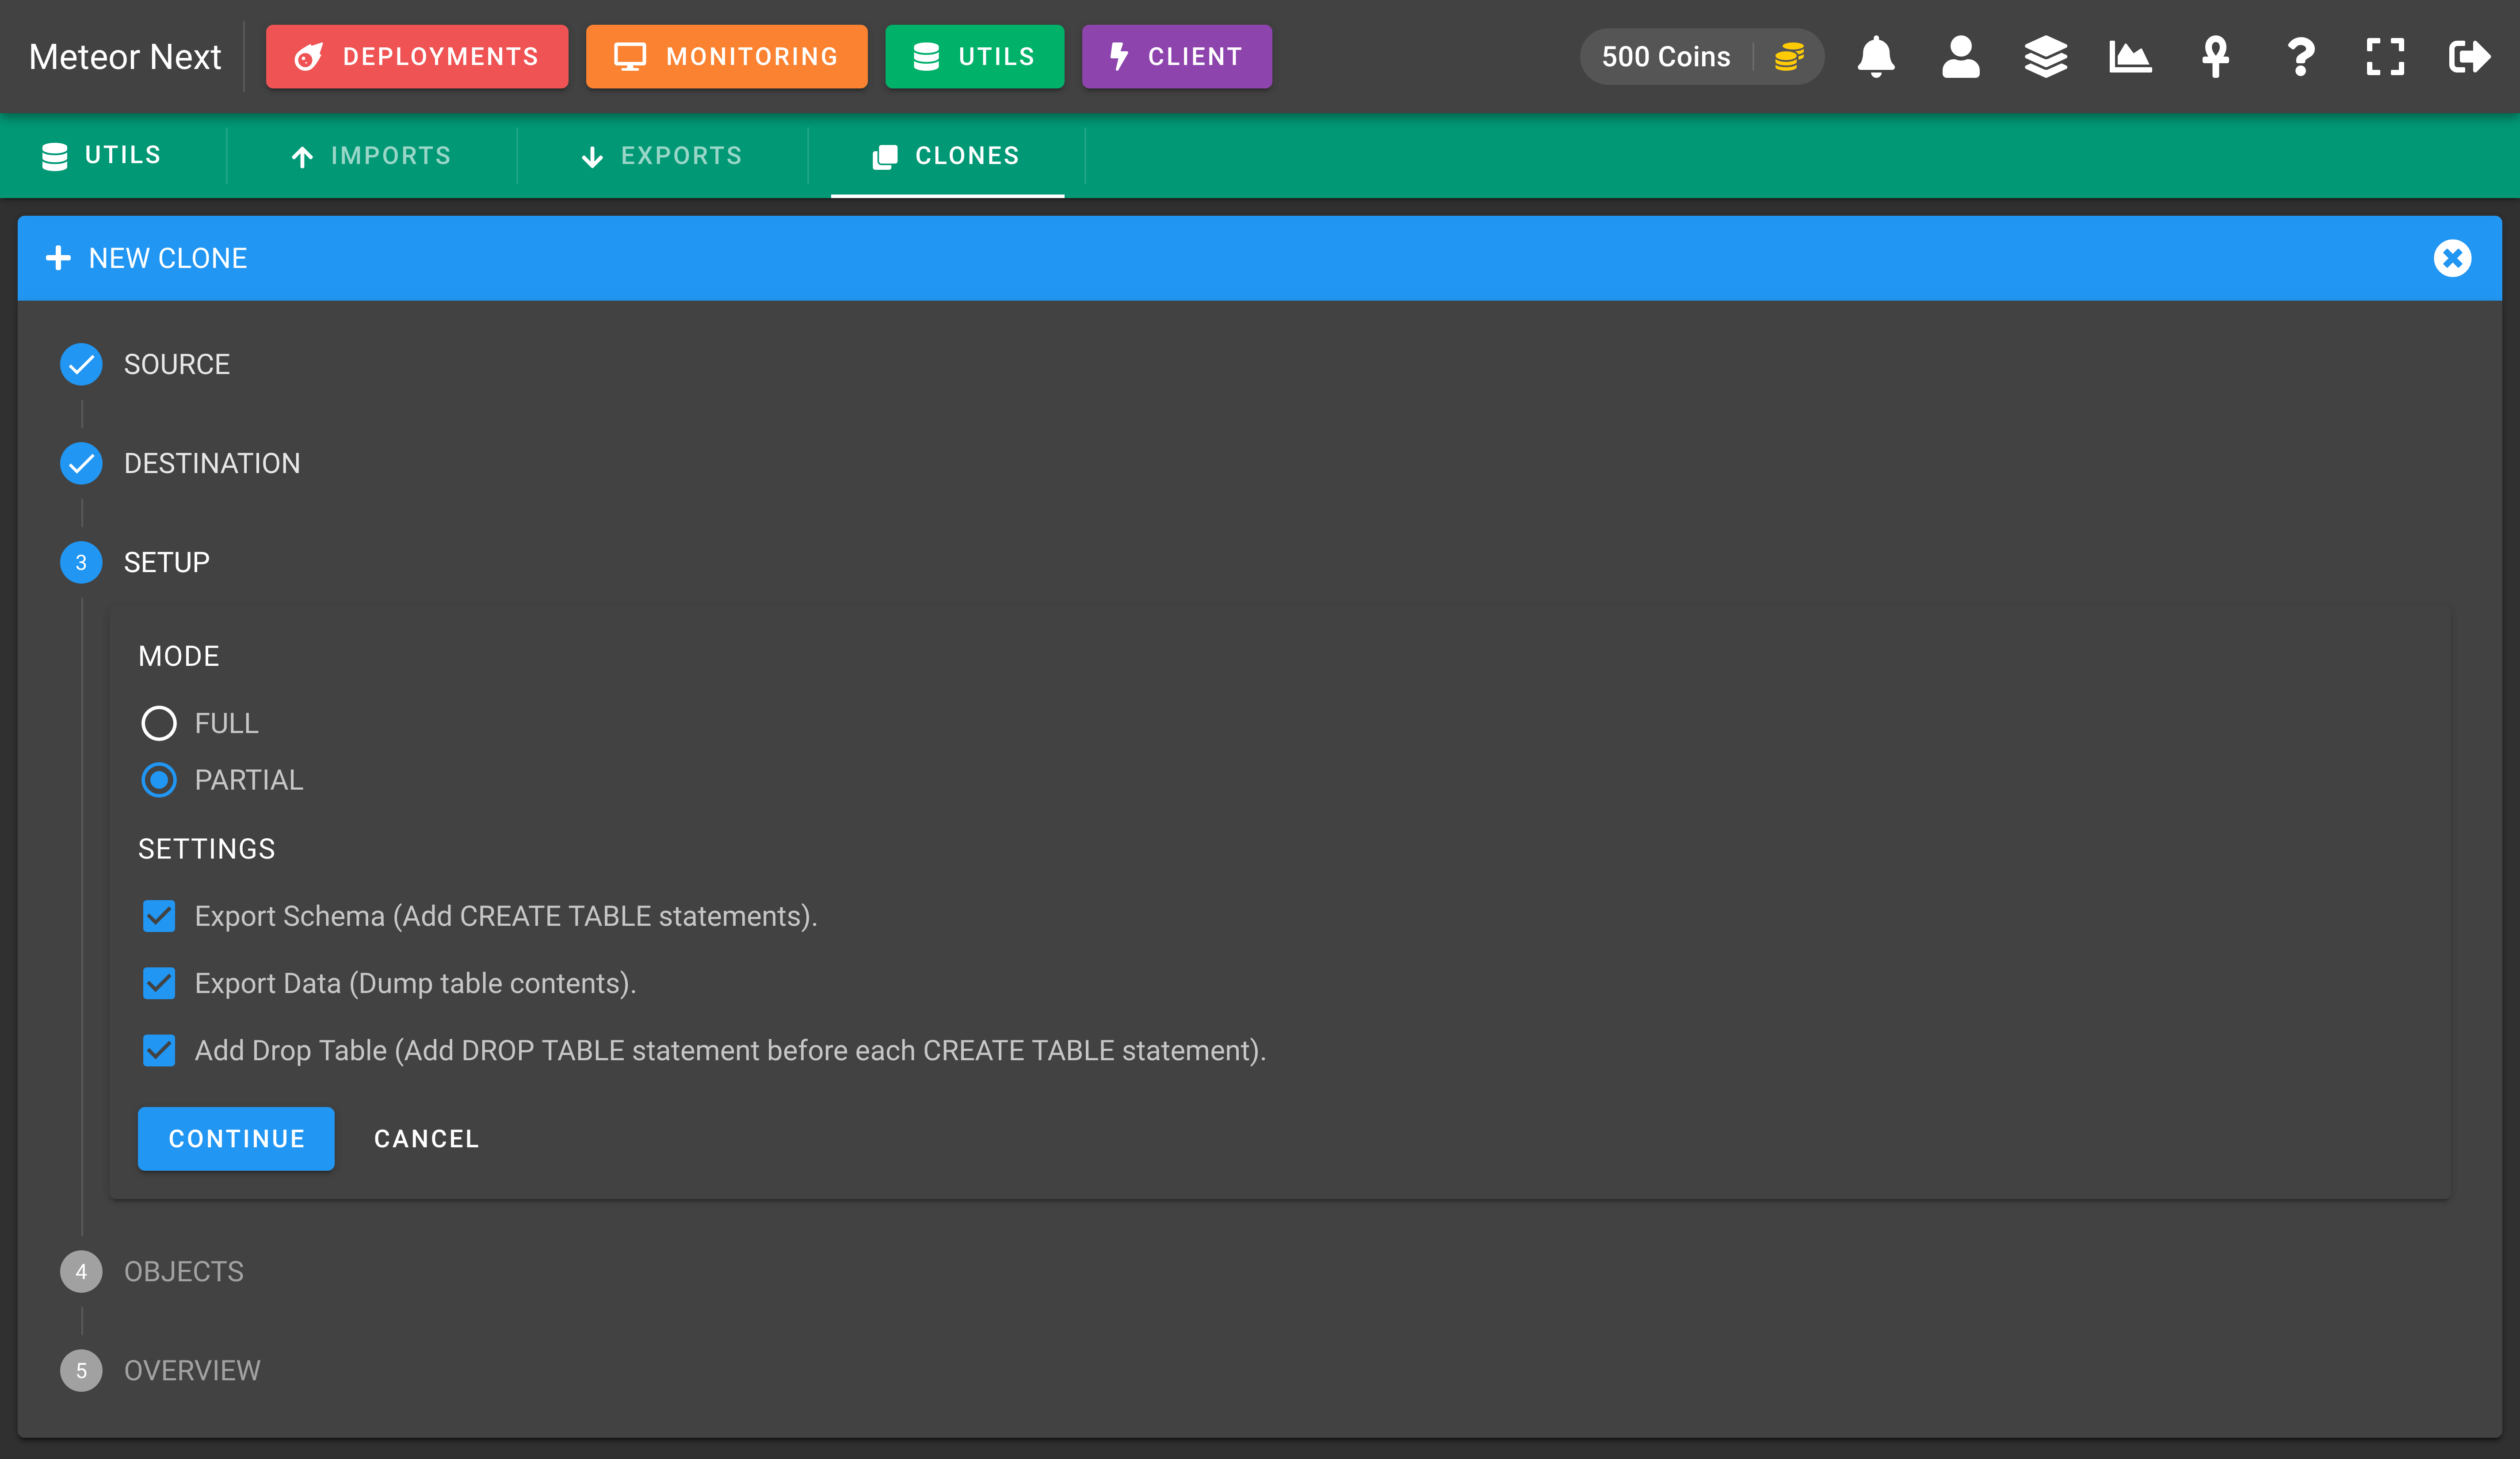
In the next step you can choose some settings. Choose the Partial mode.
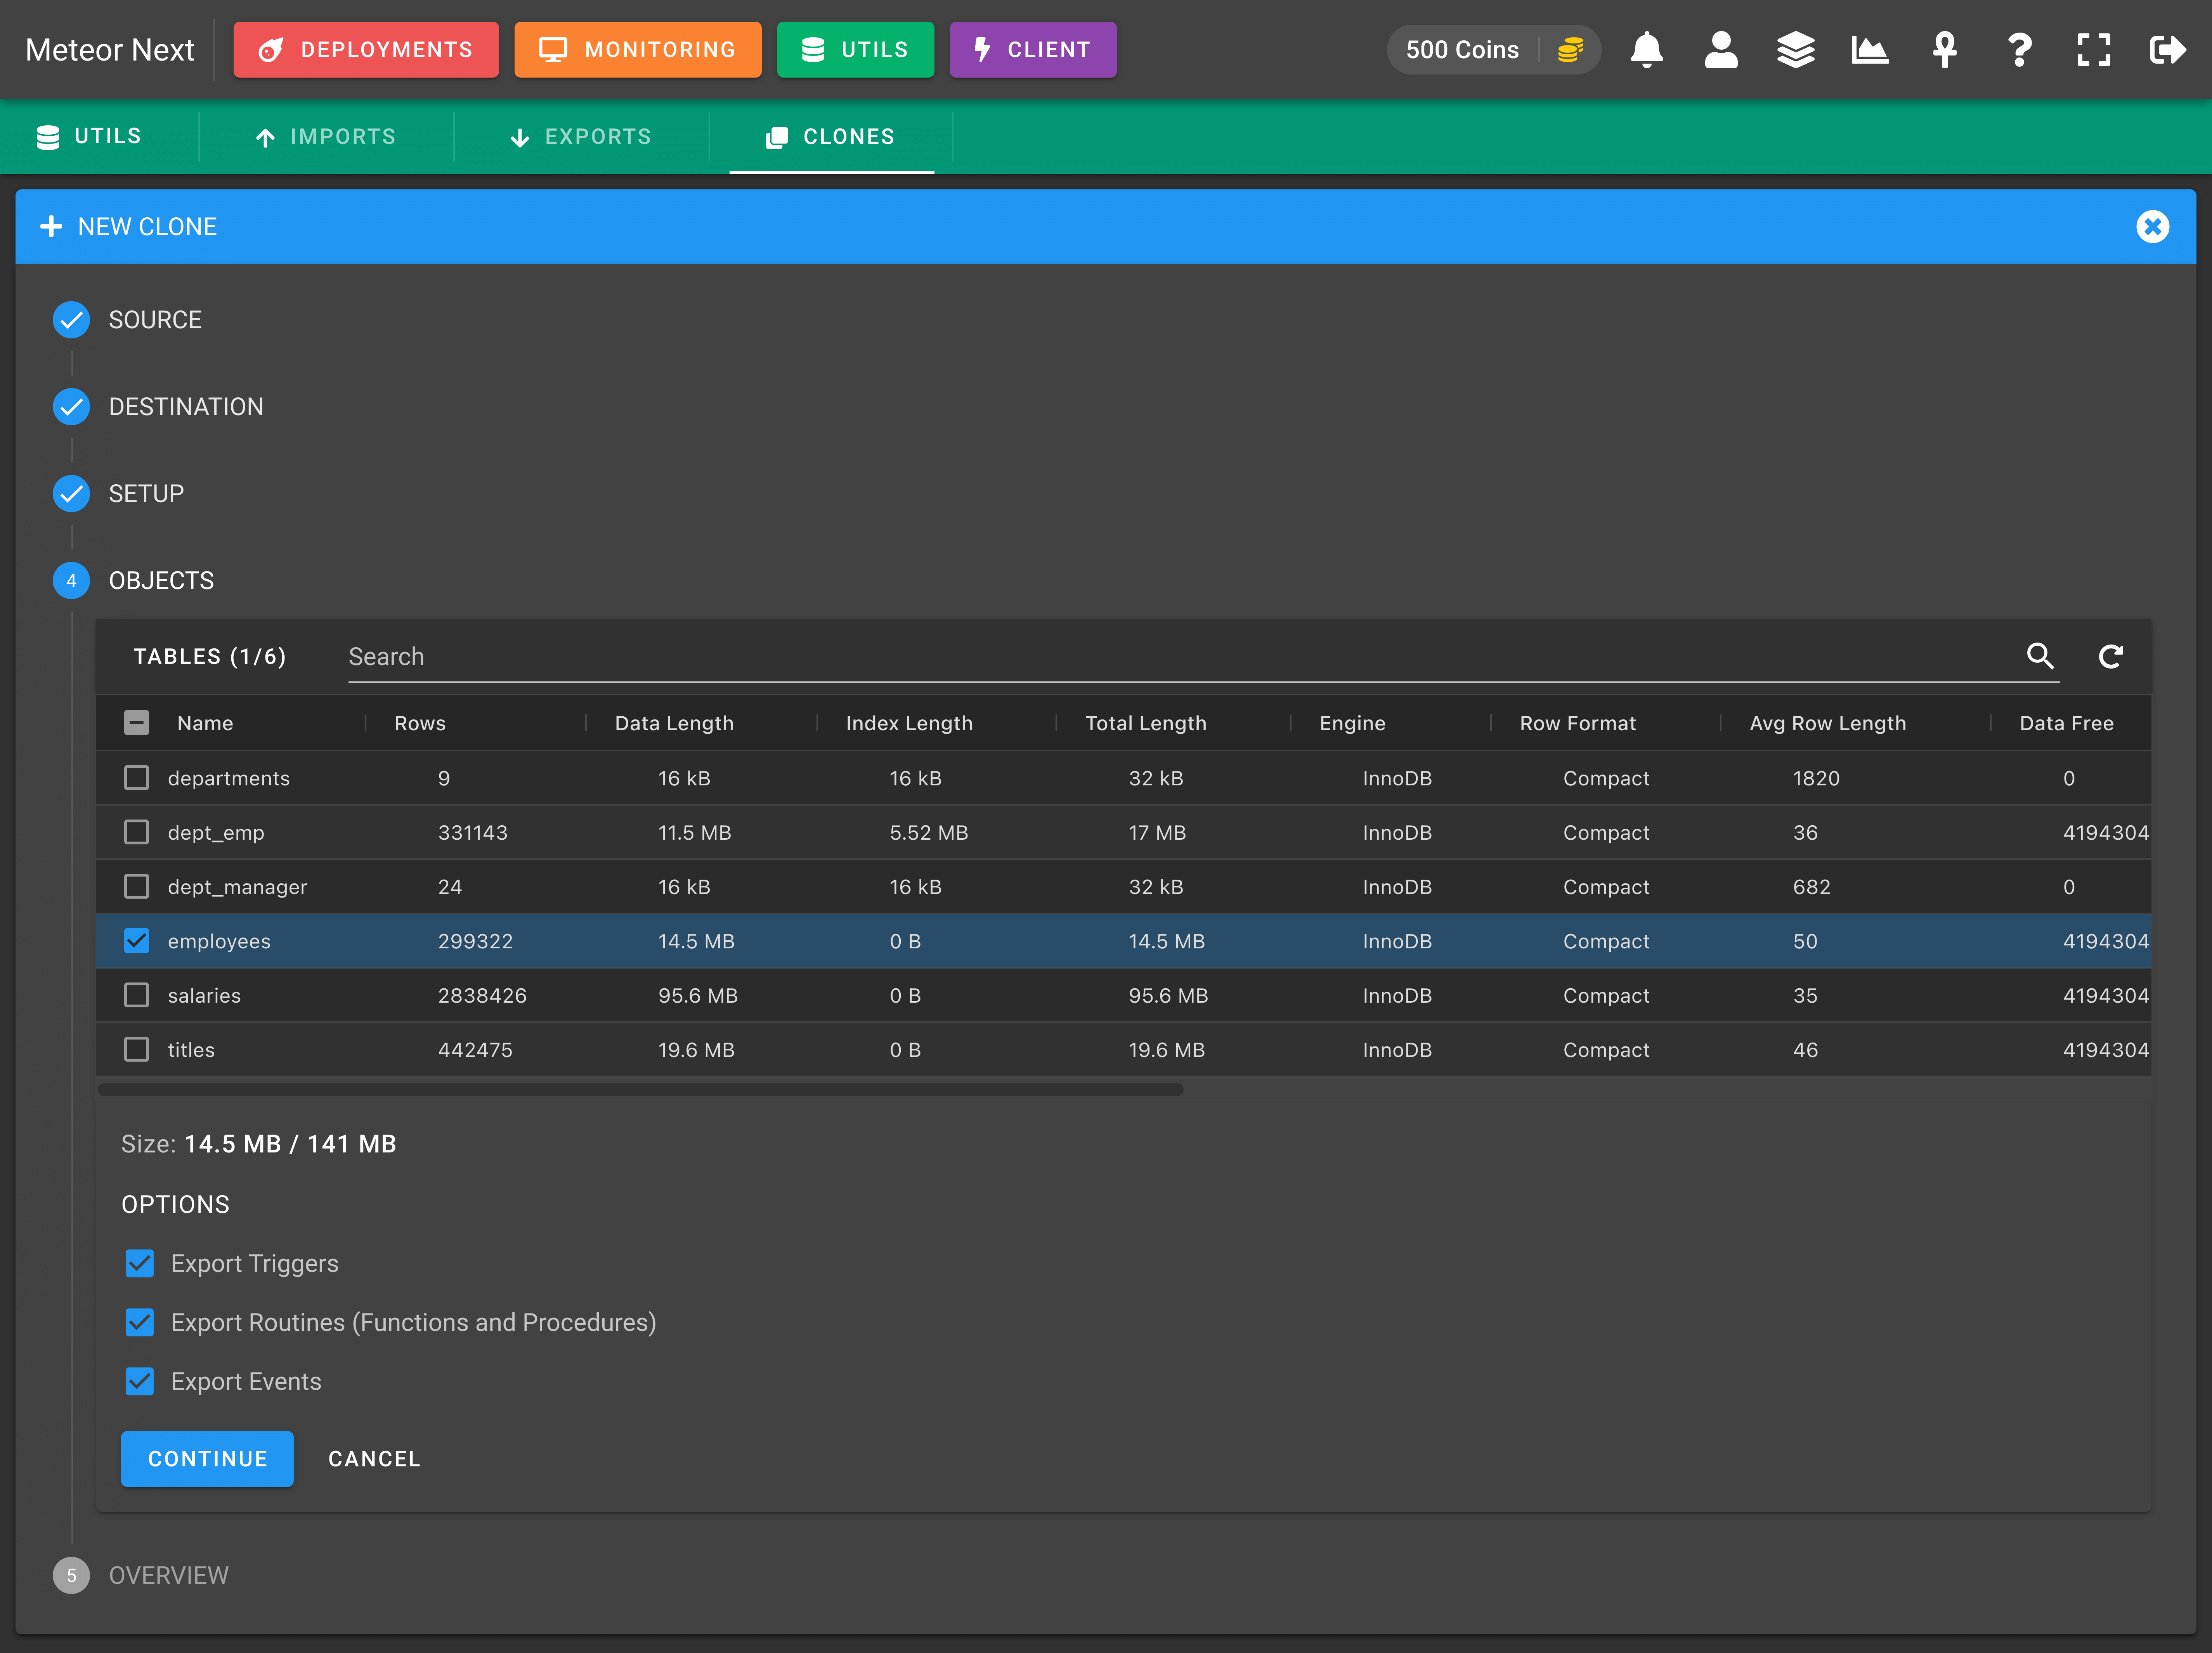
Here, you will be able to select which tables you want to clone. Also, you will be able to choose some optional settings to also clone the triggers, routines and events.
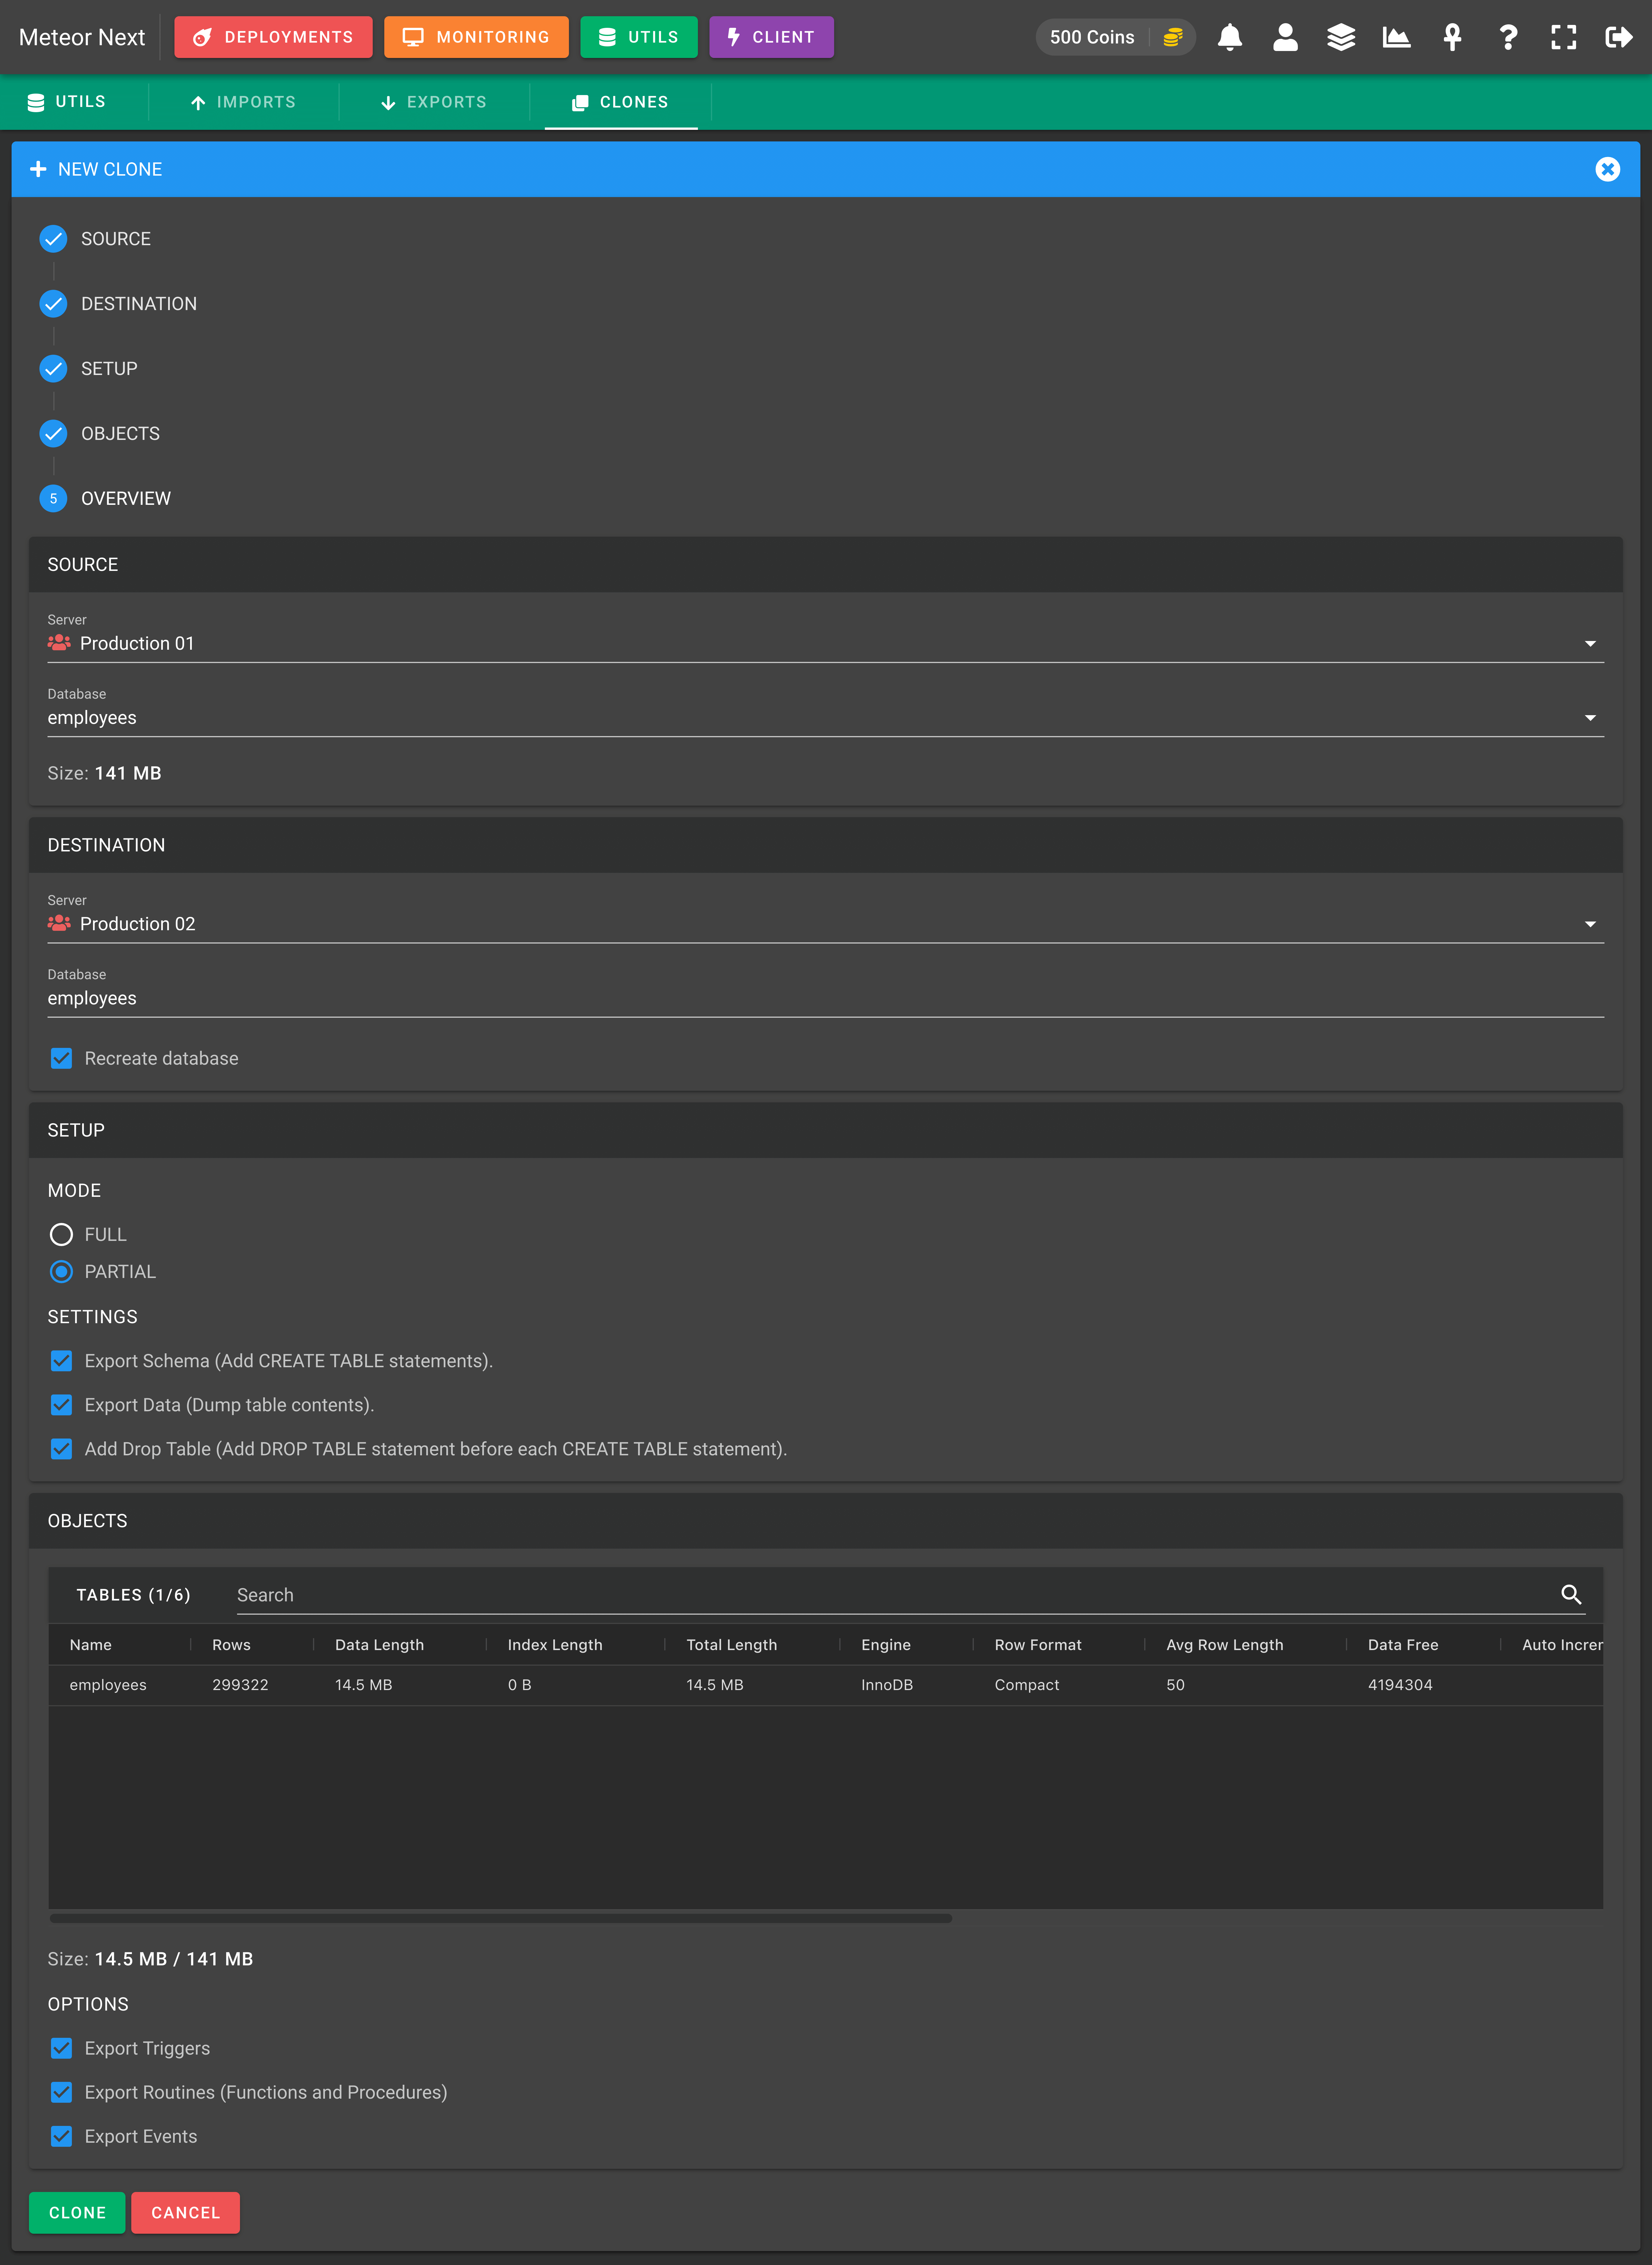
The last step will appear an overview. After reviewing all fields, click CLONE and the process will start.
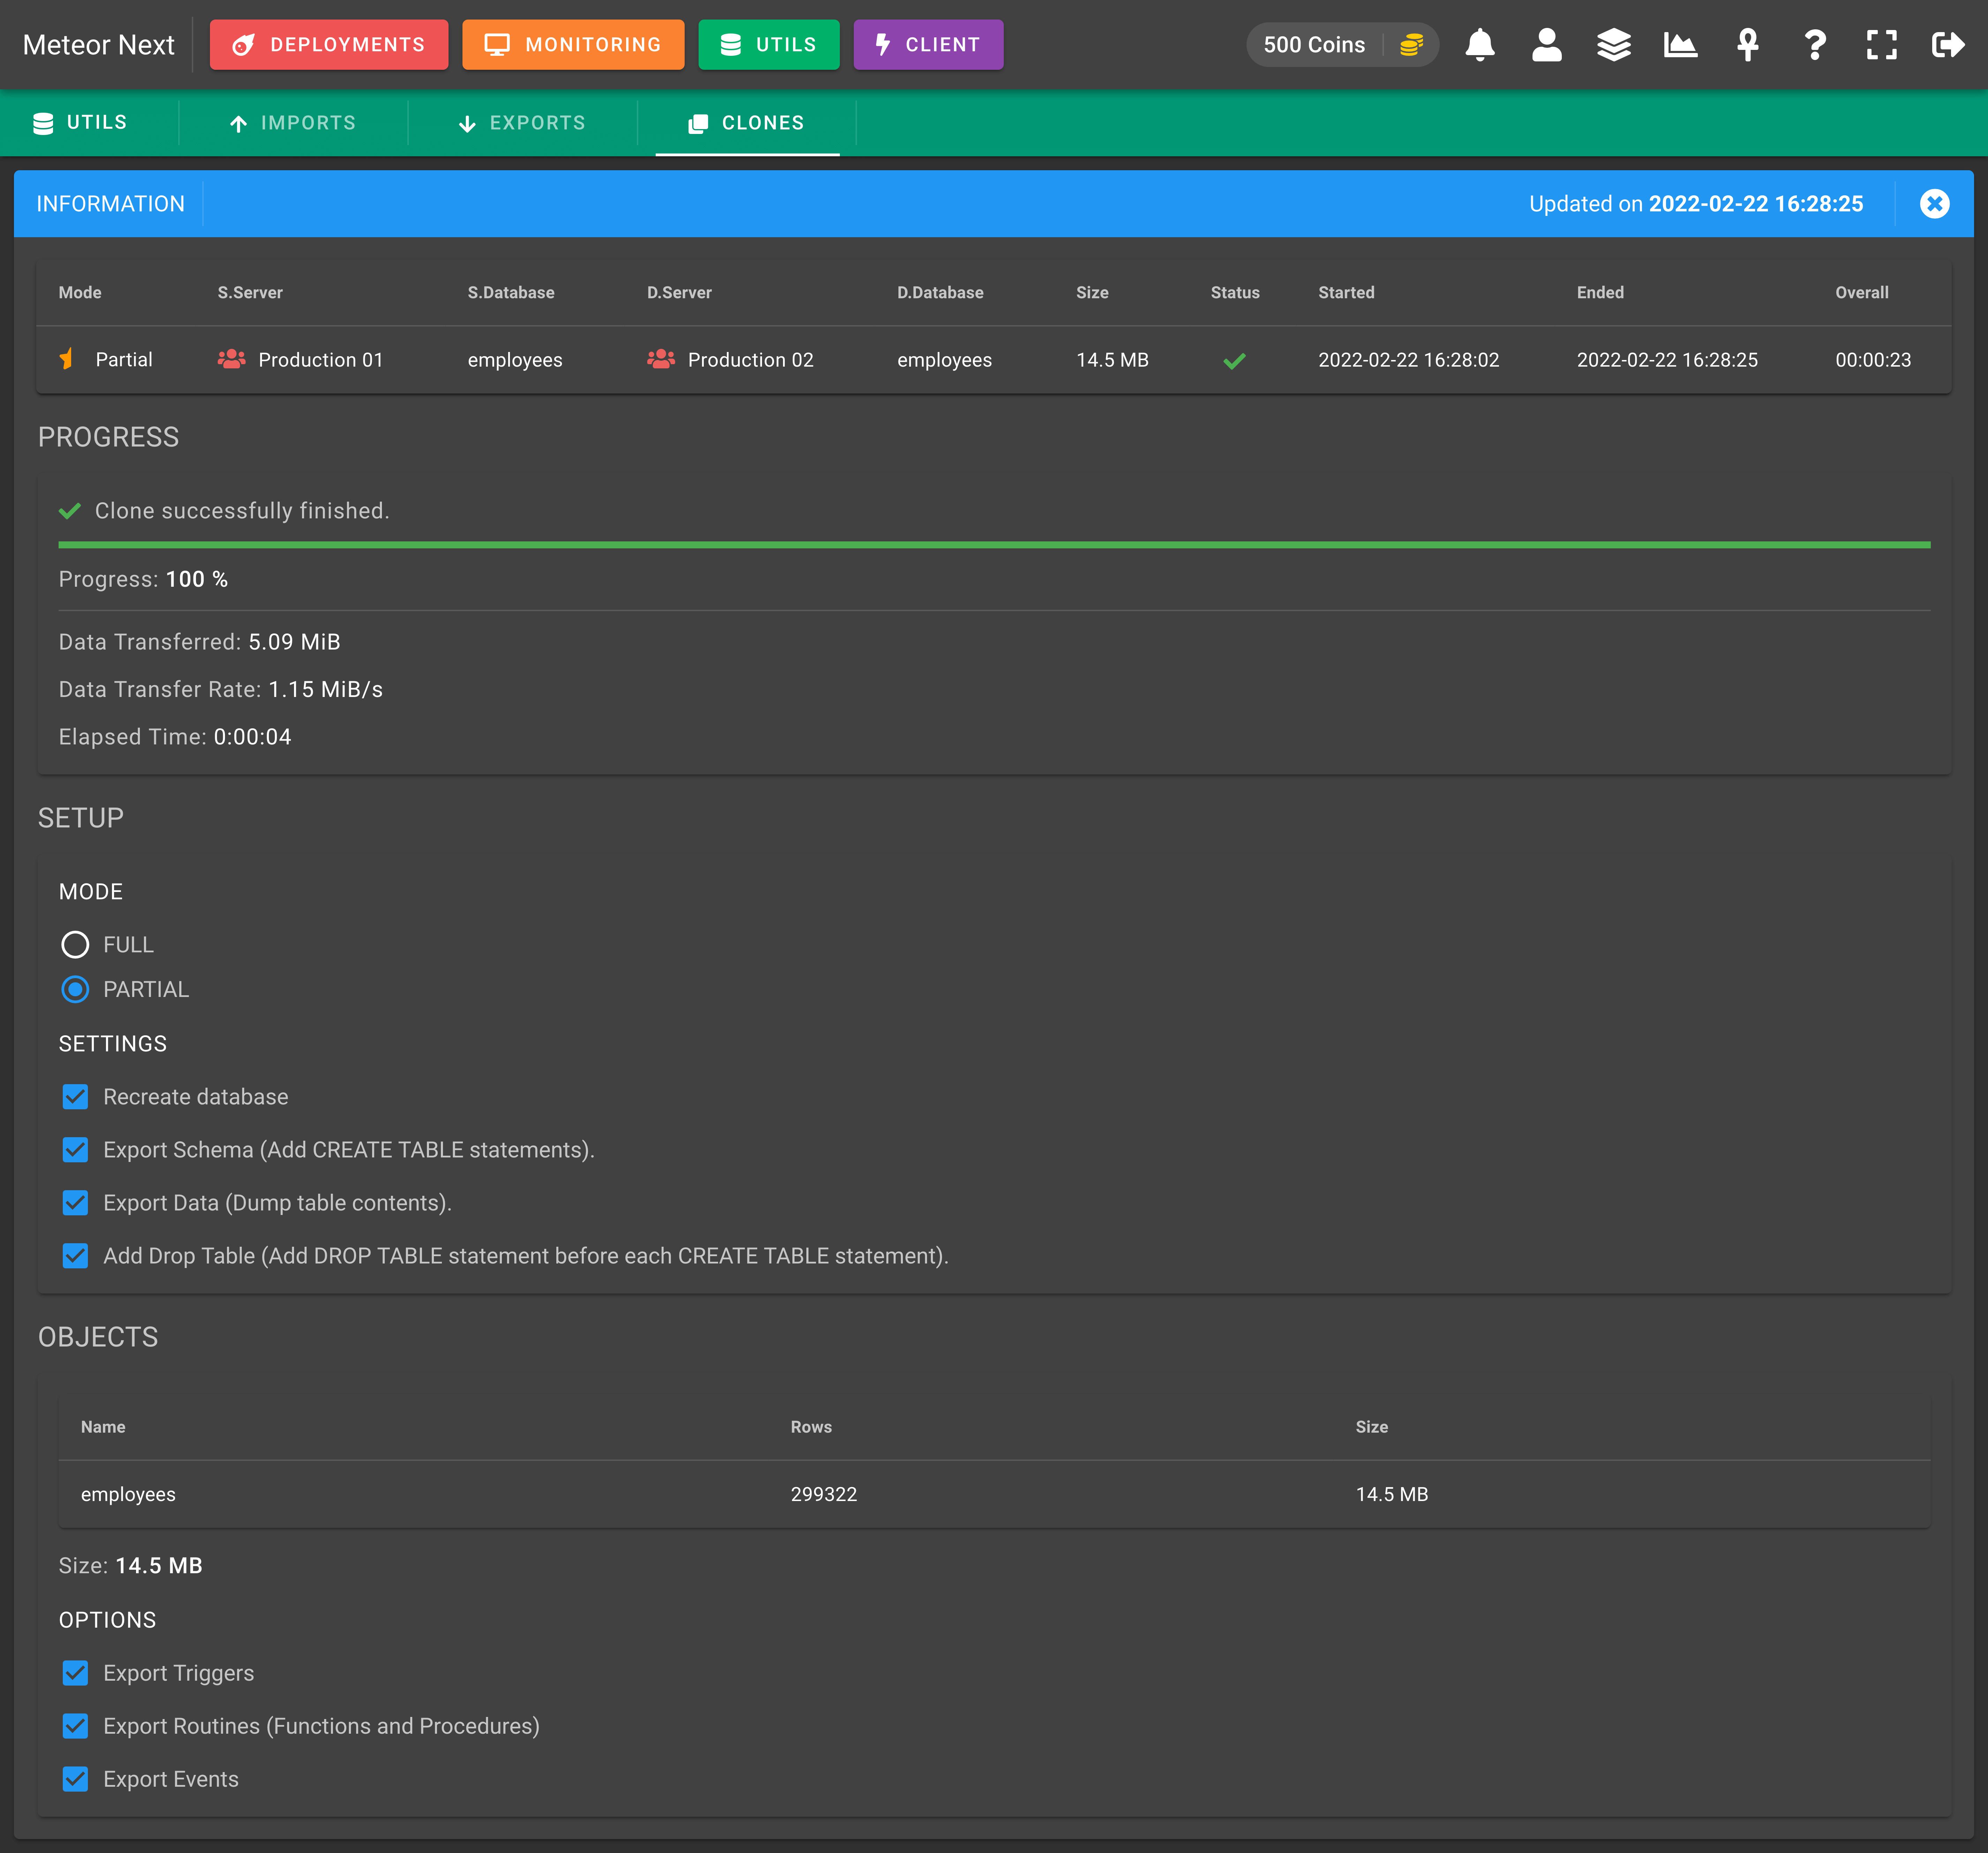
You will be redirected to another window showing the cloning process.
Infrastructure
The underlying process of the Clone is similar to how the Deployments work. The clone process is performed at the regions where the source server and the destination server are located. In this way, the delay between regions is avoided.
First, Meteor exports all the selected data of the source database directly into Amazon S3. This process is performed at the region where the server is located. After that, Meteor imports the imported file (located in Amazon S3) into the destination server's database. This process is performed at the region where the destination server is located.

Also, no files are stored into the hard drive, so we don't have to worry about not running out of disk space.
